Saturday 29 December 2012

3

Christmas Sewing: PJ edition

Jamie and Maia

I hope everyone had lovely holidays.  We've been very busy doing nothing around these parts; Jamie got the lurgy just before Christmas and is on the mend but still fairly lethargic. The up-side to this is that we've all slept until at least 9am every day this week!  He normally wakes Maia up for a companion between 6 and 7, so the extra couple of hours is a blessed relief.  Steven and I were actually the first ones up on Christmas, and swithered about whether to wake them.  We waited :)

Jamie pjs 1

I didn't do a huge amount of Christmas sewing but I did whip them up matching pajamas to give them on Christmas Eve.

Maia pjs 3

The tops are the raglan style that I use for my normal tops and the bottoms were a quicky-and-dirty cuffed slouchy bottoms traced off existing pjs.  I may at some point work on a slouchy bottoms pattern if there is interest, but I'm pretty sure there are eleventy million slouchy bottom patterns so it would most likely be a redundant exercise... agreed?  The only change I made to the slouchy bottoms I make for toddlers was to switch from a cuffed waistband to an elasticated waistband (which, incidently, was a thing of beauty since I tried the serged elastic / topstitch method for the first time rather than a channel).

Maia pjs 1

The fabric I used was an organic cotton knit from Lillestoff; as usual, the quality and handle are amazing.  In news that will madden you (and maddened me at the time), I received a gigantic order from them the night before the UK Christmas posting deadline.  There are some very special prints that I know you'll love and some more coordinating solids for your stash!  It's the very best stuff, and I'll get it listed shortly.

Harmony Collage

We had a pretty chilled day, after the initial excitement of opening presents was over there was settling down on the couch with books, soft-toys for Maia and a Sonic Screwdriver for Jamie. That boy has the most serious Doctor Who fever.

Family Collage

Lots of cuddles with mum and dad.  If you follow me on Instagram, you'll know that not a minute passes where at least one child isn't sitting on top of me or in my grille.

Joke Collage

As per perverse expectations, it wasn't the biggest or most well-thought-out presents that were the best received, it was the practical joke stocking stuffers.  That whoopee cushion will be the death of me.

Monday 24 December 2012

1

Christmas Wishes

With furious last-minute Christmas sewing on the agenda today, I'll preemptively wish you all a very happy holidays a day early.  If you are partial to diminutive Scots singing with gusto, here's a video of the kids' school singing The Gift at their Christmas service last week.  I might have cried. Which is not quite the benchmark it used to be, but the performance is very touching nonetheless.


Friday 21 December 2012

5

Make it in a Metre: Sew a double-layer bibbed cowl tutorial

With Christmas just a few days away and everyone being short on time for makes, over the next couple of days I thought I'd share some ideas for some super-quick makes for all of us that are procrastinators.
double layer bibbed cowl

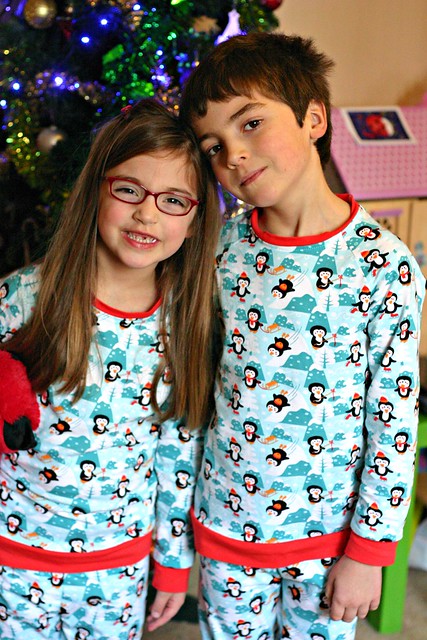
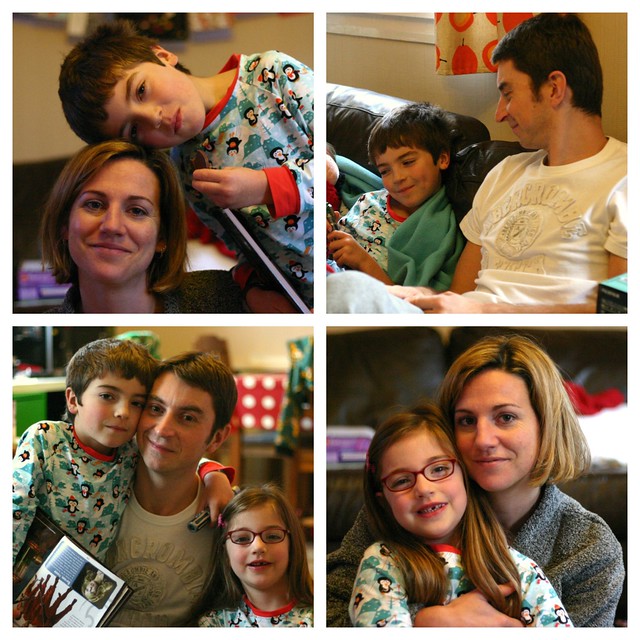
Jamie and Maia are both illogically anti-scarf, and I spend more time than healthy arguing with them about the need to keep their necks covered in the winter, so I whipped up some cowls to quell the protests.  I already have a tute for a 
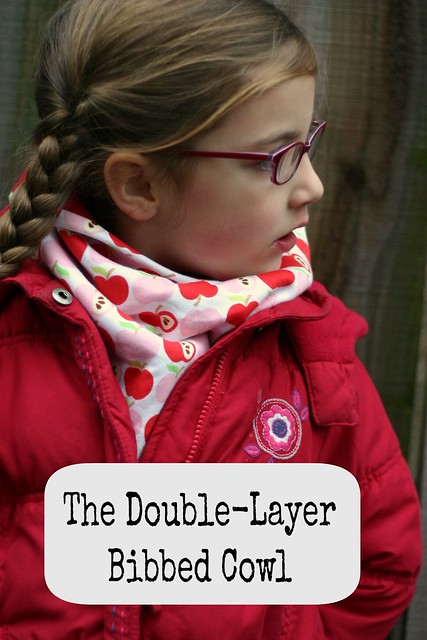
15-minute double layer snood, but I wanted to make a bibbed variation for the kids so they had some extra coverage and warmth for their chests for when their coats are zipped down against all advice and rationality.  The bibbed front means that the side seams sit on their shoulders and offers good coverage of the neck, but that the bib also extends down the chest front and back for extra warmth and protection from the elements.  Make time is again less than half an hour once you've drawn the pattern, so you can easily whip some up for the kids' stockings, last-minute birthday gifts etc. The cowl I made has an interlock layer and a fleece layer (or you could use two jerseys for less cold weather) and potentionally the cowl is reversible if you slip-stitch at the last step.  These dimensions are suitable for my five and seven year old; for adult dimensions the width still works but you'll probably want to increase overall height. It's suitable for all knit fabrics. Let's go!

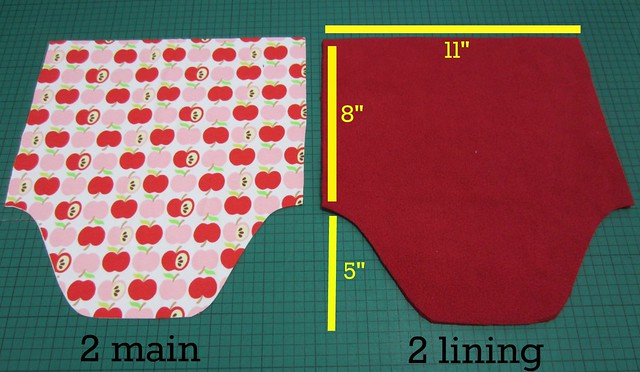
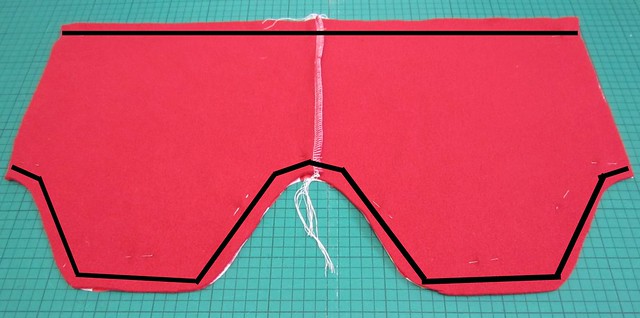
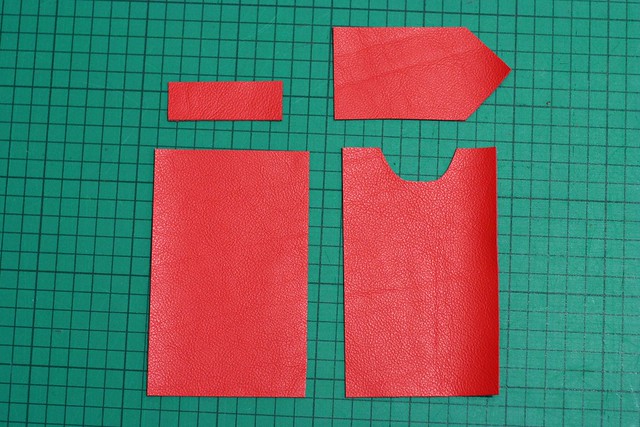
To draft the single (!) pattern piece, you'll need a piece of paper that is at least 13" by 11".  First draw a rectangle that is 8" tall by 11" wide near the top 
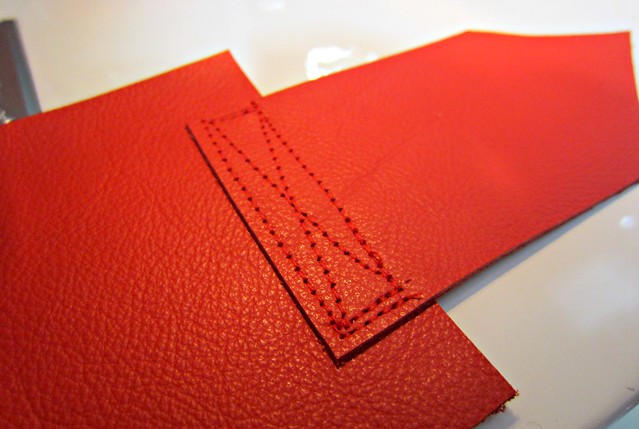
of your paper. Then draw a second rectangle just below it that is 5" by 11".  Fold the paper in half vertically so the rectangles are in half to draw the bib.  Mark 2.5" alway from the centre fold on the bottom line.   From there, draw a diagonal line to a point that is .75" away from top line and then blend it into a curve on both side.  While on the fold, cut the pattern so it's symmetrical.  If this doesn't make sense, I'll scan a pattern piece in. It probably would've taken me less time than explaining it :)

1 cut fabric

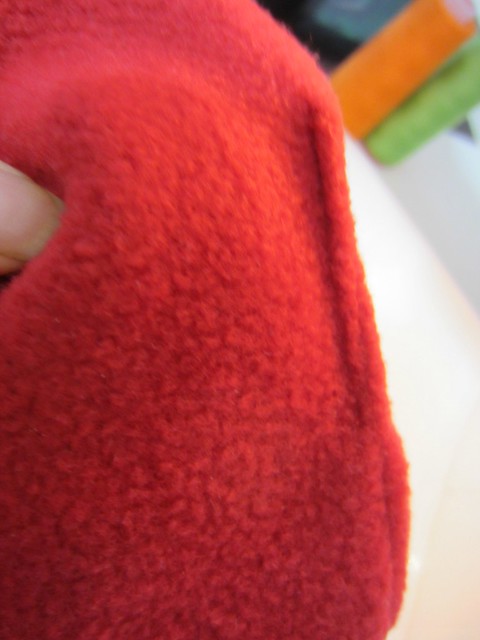
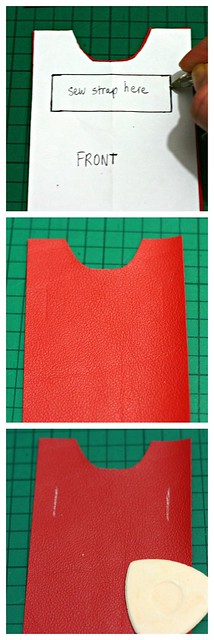
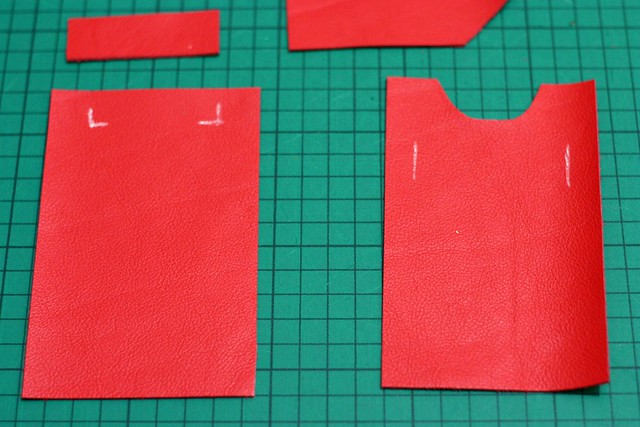
Cut two pieces each of both a main and lining. As above, I used interlock and fleece. Make sure the stretch is going across horizontally.

2 sew one side

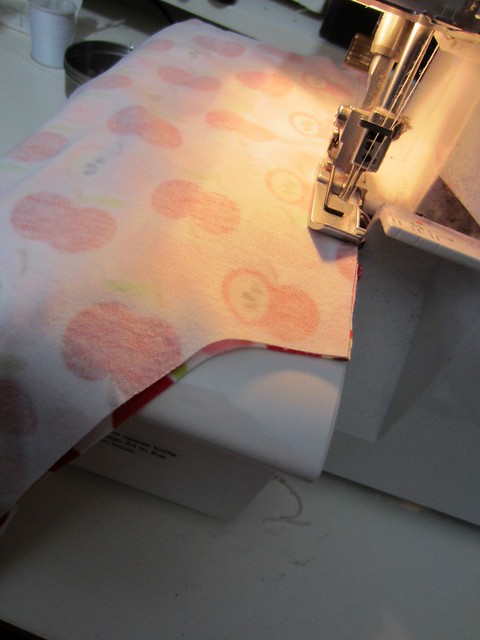
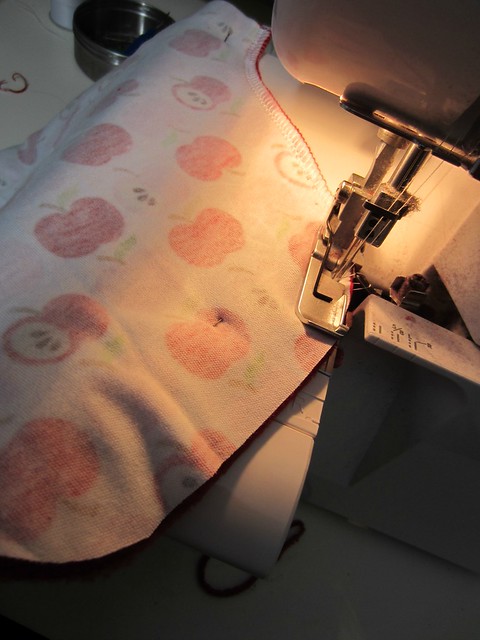
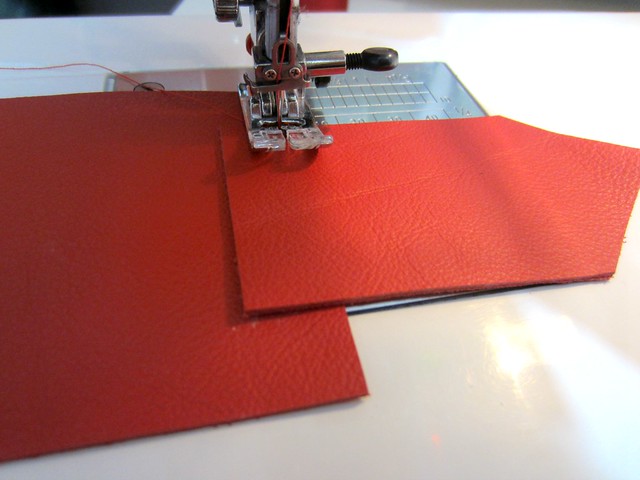
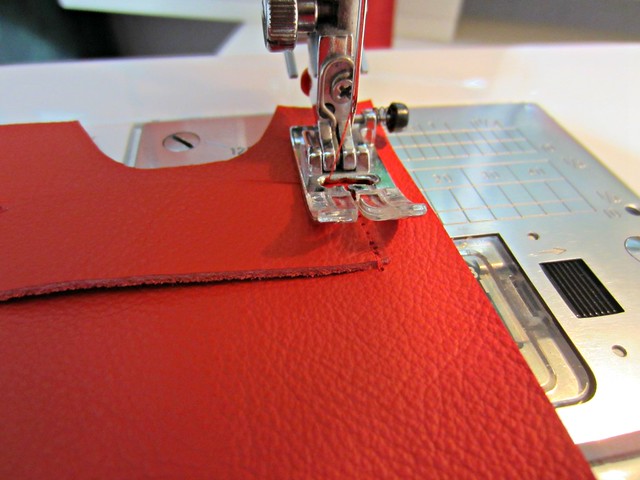
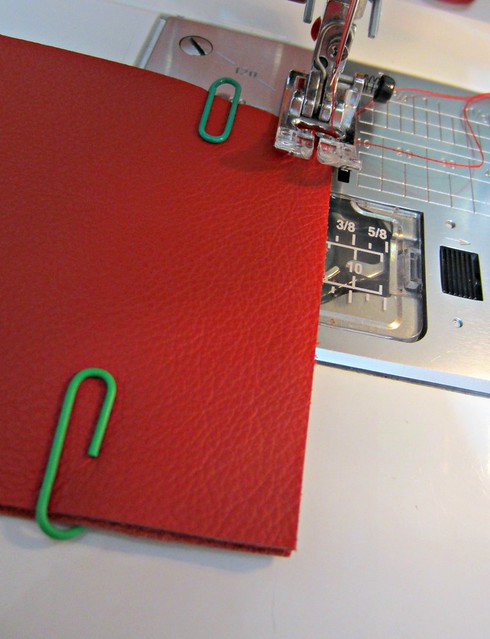
Right sides facing, sew the main fabrics together along the side seam on one side.  Repeat for the two lining pieces.  I'm using a serger because I have one, if you have a regular machine that's fine too!   Modern regular machines might have a pre-built stretch stitch (like a lightening bolt), with older or more basic machines you can use a narrow zigzag.  All of the seams end up enclosed so neatness isn't an issue.
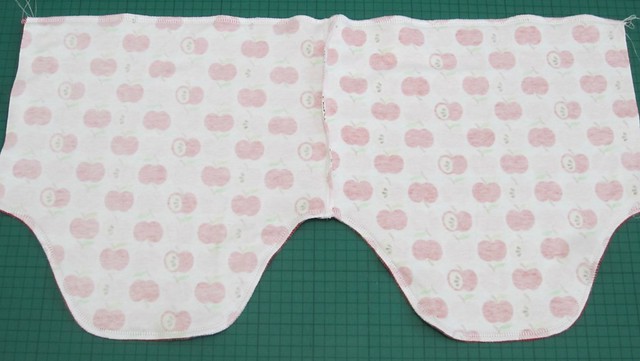
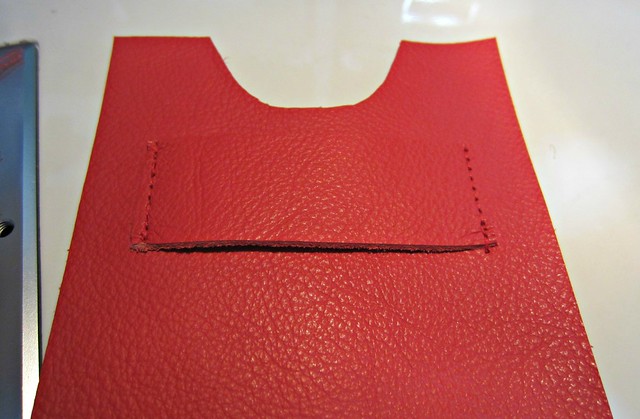
3 both sewn

Now you have this.

4 pin layers

Place the lining on top of the main, right sides facing, and pin the layers together along the top straight edge and the bottom curved edges.  You are going to sew along these lines (as per the black lines) and leave the sides open.  Obviously, follow the curves rather than my hatchet-ey straight lines in the picture.  Make sure the seams in the centre match up.

5 sew layers

This is me sewing the layers together.

6 layers sewn

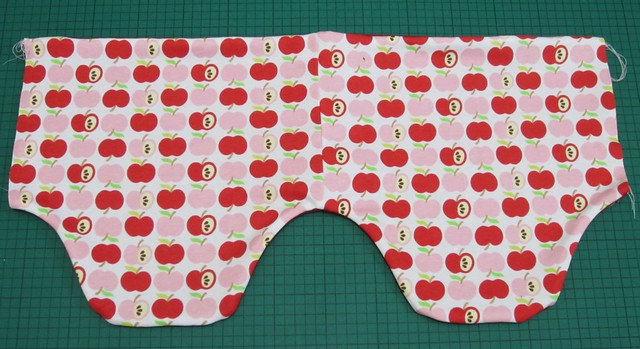
And this is me done this step.

7 right sides out

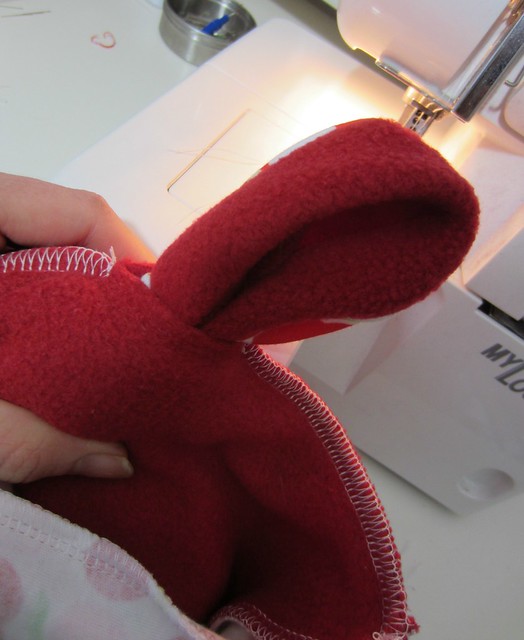
Turn right side out through one of the open side seams.  Fold along the centre seam so the raw edges match up.

8 pinch layers together

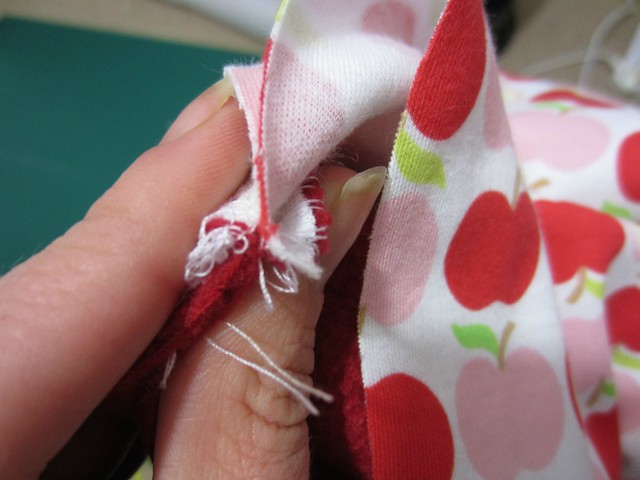
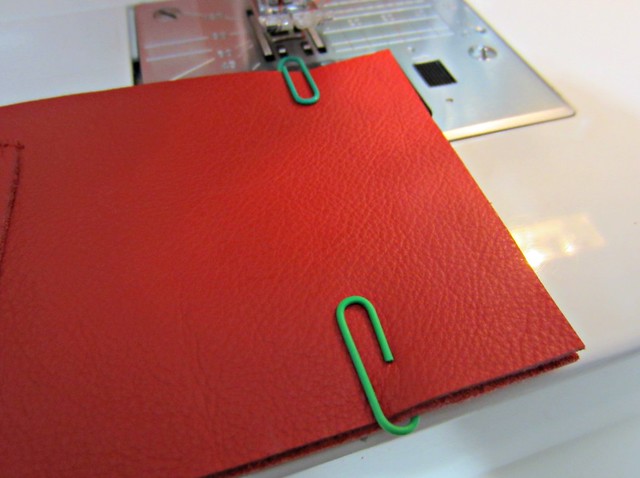
Where the main fabric transitions to the lining fabric at the top edge, pinch together at the seam so the right sides are facing.  Pin here, and then continue pinning the main fabric to the main fabric along the raw edge, leaving the lining fabrics alone for now.

9 inner layers pinned

This is what it looks like when the main fabric is pinned.  See how the lining is hanging free?

10 push to the inside

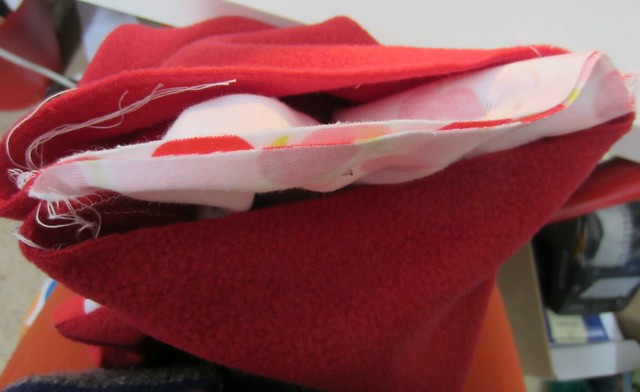
Starting at the side seam where the main transitions to the lining, start pining the lining together right sides facing. As you are doing this, the whole cowl will disappear into the interior.  This is known as bagging.

11 all pinned

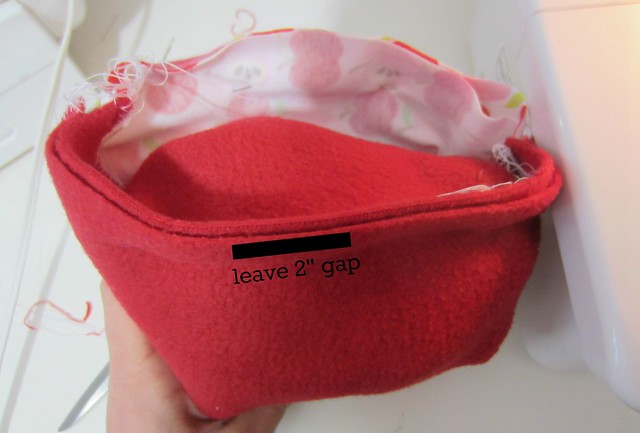
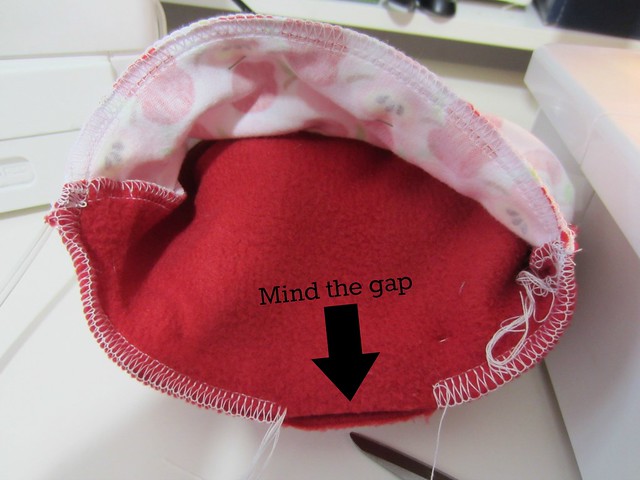
Now that all the lining has been pinned to the lining, there is a resulting circle to sew and the cowl is hiding inside.  In order to access the cowl and pull it right sides out, you will need to leave a gap in the lining.  I normally find two inches is fine for pulling it out, and I normally place the gap in the middle of the lining away from the side seams.  If you don't leave that gap, the cowl is trapped inside!

12 sew in a circle

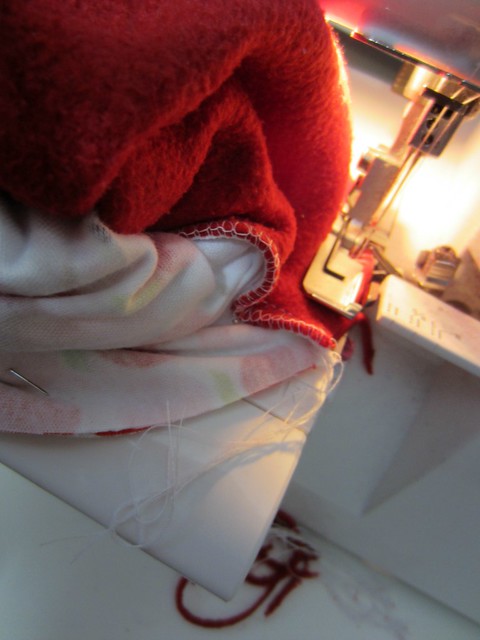
Sew all the way around this edge.

13 all sewn

Again, make sure you leave the gap!

14 pull right side out

Through the hole, start pulling it right sides out.

15 right side out

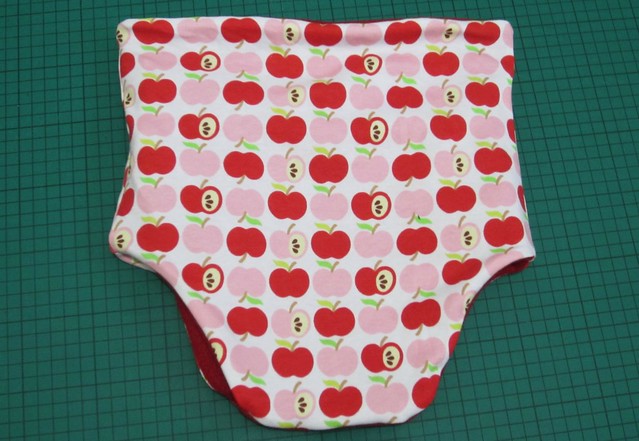
Voila!  If you want to iron for neatness, do it now.  Beware the fleece (if you're using it) as it will melt at too hot a heat.

16 open hole

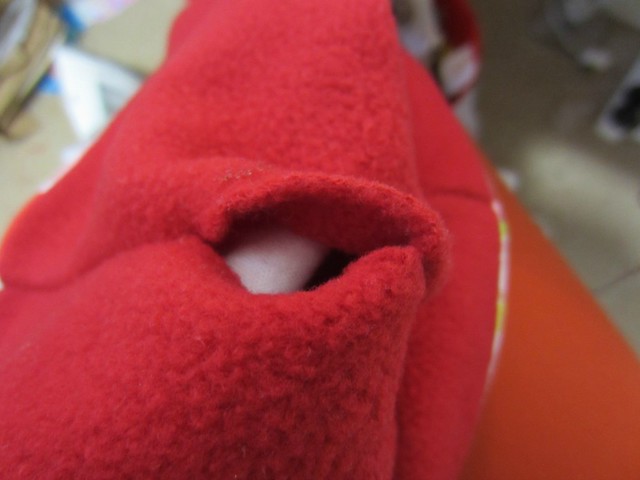
But... there's still that hole to close.

17 topstitch hole

If you want to make it reversible slip-stitch it closed, however, if you're going to have it mostly main side out you can top stitch it close to the edge.  Because it's slouchy, the stitching will disappear anyway and no one will notice.

18 all done

And you're done!

Saturday 15 December 2012

1

Reflection

mother and child

I had a tutorial ready to put up last night when I heard the news of the terrible tragedy unfolding in Newtown, CT.  This is a small town fifty miles from where I grew up; I had friends and teammates from Newtown, my high school principal is currently their First Selectman.  No event like this is ever understandable, but the proximity has me reeling.  I've always put growing up where I did on a pedestal: these things don't happen to us, these things don't affect people I know.  In respect for this heartbreaking, unfathomable tragedy, I'm having a moment of internet silence and sending so much love and support to Newtown.

Thursday 13 December 2012

7

Oslo Debrief: How to have fun on the semi cheap

Architecture Collage

As pointed out yesterday, I made a sly trip to Oslo last weekend. Steven had a milestone birthday last month (*cough* 35 *cough*) and as we hadn't been on a solo trip away since having both kids, I surprised him. I snapped up the flights on the super-cheap, and only realised afterwards that Oslo is pretty much the most expensive place on earth. I admit I panicked, but I did a lot of research and we didn't end up spending a fortune.

Oslo Accommodation Collage

As we normally do, we stayed in an apartment rather than a hotel. Beyond being cheaper and having more space than a hotel room, it's also a lot more pleasant to hang out in and you can make some of your meals in. One of the most expensive things (relative to costs elsewhere) in Oslo is drink. So we bought a bottle in duty free to bring over, and stayed in at night gorging on Sons of Anarachy. After being out all day in -10deg weather, it was no big deal to hang out in our warm flat.

Oslo food collage

We didn't have a sit down meal while we were there; street food and cafe food rock. We pretty much ate pastries and hot dogs all day long; I regret nothing.

Vigeland Park Collage

The one place we absolutely wanted to visit was Vigeland Sculpture Park, which is completely free to get into.  We did take the tram there but it was a fifteen minute walk back to the centre after.  The public transport system in Oslo is amazing; there are buses, the underground, and trams.  A single ticket gets you an hour on any / all modes of transport within the zone you pay for.  For a city-centre population only a little bit bigger than Edinburgh, the transport is amazing.  Side-eyeing you so hard, Edinburgh Council.  Anyway, Vigeland Park is fantastic.  There are more than 200 statues ranging from the sublime to the WTF.  If you like to see naked people doing strange things, this is your Mecca.

Vigeland shenanigans collage

Or if you like to see fully clothed people doing strange things with naked statues, this is also the place or you.  So many shenanigans.

Waterfront Collage

Other free and lovely things include the harbour...

Opera House Collage

And the Opera House.  This is the number one Building That Would Never Be Allowed In The UK.  The roof is on a slant upwards from the ground on both sides, and then once you climb that, on a slant upwards from the middle to the top.  It was covered in snow and ice and there was nary a security guide to make sure people were behaving themselves.  The views across the water and city are amazing.  I only fell over and was helped up by a Chinese person once.
 
Graffiti Collage

Like we do most places, we just walked around and around and around without a real plan.  Here's a graffiti enclave we happened upon courtesy of me having a map fail.

Viking Collage

We did pay to get into the Viking Museum and it was interesting but there's a limit to how much time you could spend there.  And that comes from someone who did a degree in medieval history and literature.

Folk Museum Collage

And also next door we paid for the Folk Museum; between the two we spent the better part of the day. The Folk Museum had a gigantic Christmas market (which was bigger and better than the one at City Hall) and traditional Norwegian handicrafts like knitted Justin Beiber hats.

Us Collage

And lest you think that we only took pictures of things, we also took turns taking pictures of each other in front of those things.  Despite carrying my 18-55mm lens around in my handbag the whole flipping time, I shot everything on my new 50mm f/1.8 lens and it did a really great job.

Wednesday 12 December 2012

3

New Stockist Alert

Just before we went to Oslo I managed to whip up a huge stack of trousers for a new stockist...
Leaning tower of trousers @juicytots

I've been a long-time admirer of Juicytots so it's a massive honour that they are stocking my wares.  And you might just be able to spy some things in the leaning tower of trousers that are new...

Juicytots Collage

Tigers in green and brown!  The superheroes have changed their bands from black to red and the purple stars have changed their bands from purple to fuchsia.  I haven't had the chance to upload them onto my own site yet, so if you want to snap them up head over to Juicytots.

Wednesday 5 December 2012

9

Tutorial: Sew a leather iPhone cover with flap

Leather iphone cover with text

Believe it or not, there are occassions when you don't want to dress your iPhone up like a cassette tape or lego-ise it. If it's kicking about in a handbag as dangerous as mine, it's good to protect the screen from knocks and detritus. So how about sewing it a leather cover with a flap? It's a super quick project (I estimate well under an hour) and you can knock them out for all your pals for Christmas. You'll need leather or pleather, some chalk for marking, and a heavy duty / leather needle. You can't pin leather because it leaves a hole, but if you want to you can paper-clip or quilt-clip it to stop shifting, or just hold it with your fingers. When I sew leather, I set my stitch length a bit longer (3 for me) and go s-l-o-w-l-y to make sure you don't skip stitches.  Front and back stitch a couple of times at the beginning and end. I use my normal foot, but you can use a teflon or walking foot, or even put some scotch tape underneath the foot to make it slide better. I personally don't find it necessary!

Okay, let's start off by downloading your file. Print it out without scaling and check your measurements. This cover is for a 4s, if you have a different model you might have to adjust the dimensions. It's a good idea to cut the front and back pieces out of paper or card, put your phone in the middle, and pinch round the edges to make sure it fits before you cut your leather. Does it fit?

1 cut pieces

Okay, let's cut the leather! Front with bit cut out of the top, a back, a flap and a strap.

2 transfer markings
With a pen or pencil, trace the strap and flap placements firmly onto the paper with the leather below. When you remove the paper, there will be slight indentations on the leather. Transfer these markings with chalk. Alternatively, cut the box and flap markings out of the pattern piece and transfer directly with chalk. You are the master of your own destiny.
3 chalked
All chalked up and ready to sew.
4 sew flap
Place the flap onto the back matching the chalk marks. Sew along the top,making sure you catch both layers and that the flap doesn't shift.

5 boxed flap

When you get to the end, pivot and sew down toward the corner, pivot and sew to the opposite edge, pivot and sew back to where you started.  Then you can sew a boxed X through the middle of the rectangle if you like, I personally think it looks better and I am world-renowned for my good taste.

6 sew strap

Put the back to the side and get the front and strap out.  Strap matches the marking and sew it on close to the edge.

7 strap sewn

Repeat on the other side.

8 match bottom

Place the front and back together wrong sides facing at carefully match up the bottom edge.  Out come my paper clips.

9 sew bottom

Carefully sew along hte bottom close to the edge, catching both layers.  I match the inside edge of the oval window of my foot with the edge of the leather, it's scant.

10 bottom sewn

This is what the bottom edge looks like sewn.

11 sew right

At this point I remove the paper-clips as I find they can distort the pieces; if you matched the bottom well the side's should be matching up too.  Slowly sew up the right side close to edge, right to the top.

12 sew left

Now, resist the urge real hard to sew the left side from the top to the bottom.  You really want to sew it from the bottom to the top as you did the right side, as if you sew one side top to bottom and the other side bottom to top you're risking slippage and distortion.  It can make the rectangle a bit more like a rhombus (ask me how I know).  So from the bottom to the top, sew the left side close to the edge.

13 finished

Carefully prise your iPhone out of the mitts of your child, insist that it's yours, slip it into the cover and secure the flap.  Now take it to Norway*.

*Do you like how I casually slipped that in?  Steven and I are off to Norway tomorrow. Without children!