I know, it's scandalous I didn't finish this tutorial until almost a month after the last step. But just think about how prepared you must be now! In my defense, I
was on holiday and didn't want to sit indoors for hours writing tutes while my family enjoyed the sunshine.
To refresh, here are the previous steps:
- Measuring for your suit
- Drafting your suit pattern from your measurements
- Preparing to sew (including list of materials, cutting your pattern, and general sewing information like stitch choices and about pinning)
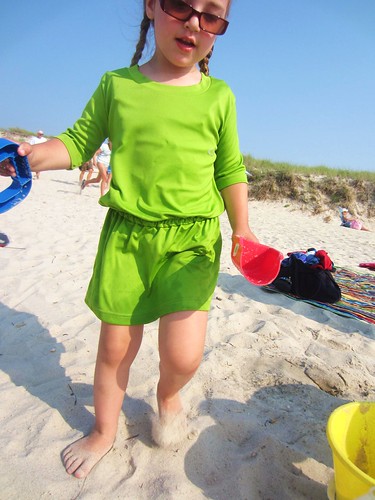
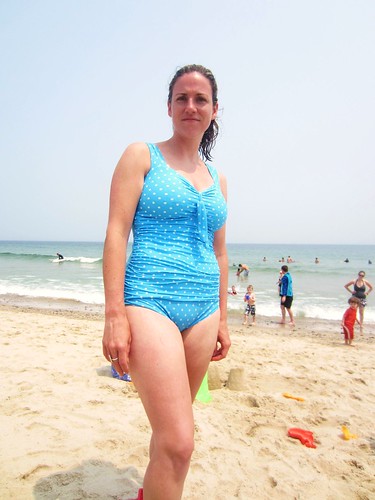
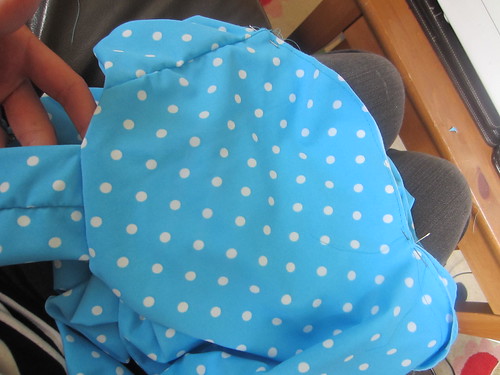
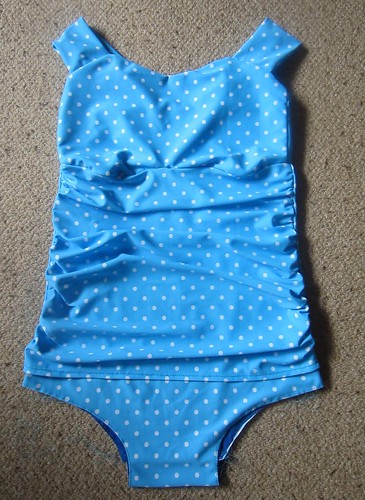
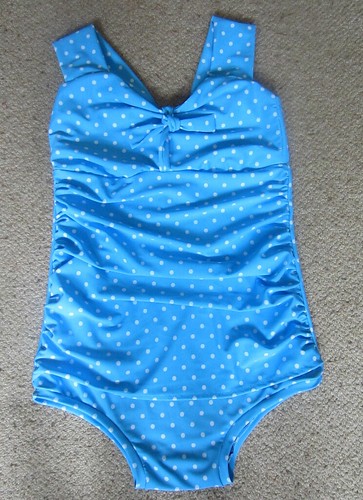
And to remind you what the suit looks like (bonus: outside of my own dreary Scottish dungeon with a camera hiding my face):
New visitors to the blog, welcome. We don't know why I make strange faces so much, but discuss it at length.
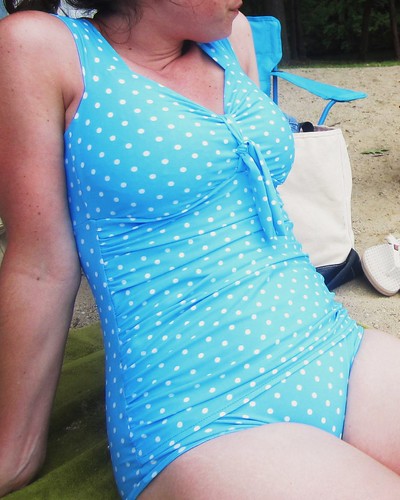
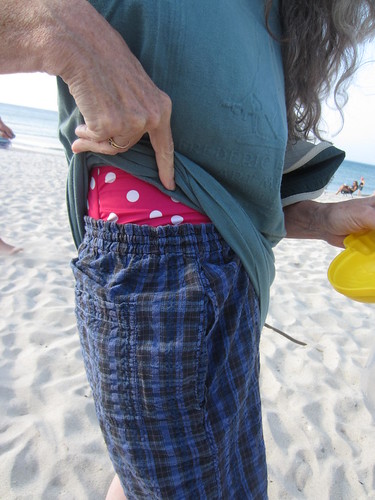
I'm not going to give you a full-on bum shot, but this side view shows the coverage to the back and upper leg. For me: plenty. I would also like to add (and have edited the Drafting post to reflect) is that my mum allegedly wore my pink suit. I say 'allegedly' because being very private about such things, she wouldn't show me more than this:
Why is it noteworthy that my mum wore my suit? Because she is a very different shape to me and several stone lighter (ie several dress sizes and a very many inches smaller) and my measurements and suit
still worked for her. Allegedly.
Here we go then, let's get sewing.
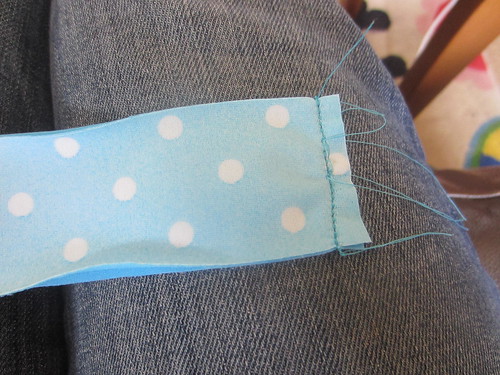
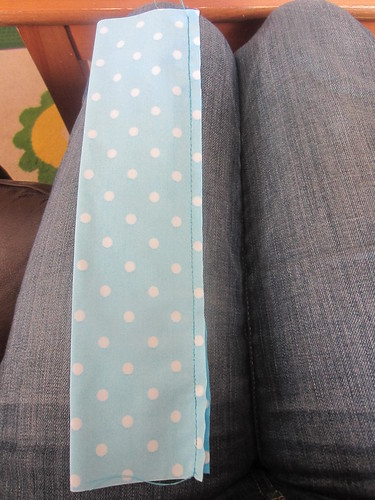
Right sides facing, fold a leg band in half so the short ends meet. Sew together close to the edge using your chosen stretch stitch, I emphatically recommend triple stretch stitch if you have it. You might find that the fabric with catch and bunch if you start stitching too close to the edge so I normally start at the middle and go to one edge and finish, and then start back at the middle going to the other edge. You can see that a bit in the pic above. Repeat to other leg band.
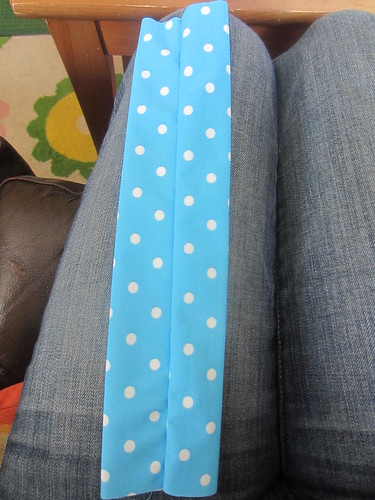
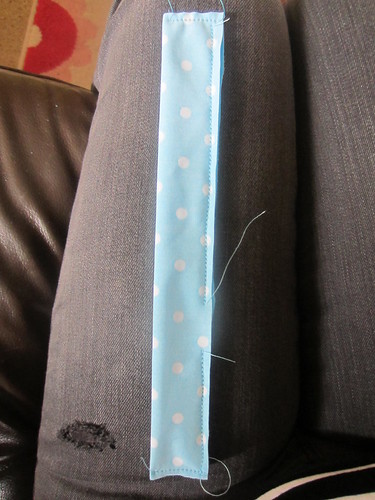
Fold a shoulder strap in half vertically with the right sides facing so the long edges match. Sew along this edge with your stretch stitch. Repeat for other strap.
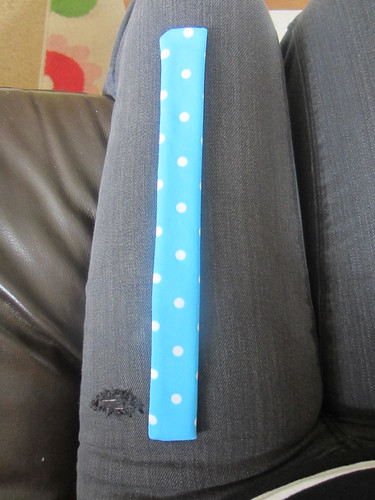
Turn right side out and position so the seam you just made is centered, this will be hidden underneath your strap when wearing.
Right sides facing, place one of the front bodices on top of one of the back bodices so their side seams align. Sew this with your stretch stitch. Repeat at other side seam, and then repeat the whole process with your other front and back bodices. One will eventually be your shell bodice and one will be lining bodice, but both are identical.
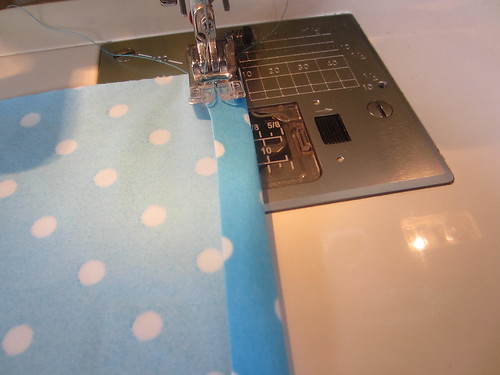
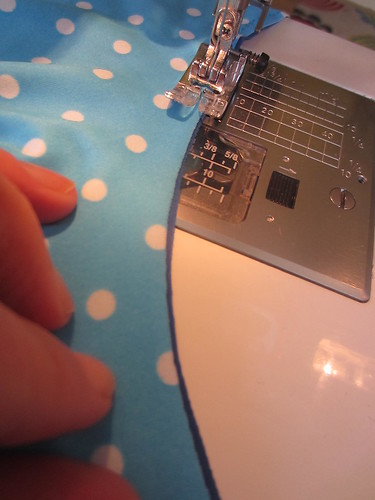
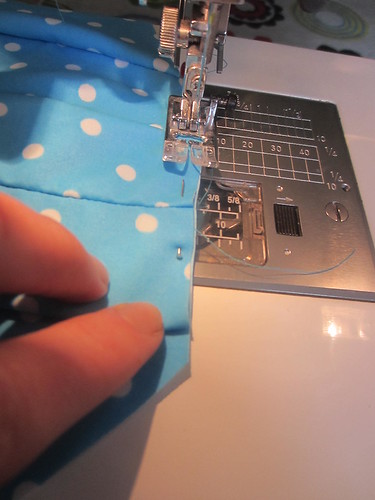
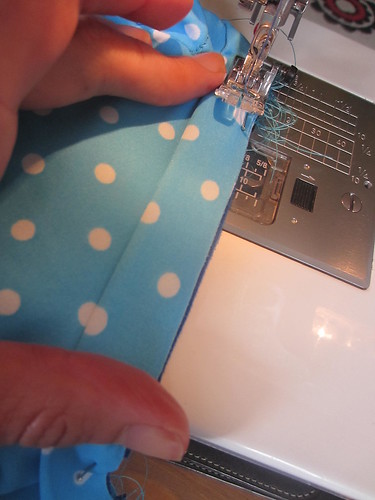
Fold over the hem allowance of the ruched front piece 1/2" and then trap it (ie so you're not using pins) with your machine foot to hold it in place. Sew the hem with your chosen stretch stitch, I emphatically recommend triple stretch stitch if you have it.
Trim close to the stitch line.
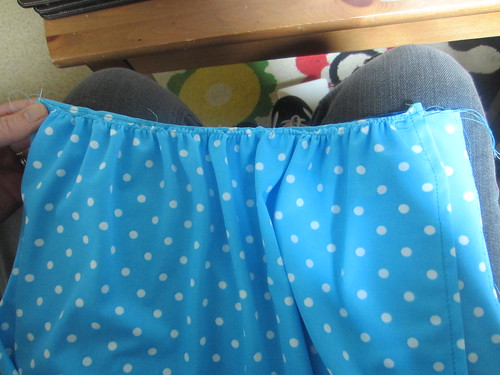
Sew a long gathering stitch (straight stitch, long length) as close to the side seam edge as you can manage. By turning your tension up, it will gather it a bit for you. Repeat to the other side seam of this piece.
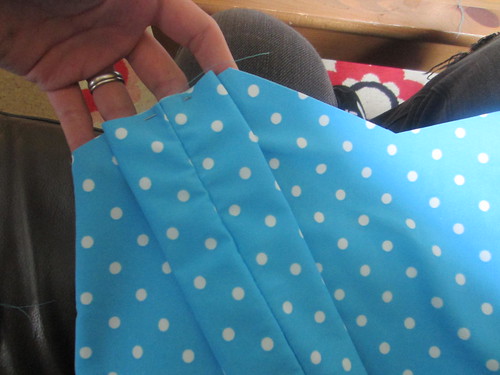
Remember to leave long tails on all of your basting stitches, this is important! Put this piece, your leg bands, your shoulder straps, and your bodices to the side for a bit and get ready with your front and back outer pieces and your front and back lining pieces.
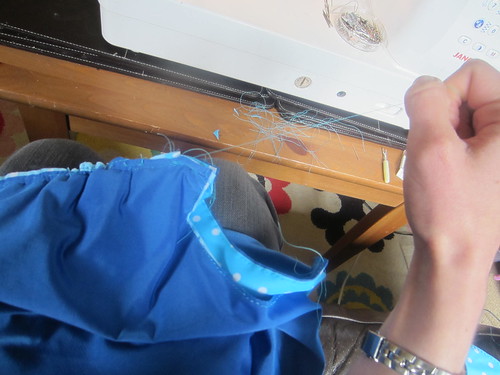
Change your stitch to basting (straight and long but with normal tension).
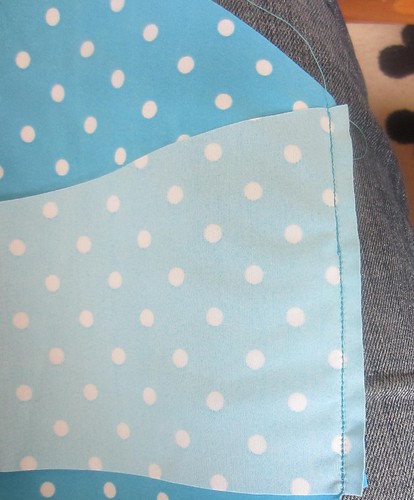
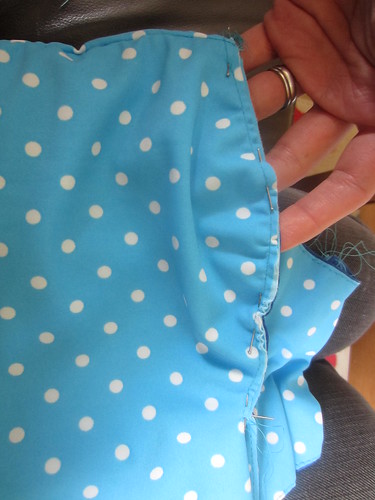
Wrong sides facing, baste the outer front piece to the lining front piece very close to the edge on every side. Go slowly, especially if you're not using pins like me. Because you trimmed your lining slightly bigger than your outer piece, make sure that as you are stitching you can see a bit of the lining peeking out at the edge (as above). Because the fabrics are slippery, it's not hard to slide them where you want them. Don't worry if more of the lining peeks out here or there or if the corners don't perfectly line up at this stage, it really doesn't matter. What
could matter, however, is if the stitch doesn't catch both layers as then your lining might not securely attach when you sew all the pieces together. It's better to catch more. Repeat the process to baste the outer back piece and the lining back piece together.
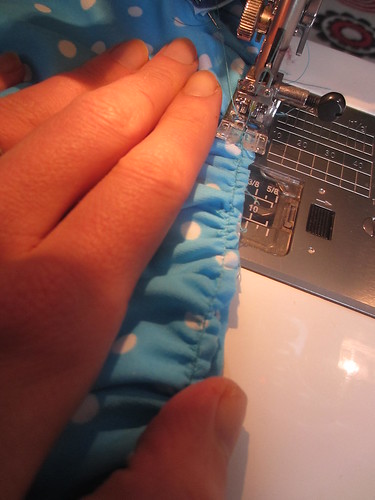
Very close to the edge (ie within the seam allowance) pin the hemmed edge of your ruched front piece to your front piece one inch from the bottom so that the
wrong side of the ruched piece faces the
right side of the front piece.
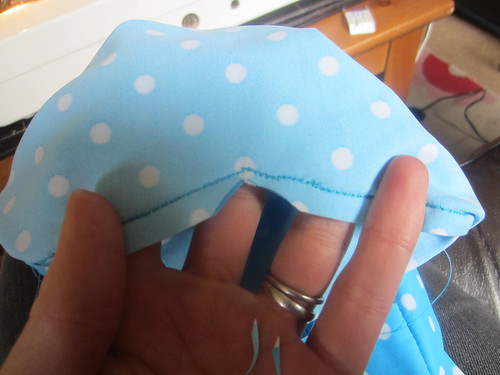
Tighten and adjust the gathers of your ruched front piece so it matches the side seam of the front piece. I haven't pinned more than the one pin at bottom corner, but if you want to pin, do it within the seam allowance only.
Change the stitch back to your chosen stretch stitch. Making sure that you are sewing to the left of your gathering stitch, slowly stitch the layers together, using your hands to keep the gathers and layers together.
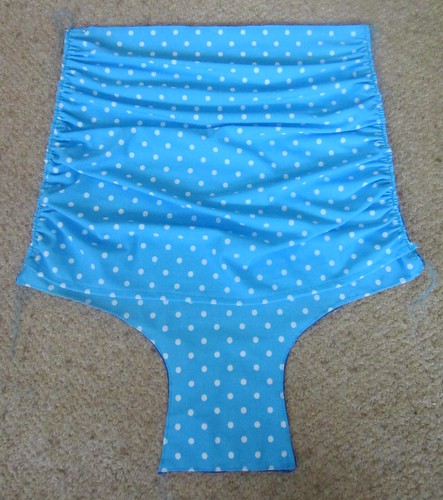
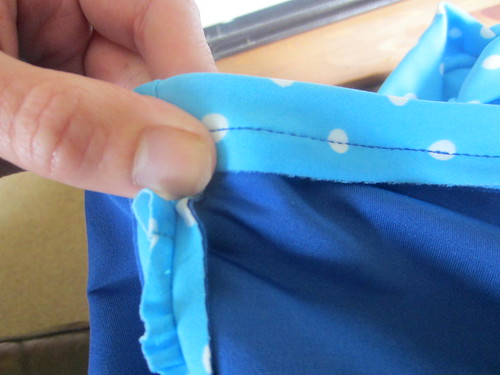
Repeat on the other side seam and it will look like this.
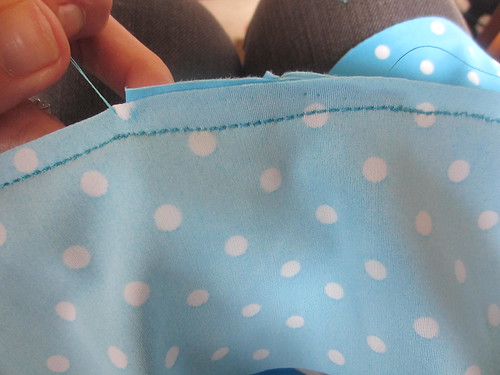
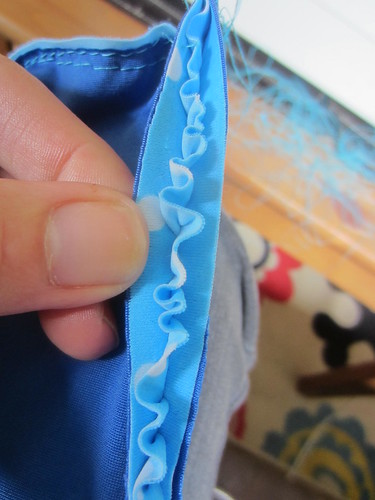
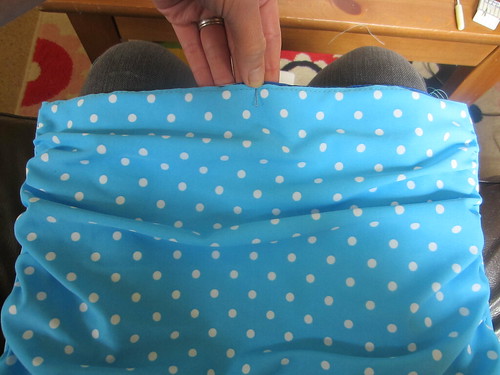
Return to your basting stitch and baste the layers together along the top edge. Again, see how I let the lining peek out a bit so I know that it's catching all the layers.
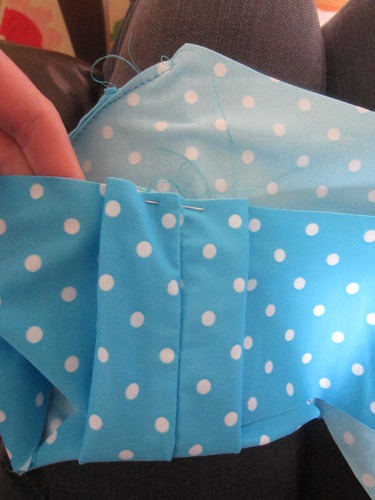
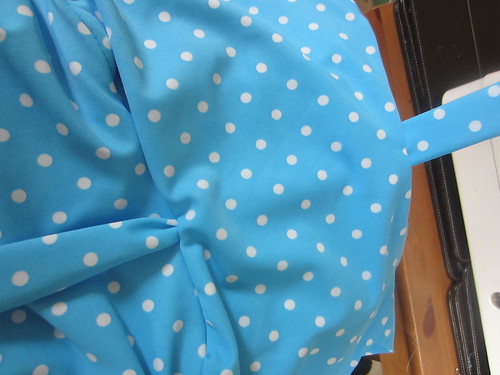
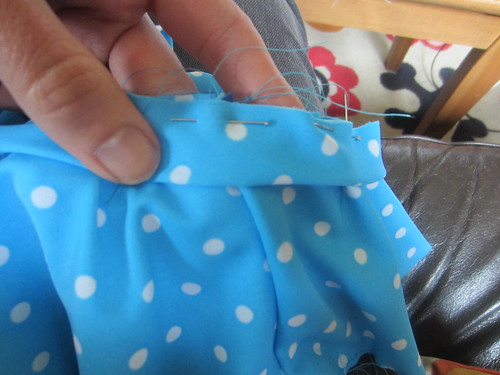
Very close to the edge (ie within the seam allowance), pin a shoulder strap to the right side of the front bodice so that it is 1/4" away from the where the centre V starts dipping down. The placement of 1/4" from the V is important here.
Baste in place close to the edge, moving the pin when you need to.
Repeat for other shoulder strap.
On the back bodice, measure 3" from the side seam and make a mark close to the edge with a washable fabric pen.
Pulling the strap under the bodice from the front to the back, match up the closest / outer edge of the strap with the mark you made in the last step. If that doesn't make sense, I'm trying to say that the strap starts three inches from the side seam!
Pin in place within the seam allowance and then baste like you did to the front of the strap. Repeat for other strap.
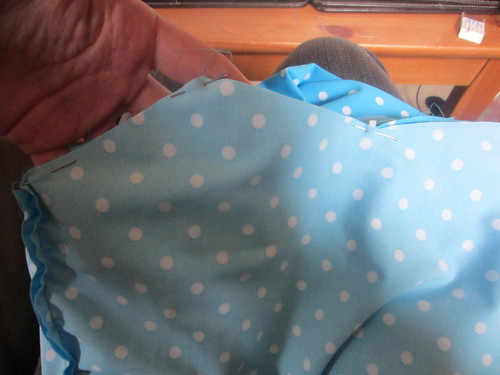
Right sides facing, slip your other assembled bodice (the lining one) over the top of the one you've attached the straps to (the outer one). The straps are hiding in between.
Match up all seams and points along the top edge and pin together within the seam allowance.
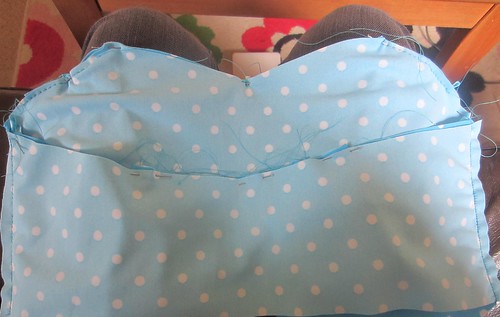
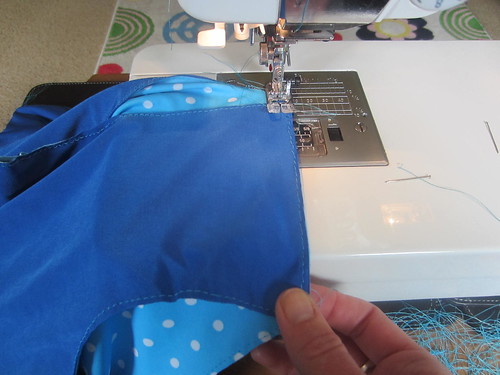
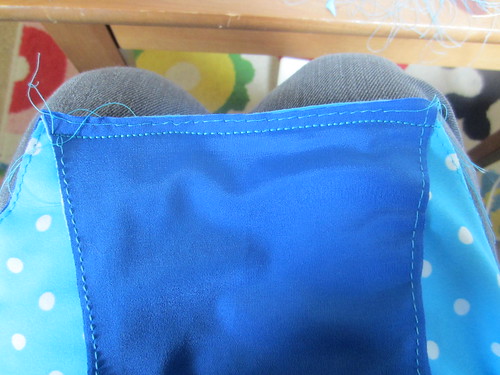
Switch back to your stretch stitch. Starting at the side seam, sew along the top edge so that your stitching falls below where you have basted your straps. When you get to the top corner of the V neck, lift your foot and pivot down the V. Make sure you pivot
right after where your strap lies (i.e. not while on the strap), you will be able to tell with your fingers where that is. If you pivot while on the strap it won't sit right when you turn it out. This is why you placed it 1/4" away in the step above.
Same drill when you get back to the top of the V: pivot
just before your needle is on the strap. Continue sewing all the way around to where you started. You can see from the picture above that the stretch stitch falls below the basting stitch, the pins are within the seam allowance, and where I have pivoted for the V.
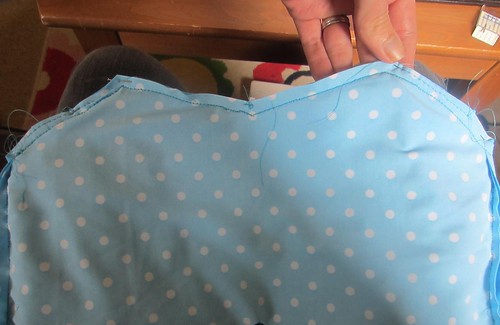
Cut a notch into your V.
Using the long tails that you left when basting, pull out the basting stitches that originally secured the straps to the outer bodice.
Turn bodice right side out. Switch to your basting stitch and baste the layers together along the entire bottom edge.
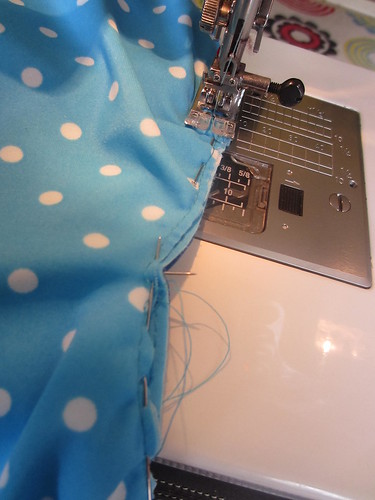
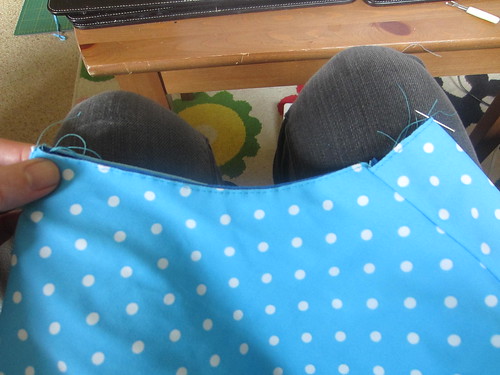
Right sides facing, lay the back piece on top of your front piece, matching up the side seams.
Using your stretch stitch, sew the side seam together to the left of your basting stitches.
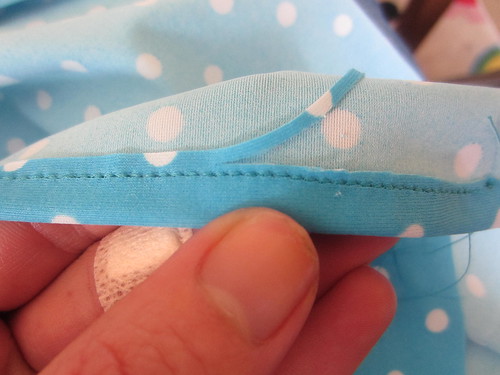
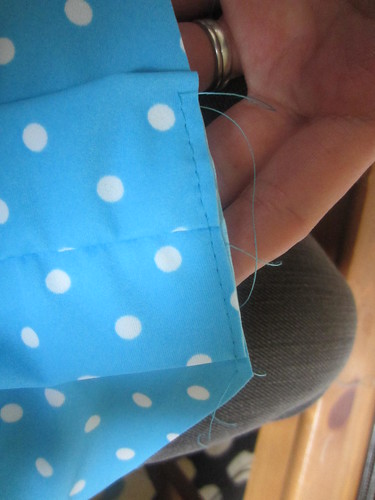
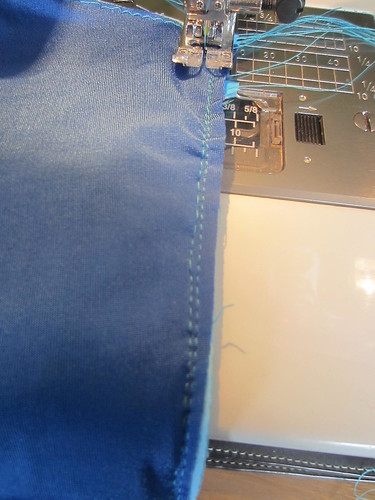
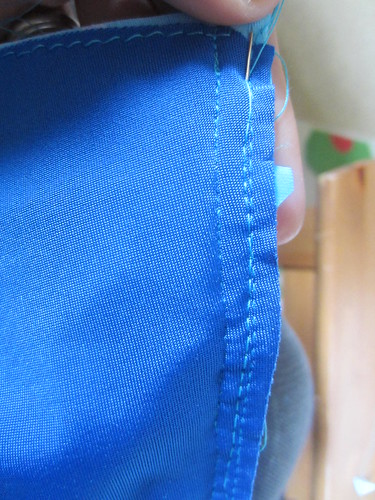
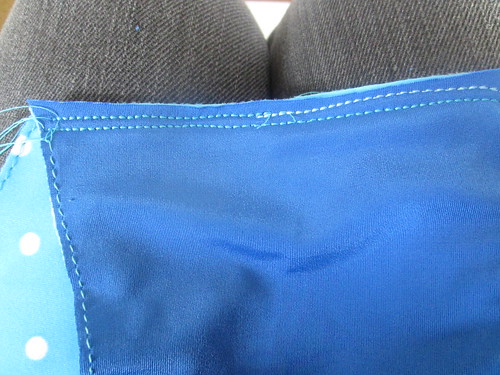
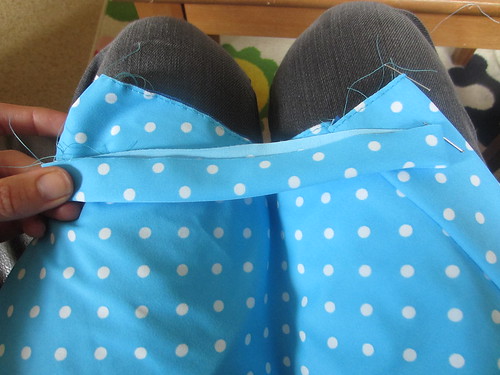
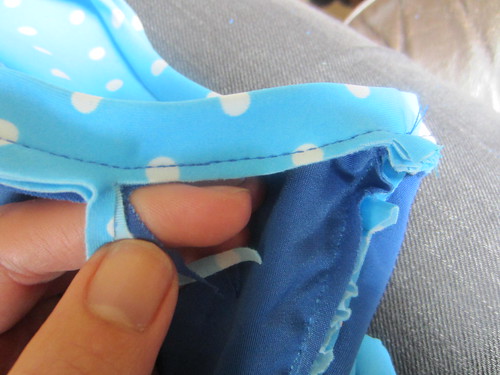
In this picture, from left to right you can see the stretch stitch, the basting stitch that attached the ruched front to the lining / outer front, and the basting stitch that attached the lining front to the outer front. Each time you are stitching layers together, the stitch line moves to the left a bit (ie larger seam allowance).
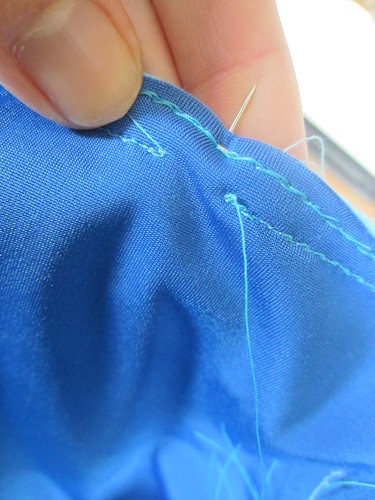
Remember all the tails that you left in when basting? Gripping a tail, pull your basting stitch right out along the side seam. Repeat for all the basting stitches along the side seam. If you don't, they will snap when you put your suit on and the sound will make you terrified of wearing it!
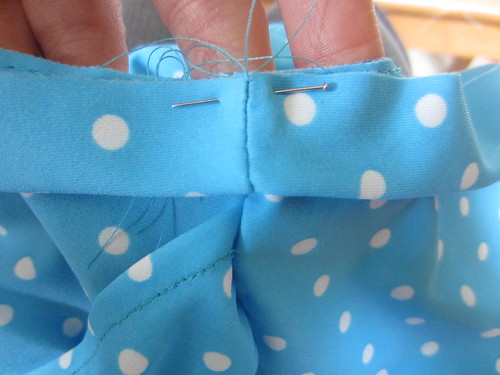
In this picture you can see the side seam with basting stitches removed: lining, outer, ruched, outer, lining. Only the stretch stitch remains.
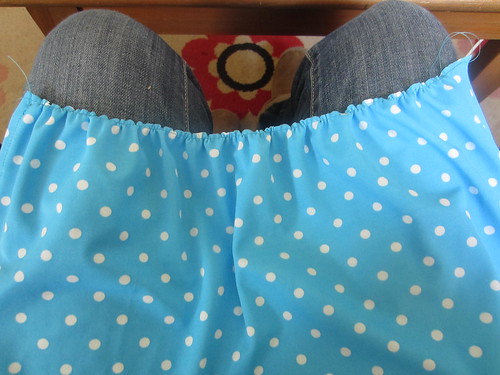
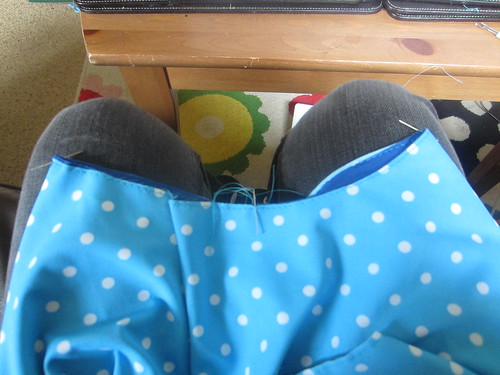
Match up the front and back seams along the bottom edge. Sew together with your stretch stitch to the left your basting stitches.
This is what it will look like when you are done. Pull out the basting stitches.
Now that the basting stitches are out, do another row of stretch stitching within the seam allowance. This is for added security as this is the seam you really,
really don't want to split.
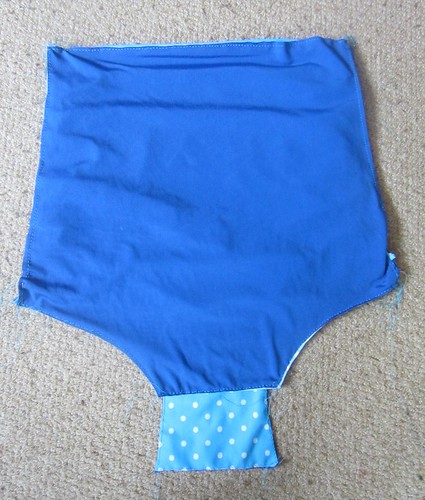
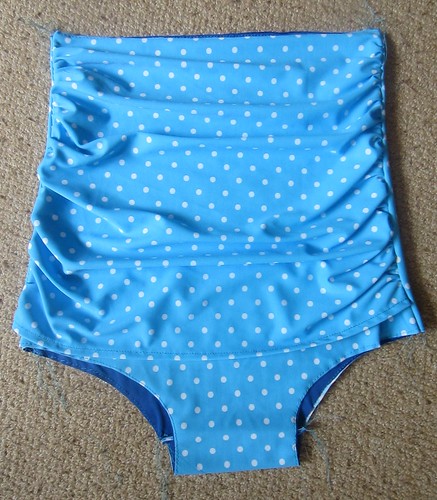
Except for the leg bands, the bottom of the suit is now complete.
Fold in half and place a pin within the seam allowance at centre front. Do the same to your front bodice.
Right sides facing, slip your bodice over you lower suit, matching the pins at centre front and the side seams.
Pin all the way around close to the edge (ie within your seam allowance).
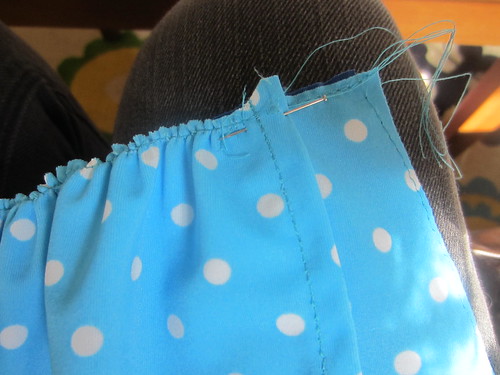
Starting at the side seam, stitch towards centre front with your stretch stitch, to the left of your basting stitches. Stop when you get 1/2" from centre front and start again 1/2" from the other side of centre front (ie leave a one inch gap at centre front). Continue back to where you started.
This shows your gap.
Flip your suit open.
Fold your front tie piece in half vertically and sew with a stretch stitch the top edge, pivot down and sew the long edge about two thirds of the way down, stop, leave a 1/2" gap, and then continue down the long edge, pivot, and then the other short edge. See the gap?
Using the blunt end of a pencil or pen, turn right side out through the gap. There will still a small opening which you can slip stitch closed but (like me) you can just leave it. This bit will up inside your suit so it doesn't really matter.
Slide the tie through the gap at centre front so that the small hole in the tie (if you haven't closed it!) is just above the centre front, inside the suit. Holding in place, flip the bodice down and sew the gap at centre front closed, trapping one side of the tie to the inside and one to the outside. Sorry I don't have a picture of this!
At the leg opening of the suit, fold so that the crotch seam on one side. Match up along the leg curves and place a pin within the seam allowance where it folds at the other side, this is your half point.
Match up the crotch seam with the pin you just placed and line up the leg curves again. Two new folds will form, these are your quarter points. Place pins within seam allowance to mark these. Repeat for other leg opening.
Fold one of your leg bands so the right sides are out and the raw edges are together. With the seam to the left, place a pin within the seam allowance where it folds at the right (half point). Make sure you catch both raw edges. Refold so your pin and the side seam are on top of each other and the two new folds at the left and right are your quarter points, placing pins there to mark, making sure you catch both layers again. Repeat for other beg band.
Right faces facing (with all three raw edges to the top), place your leg band over your suit so the side seams match. Pin layers together within seam allowance.
Match up the pins marking quarter points and half points and pin together within seam allowance. After these four pins are in place, stretch gently so the leg band matches the leg curve and place pins within the seam allowance in between these four pins. Make sure you are catching
both layers of leg band when you pin.
Starting at the side seam, sew the leg band to the suit 1/4" from the edge, moving the pins as you go and gently tugging on it with your hand so the leg band is stretching slightly but your leg opening is
not. Go slowly so you can contiually check that both layers of your leg band are being caught by the stitch.
When you get back to where you started, examine the band all the way around to make sure are the layers were caught. If they haven't, you'll have to carefully seam rip and re-sew, but hopefully you'll be fine!
Once you are certain these seams are secure, trim close to the stitch line. This will remove the basting stitches holding the lining to the outer fabric around the leg openings. Repeat for the other leg.
Your suit is almost done! The final step is to pull out the remaining basting stitches along the seam attaching the bodice to the body of your suit, the ones that held together the lining and the outer fabrics. Now you should only have stretch stitches left,
please make sure because, I've said before, if the basting stitches are still there, it will sound scary when you put it on.
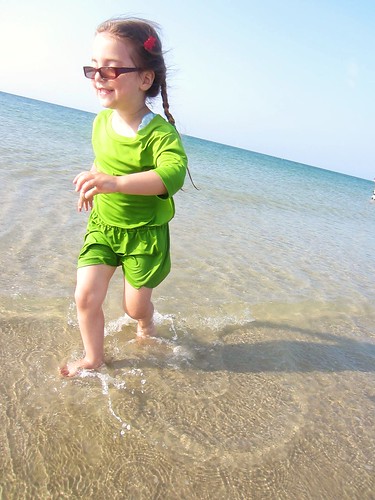
Put it on, adjust your front tie, and you're done!
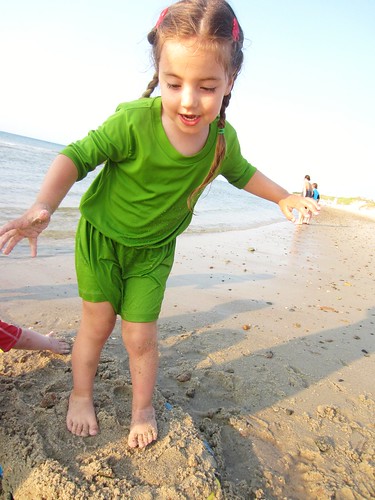
Go to the beach and get some snaps of your legs looking super stumpy by hiding the bottom half in the water. And then post them in
the Flickr group.