


There is still plenty of time before Christmas to make one! This hat fits both a two year old (19.5" head circumference), a four year old (21" head circumference) and *cough* myself, although not in a remotely flattering fashion. So if you making one for a bigger or smaller person adjust the measurements accordingly.
- Cut two rectangles measuring 10.5" by 7.5" and two rectangles measuring 10.5" by 6" with the stretch along the width. Cut four roughly 3.5" by 3.5" squares and then round their edges along the bottom. This makes pretty big lampchop-esque flaps so feel free to make them smaller if you prefer a more petite look! For the tassels I cut twenty 0.5" by 3.5" strips.

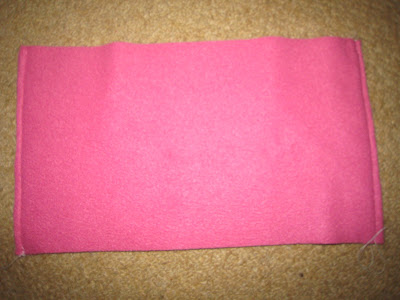
- Right sides facing sew the bands together at the left and right sides. Fold right sides out with the raw edges aligned and you have a circular band.
- Right sides facing, sew around the curved edge of your first ear flap, leaving the top open. Flip right side out. Repeat for second ear flap.

- Baste the top edge closed.

- Bunch up half of your tassels. It helps to wind a thread around them and pull tight to keep them together.

- Place the bunch in the top corner of the hat rectangle (onto the right side of the fabric), at a 45deg angle facing down. Pin in place.

- Baste across the tassels at a 45deg angle. At this point, your machine might seriously hate you because the fabric is so thick, so push down quite hard with your finger / hand and go slowly.
 Repeat for the second tassel.
- Put the other rectangle on top of the piece with tassels and pin in place. Turn over so that you can see the basting stitches at the corners.

- Following the blue line below, stitch up one side until you get about a 1/4" below your basting line. Pivot and sew across at a 45deg angle, below your basting stitch line. Reverse back a forth over this line a few times in case it's skipped any stitches and so your tassels are firmly secured. At the top, pivot again at sew along the top edge until you are about 1/4" inside of your basting line, pivot and sew across at a 45deg angle below your basting stitch line (repeating a couple of times), pivot again and then sew down the remaining side seam. Leave the bottom open.

- Trim your corners.
 Flip right side out.
- Pin your ear flap to the inside of your hat, straddling the side seam, and baste in place. Repeat for other ear flap.

- With the ear flaps still pointing up, place your band inside the hat, matching up at the side seams. All raw edges are aligned. Pin in place. Using a medium length stitch to allow a little bit of stretch, stitch around the circumference. Again, going very slowly over where the ear flaps are because, most likely, your machine will be hating you again.

- Flip the band up to the right side of the hat and the ear flaps will pop down.

- Find a nudist to try it on!


Absolutely adorable model you got there. :)
ReplyDeleteNice job on the tut, too!
Pictures of you in the hat please!
ReplyDeleteFab, thanks Amanda! I have some spare purple and white fleece and a little one needing a warmer hat :-)
ReplyDeleteOoh thanks. Got loads of bits of fleece lying around so will have a go at this. Just need to make a sewing machine cover and a cushion cover for presents first. Bit last minute me!
ReplyDeleteJust made it! Added an applique, and lengthened the ears, which I will snap as a chin-strap, for my hat-phobic daughter. Thank you :-)
ReplyDeleteHurray! I bought some snowman print fleece on saturday - off to make one for munchkin now. Thank you!
ReplyDeletepaddymade made the comment I was aiming for!
ReplyDeleteBrilliant, i wonder if my basic sewing skills can manage it? i have some pink flowery fleece scraps i can try with. Maias hair looks like its getting really long. shes so pretty bless her and such a clever mummy too.
ReplyDeleteShe lokes so cute!
ReplyDeleteHappy Christmas to you and the family. Karen x
Thank you for the awesome tute! I made one for my daughter and blogged about it here:
ReplyDeletehttp://treasuresfortots.blogspot.com/
Thank you again for the quick and easy tute!!
This is so much nicer than the simple version I've made in the past. Thanks for sharing! I've posted a link to childmade.com.
ReplyDeleteI AM GOING TO MAKE THIS ONE!! Thanks.
ReplyDeletejust featured this on my blog-- with other winter hat tutorials! thanks for sharing it. http://www.patchworkposse.com/blog/2012/12/11-winter-hat-tutorials/
ReplyDelete