


You guys are in for a rare treat today: my head is making an all-too-rare appearance, and you get to see me stripped of all dignity. Bookmark for lols.

1. babushka, 2. polkadot folded, 3. on head double folded, 4. polkadot unfolded, 5. on head semifolded, 6. red unfolded, 7. double folded, 8. semifolded
Now it's completely clear to me why Maia didn't want to model all the variations of the snood, the clever girl. Almost 38% are vaguely humiliating, although when it's -12deg as it was this morning, I might just value ears over dignity. It might not look at first glance that there's a huge difference between 2, 4, 7, and 8 but you'll have to trust me, it's some highly technical business between whether it's folded (and how many times) or scrunched.
So here's how to make your own. It's a super-fast project and there's no excuse to to make one for your loved or not-so-loved relations for Christmas. I used some polkadot jersey for one side, and red microfleece on the other. Being wide enough to fit over your head without stretching, you could probably use wovens too, but you'd want to use wovens that are not too stiff.
As far as wearing it, it's tall enough that you can wear it slouched down, partially folded over, folded in half, or folded over twice, and with either of your fabrics facing out. The trulydesperate confident can wear it on their head also if you really want to do that I'd recommend making the width narrower than 27" and closer to the circumference of their own head.
Remember if you make one to post it in the Flickr pool!
So here's how to make your own. It's a super-fast project and there's no excuse to to make one for your loved or not-so-loved relations for Christmas. I used some polkadot jersey for one side, and red microfleece on the other. Being wide enough to fit over your head without stretching, you could probably use wovens too, but you'd want to use wovens that are not too stiff.
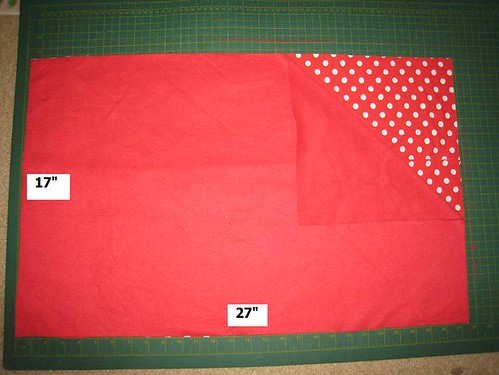
- Cut your rectangles for each side of the snood. As I said above, I used polkadot jersey and microfleece. For me I made rectangles 27" wide by 17" high, for child sized I used 22" wide by 13" tall.
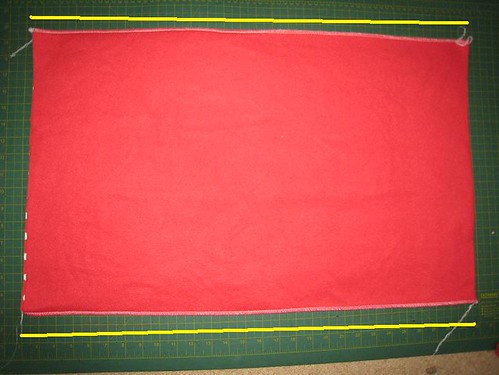
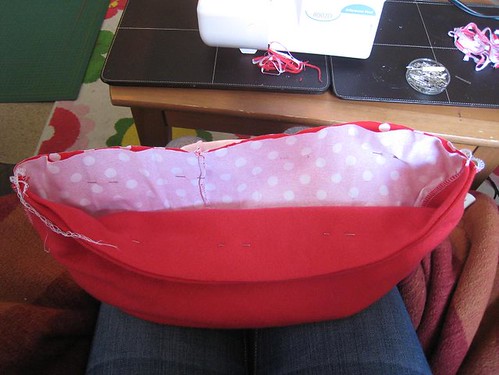
- Right sides facing, sew the rectangles together along the two wide edges (yellow lines).
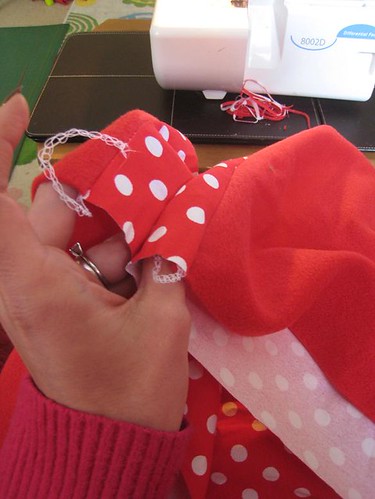
- Open your tube so the right sides are facing out and fold so the raw edges are all on one side. Pinch together the two fabric ones, leaving the two fabric twos hanging free.
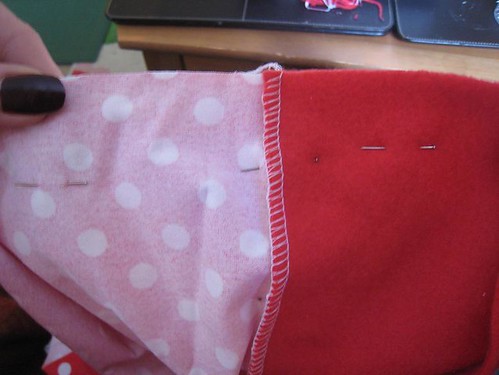
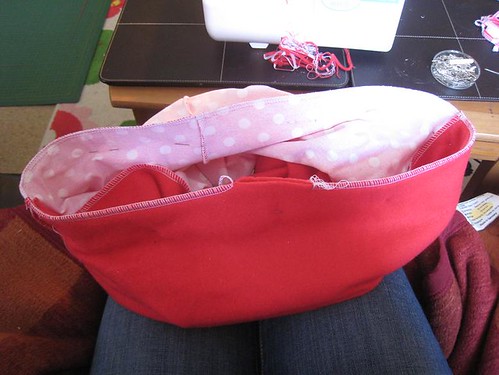
- Pin the raw edges of fabric one together (so their right sides are facing) and continue doing this along the length of the raw edge, transitioning over the seam to pin together the two fabric twos.
- Continue pinning all the way along this edge, you're going to end up with a tube again.
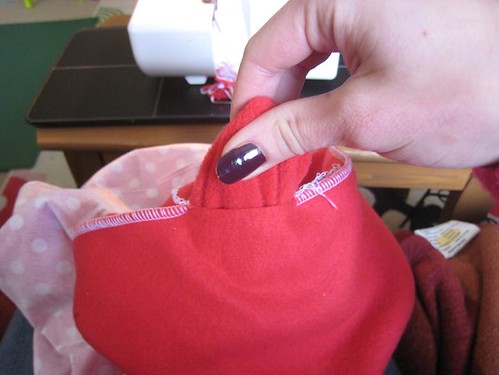
- Sew along this edge, starting in the middle of fabric two and ending about two inches away from where you started. You must leave this hole or you will cry!
- Pull the snood right sides out through this hole.
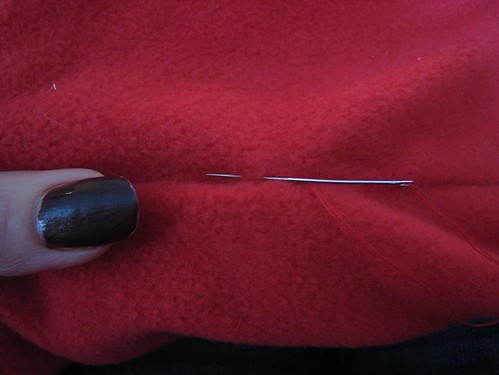
- Slipstitch the hole shut. You're done!
As far as wearing it, it's tall enough that you can wear it slouched down, partially folded over, folded in half, or folded over twice, and with either of your fabrics facing out. The truly
Remember if you make one to post it in the Flickr pool!
Very nice tutorial! And you look cute in polka dots. I see these knitted all the time, but so much work. 20 minutes at the sewing machine is more my style!
ReplyDeleteFab! I have enough snowman fleece to make munchkin a snood that matches the hat I made from your tutorial last year :)
ReplyDeleteVery cool! Bookmarked!
ReplyDeleteOn the other hand, I'd say almost 63% look positively good on you.
ReplyDelete-12°? Ouch. I was feeling hard done by here, with -4°. Keep warm!
I want one! Great and great fabrics. Kxx
ReplyDeleteWow, -12? I'm with glitterboy1, -4 was cold enough (and I was outside in -4 or so at the Christmas spectacular put on by our local businesses for over an hour and trust me, thermals. And hat. Did not cut it.) You have my sympathy:( Plus they look cute on you.
ReplyDelete