Thursday, 12 April 2012

7

Tartans and Macarons

Ever wonder what fifty tartan sashes look like all stacked up? Well, wonder no longer:

fifty tartan sashes

Steven's aunt and uncle are having a very swish anniversary party next weekend and I was commissioned to sew up fifty sashes for the ceilidh dancing.  I definitely brushed up on my cutting in a straight line, sewing in a straight line, and ironing skillz.  Oh dear god, the ironing.

With seven sewing days to go, I'm still considering making my dress.  And would you believe I'm thinking about revisiting the abortive Macaron?  That's right, this one:

To augment the process I'm thinking I could probably Frankenpattern it with my self-drafted posh dress pattern:


The bodice and waistband are already well fitted (including the eleventy bust darts), but I'd have to re-draw the neckline.  And fabric yardage constraints might mean I will have to un-Macaron the skirt too. So really I guess I would be channelling the spirit of the Macaron whilst doing the hard drafting work myself.

What say you- a plan or a folly?

**Addendum: Actually I could just wear the dress pictured above but that lacks the last-minute pathos and panic that I have grown accustomed to.

Monday, 9 April 2012

8

Adventures in negative ease

orange top full

After taking some time to mull over your most helpful advice on how to remove the drag lines from my Renfrew shirts, I concluded that if you don't want any wrinkles and pulls in a knit shirt, it needs to be tight. So I went down even smaller than size zero (although I stuck with 8 at the bust for the front piece), changed the fit through the shoulders and sleeves, and moved the neckline down.

orange top side

In short, I pretty much un-Renfrewed it.

orange top full 2

In no particular order, here are some things we're going to pretend never happened:
  • that I made a top out of this fabric
  • that I'm trying it on with red jeans
  • that I have a glaringly obvious dark coloured bra on
  • that there's all that detritus in the background
  • that my camera is still taking consistently terrible pictures

The good news is that I removed the drag lines. The bad news is that it's hello-police-I'd-like-to-report-an-indecent-exposure tight. Should I cut into precious fabric or make another muslin (with the changes you are going to tell me to make)?

Sunday, 8 April 2012

1

Happy Easter

happy easter

Hope everyone is enjoying their Easter, be it with chocolate eggs or otherwise.

Friday, 6 April 2012

16

International Day of Anticlimax

Well, I have to say that you guys have really upped your sneakiness this year. Last year I had 54 delurkers, this year a mere 19, despite an increase of 161% in my overall visitors. This leads me to conclude that not only are all the extra readers I've picked up this year sneaky, but that their sneakiness has somehow affected my long-term readers. Although I am sad that you just like me less than last year not to have reached the giddy heights of 2011, I keep reminding myself that:
  • It is quality not quantity that matters. This was an excellent crop of delurkers.
  • Most likely the majority of you gave up delurking for Lent.
Because graphs are fun, let's break down the blog visitors over the last twenty four hours:

According to Google Analytics, I had 620 unique visitors since yesterday's post. Regular commenters who continue to indulge my dorkiness are sneaky like a cat (i.e. just want to poop outside), the more elusive semi-sneaky raccoons are quite possibly sneaky but on this occasion magnanimous, and the brave squirrelly souls who genuinely delurked are sneaky but obliging. Visitors specifically to the International Day of Delurking post or to my general blog address who did not comment (46%!) are sneaky like almiqui, which have an inner sneakiness so profound that they successfully convinced the world they were extinct. That leaves the 44% of visitors who were to busy looking through my tutorials to partake in shenanigans, and 4% of visitors who are sketchy and came in via questionable search terms. I'm giving the side-eye to you, person who googled 'a girl pooping herself'.

Thursday, 5 April 2012

24

International Day of Delurking - 2012 edition

The absolute worst thing about being bed-ridden over the weekend was missing the anniversary of International Day of Delurking, my favourite event from last year. It is the day that we celebrate the army of readers-but-not-commenters, and invite them to say hello. Now, enticing a lurker out of their lurkiness (or even their Reader of choice) is never easy but I have recently disabled word verification to ease commenting, and I've prepared a whole new litmus test of my blog visitors' relative sneakiness. Horses, pandas and alligators are so 2011.


Google Image Search declares this cat the most sneaky animal in the world. Google, adjust your algorithms as this cat is not at all sneaky, but forlorn. Ironically, if he was allowed to poop outside, he'd probably be heaps more sneaky as he'd have to find places to do his business without the neighbours getting angry. On International Day of Delurking, the role of Obviously-Not-Sneaky-Cat is played by the regular commenters. Substitute a desire to poop outside with 'comment regularly and be celebrated for it' and we have a direct match.


Now we are into the grey area: the creatures that are allegedly sneaky but Google Image results do not prove beyond a doubt. Occasional commenters who would really prefer to lurk (but might have a question for me), today you play the role of Possibly-Sneaky-Raccoon. For photo-ops and meal-sharing you put on a brave face to hide your sneakiness but your true nature is the raccoon at the back.


At last, we have Legitimately-Sneaky-Squirrel who waits for you to be so preoccupied with capturing the perfect shot with your camera that you won't notice when he sneaks up onto your backpack. With the preponderance of photo-taking angst from me this year, all we need to do is substitute backpack for 'blog' and Sneaky Squirrel becomes the perfect metaphor for Kitschy Coo lurkers. Don't fret, lurkers, I've noticed you on my backpack and love you just the same.

Well, I hope I've done enough anthropomorphising to land me some comments. Regular commenters, do you relate to Not-So-Sneaky-Cat? Occasional commenters, which of the five raccoons best encompasses your nature (or are you best suited to 'raccoon not pictured)? Uber-lurkers, I am giving you one more bonus conversation starter:


The almiqui: super sneaky or super scary? Discuss.

Wednesday, 4 April 2012

6

Applying labels. In a way unlikely to cause controversy.

labels detail

A series of exciting packages* paraded into our house whilst I was in the throws of Extreme Tonsillitus.

labels jar

My new woven labels finally arrived and look fittingly cheerful in a massive glass jar. The lag time from ordering to receiving was a lot longer than I expected (about seven weeks if you're asking) so in the interim I made these labels to sew into clothes:

self made labels

In an ideal world I would have had my woven labels printed with this rainbow on black logo but there were too many colours for the weaving machine so I had to change it quite a bit to comply. I made them with printable fabric, my desktop printer and Heat and Bond and it was a super quick and pretty inexpensive job (although not as inexpensive as ordering the woven labels in bulk from Hong Kong!).

*The least exciting package that paraded into our house whilst I was in the throws of Extreme Tonsillitus was Jamie's friend from across the road. I could hear Jamie saying, 'Do you want to see my sick mum? She's in bed!' but being unable to move or talk rendered me incapable of stopping him from bringing his friend bedside to stare at me. Where I languished in a sweaty and underdressed state, grunting and shaking my fist to GET OUT.

Monday, 2 April 2012

14

Make it in a metre series: The Tennis Skirt

Tennis skirt collage

After so many fantastic guest posts in the 'Make it in a Metre' series, I reckon it's high time that 
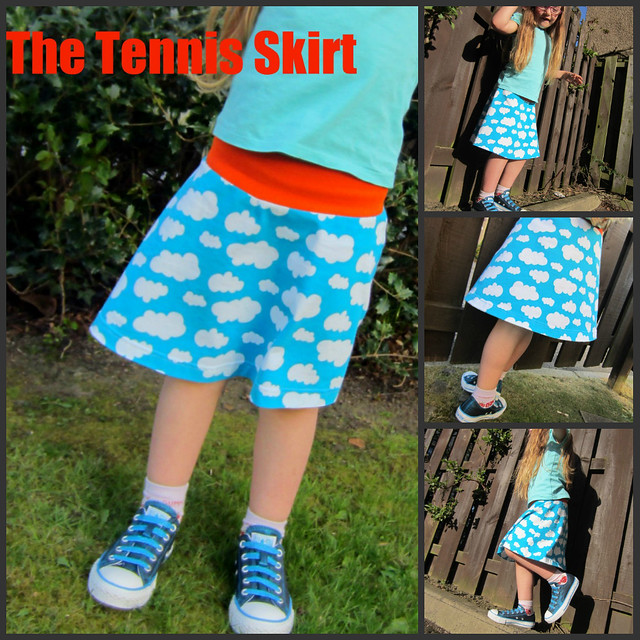
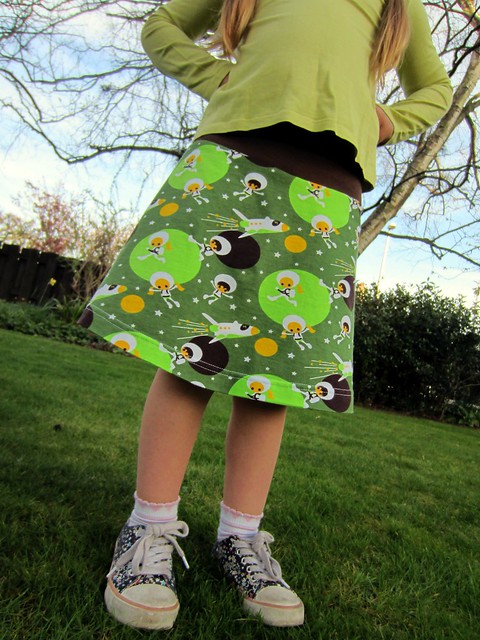
I contribute a project tutorial! So here we go with The Tennis Skirt, which is a very quick to sew a-line skirt using knit fabric. The hem is full and curved so there's quite a lot of flounce and body. From cutting to finishing, the skirt can be completed in about a half an hour and requires half a metre of fabric at most! I can definitely see myself knocking a dozen of these out for summer basics. The sizes I've included in the file are 18m/2T, 3T/4T, and 5Y/6Y.

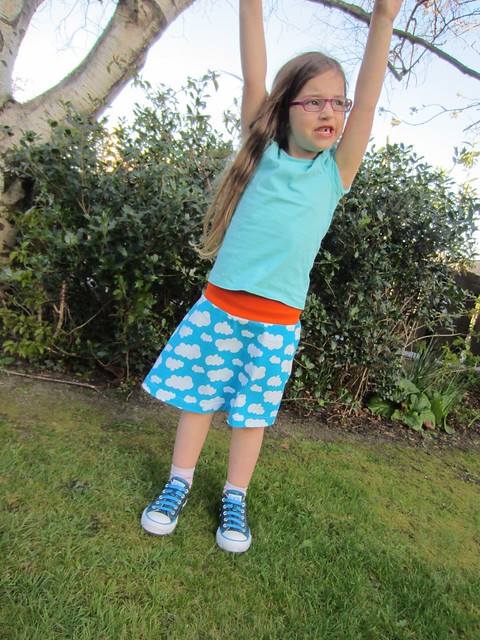
Version one is seen here:

astronaut tennis skirt

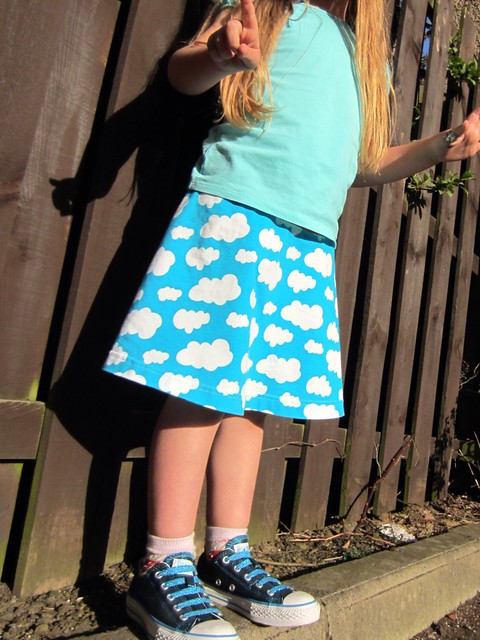
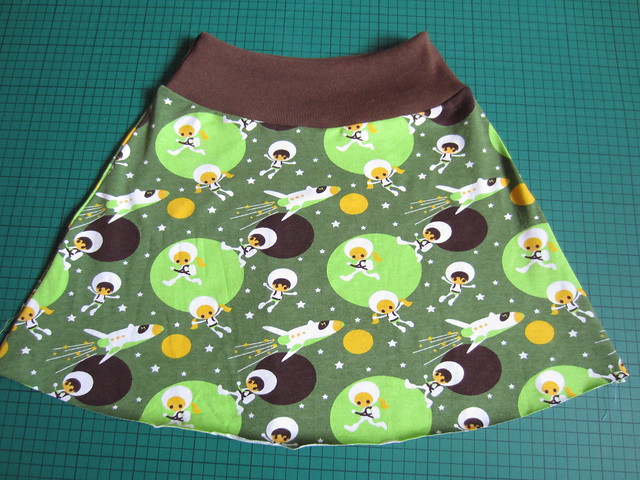
And version two here:

cloud tennis skirt

I made one small change between versions one and two... the combination of my daughter's rounded belly and bum meant the hemline was riding higher in the back so version two has a higher rise in the back piece. If your recipient has this body type I recommend using both front and back pieces; if your recipient is more straight up-and-down through the torso and hips you can use the curved 'front' piece for both the front and the back.

Materials required:

1/2m knit fabric for skirt body
1/4m ribbing or cotton lycra (or anything with lycra / spandex / elastane and good stretch recovery) for the waistband
Stretch needles for sewing with knits
Pattern pieces (download the pattern and assembly instructions here)
Tape to assemble the pattern
Optional but recommended: a double needle for hemming
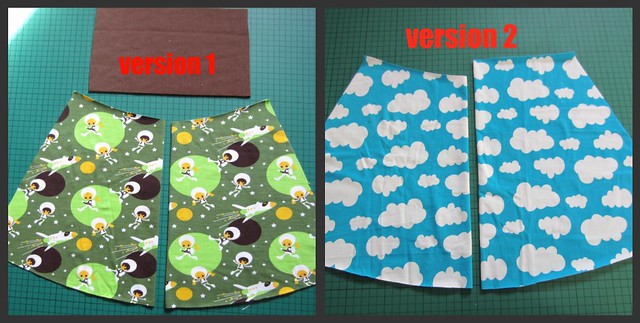
Cutting your fabric:

If your fabric is dimensional you will need to cut the skirt pieces side by side (requires slightly more fabric with some wastage between the pieces)

If your fabric is not directional, cut one piece on the fold first, then refold and cut the second piece upside down (practically no fabric wastage!)

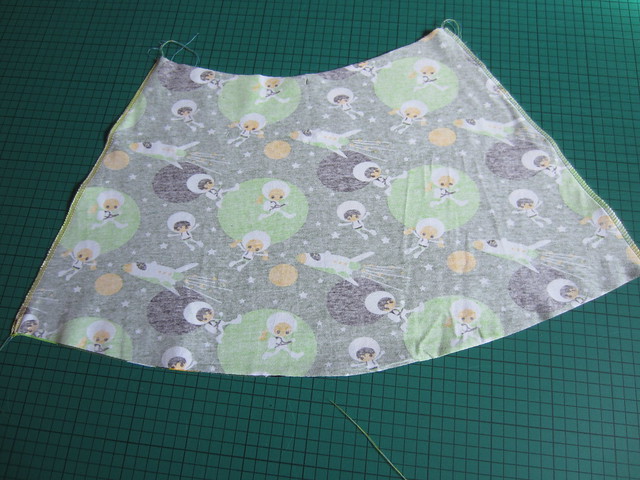
Your finished pattern pieces will look like this:
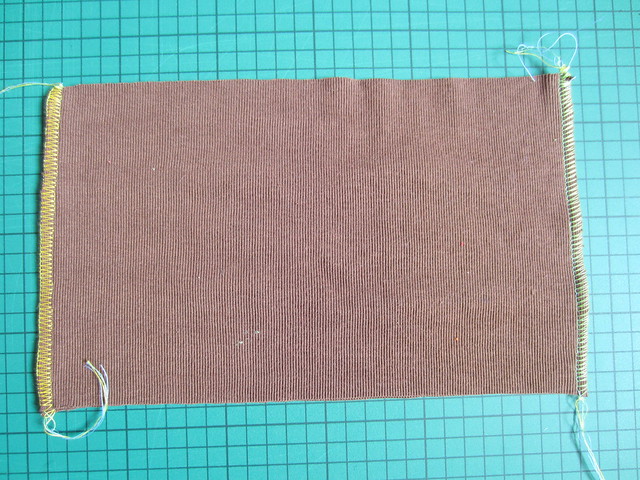
cutting

Sewing your skirt:

I have used a serger for the construction only because I have one. But it's not a problem to sew the skirt on a regular machine! You will need to use a stretch needle, a stretch stitch (either a pre-set stitch like the lightening bolt, triple stretch, or overlocking stretch, or if your machine doesn't have a pre-set a narrow zigzag), and reduced pressure on your foot to reduce wavy-ness. If you can't reduce the pressure on your machine, I've heard others swear by a walking foot but I've never tried one.


Step one: Sew both side seams of your waistband:

2 tennis skirt tute sew waistband

Step two: Sew both side seams of your skirt:

3 tennis skirt tute side seams

Step three: Fold waistband down, fold in half an place pins at centre front and back. Fold skirt in half and place pins at centre front and back. Now you have all your quartermarks to match.

4 tennis skirt tute quartermark pins

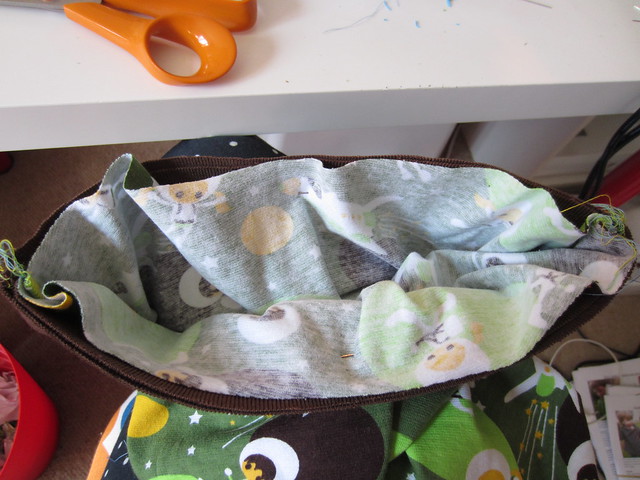
Step four: With all the raw edges at the top, pin the waistband to the skirt, matching up the side seams and the centre front and back pins. As you can see, there is excess skirt fabric between each of the quartermarks that the waistband will be stretched to fit as you sew.

5 tennis skirt tute pinning waistband

Step five: Starting at a side seam, drop the needle into the waistband / skirt. Holding the fabric at the next quartermark, stretch the waistband only so that the edges match up without wrinkling. (If you have curly edges on the skirt fabric that you find hard to tame, this tute should help!). While holding taut, sew up to the quartermark, stop in the down position and repeat.

6 tennis skirt tute sewing waistband

Step six: continue this process all the way around.

7 tennis skirt tute waistband done

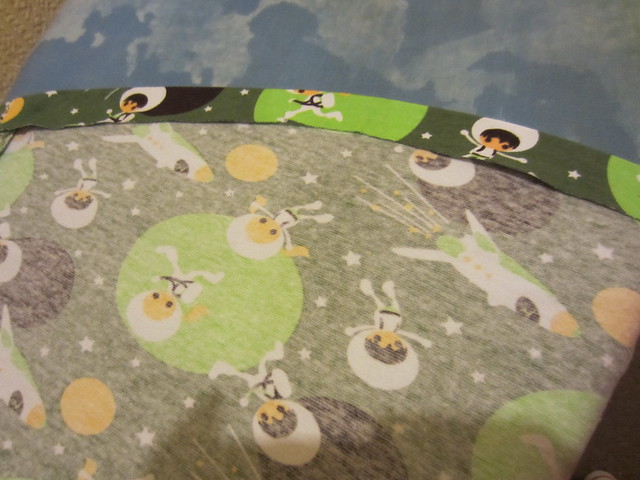
Step seven: Flip the waistband up. Press the seam allowance down to the skirt so it's flat and smooth.

8 tennis skirt tute waistband flipped up

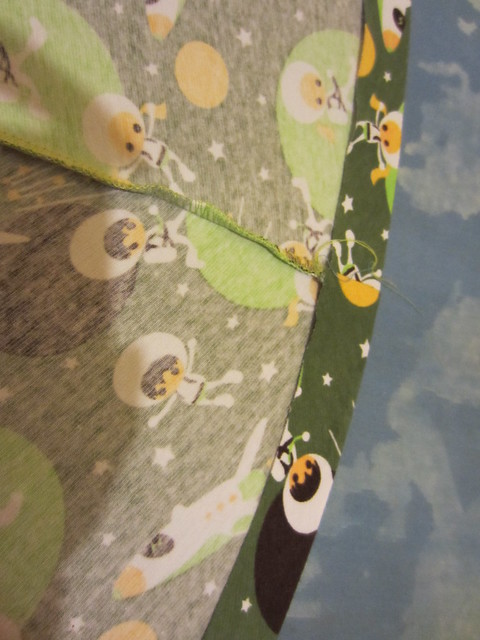
Step eight: Starting the the side seam, press the hem of the skirt up one inch. Continue this all the way around. Where the curve of the hem is the deepest, gently pull the fabric so it follows the curve evenly.

9 tennis skirt tute pressing hem

**Tip**: What works the best for me is to brace the fabric against the ironing board with my hip while pulling with my left hand and ironing with my right. When it's not being pulled it looks like this:

11 tennis skirt tute pressing hem  continued

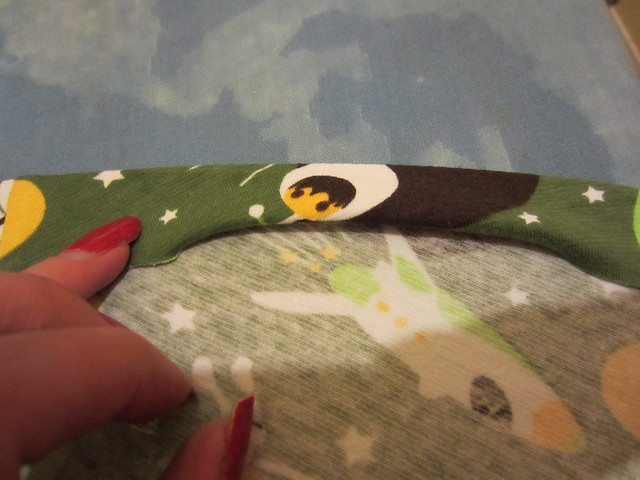
See how there are small sections that lift up a tiny bit? When stretched just a very small amount whilst sewing they go completely flat.

If you are not going to use a double needle for hemming and instead want to hem with a normal single needle, after you have pressed an inch all the way around, additionally press the raw edge under a quarter of an inch all the way around.

10 tennis skirt tute pressing hem for single needle

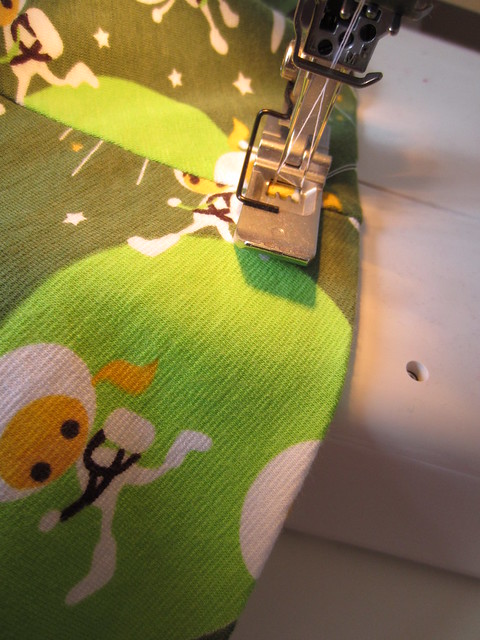
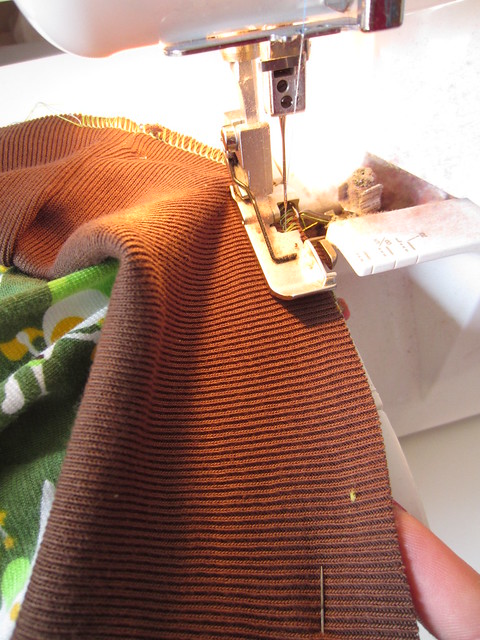
Step nine: Hemming your skirt.

I am using two needles with my Coverstitch, again, because I have one. The result with a double needle in a regular machine is practically the same: there's a row of parallel lines on the right side and a weave on the wrong side. (There's an intro to twin needles here or here). When coverstitching or using a double needle you sew with the right side facing up, which can take a little bit of practise to master. It can help to use twin needles with quite a bit of width between them, and to draw a faint line with chalk on the right side along the hemming line.

If you are sewing with a single needle, you can sew from the wrong side (so it is easier to follow) and I suggest lengthening your stitch to 3 or 3.5. You shouldn't need to do a stretch stitch because the hem is wide enough it won't be overly stretched or prone to snapping.


Starting at the side seam, sew your hem so that the raw edge underneath is being straddled by the two needles (or so both needles hit the hem if you want to be safe!). Pull ever so gently in front of the foot so it lies flat, and go slowly.

12 tennis skirt tute double needle hem


Continue all the way around until you're back to where you started.

13 tennis skirt tute double needle finished

You're done! Press the hem again if it needs flattening.

cloud tennis skirt champion

Then find a cute model and post it in the Flickr group :)