Saturday, 10 March 2012
The Seasonally Inappropriate Space Dress
By popular demand of those who don't live in Scotland, we now have short sleeves.
By popular demand of the under-five set, we also have butterfly face paint. I knew I should have taken modelling pics before the nursery ceilidh fundraiser.
I wish you could see the tattoo on her arm so much. It is super-fugly cat with the words 'Pretty Kitty' next to it. When Maia picked it, I laughed out loud and asked the dad who was in charge of giving tattoos if it was from their Irony Range. He looked at me like I was mental.
I didn't end up shortening the skirt, but I did decide to make a larger hem as I am getting more confident with my coverstitch machine. But not confident enough to try any of the six screw-on hemming or binding plates I bought eight months ago. Feel free to shame me.
I reckon it just looks a bit shorter than Cool Cat because of the bare legs.
Friday, 9 March 2012
Make it in a metre series: Piecing, colour-blocking, accenting and more
___________________________________________________________________
My name is Katie and I blog over at Kadiddlehopper. I sew for myself, my 3 kids and on occasion, my hubby. We love the easy comfort of knit clothing of all varieties, and I love how fun knitted fabrics are to sew. Amanda was kind enough to send me a meter of the most amazing knit ever, and so I want to show you how to make a meter of a special fabric really go far. There are three strategies I tend to use:
- Piecing
- Colorblocking
- Special Accents
Piecing
One of my favorite ways to make a special fabric really count is to piece it with solids or coordinating prints.
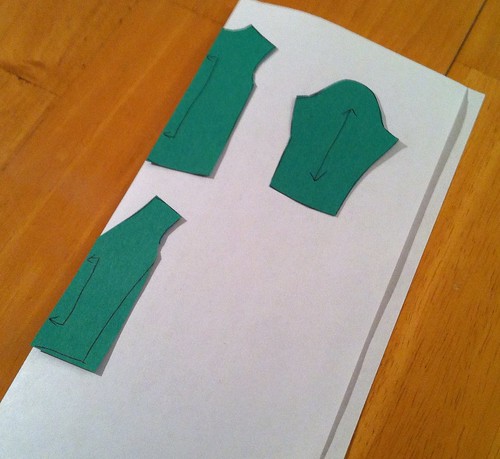
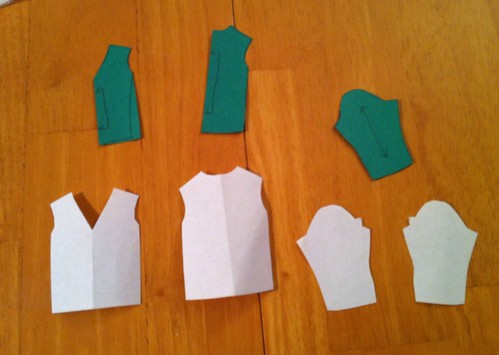
To make a pieced garment, start with a pattern that you already have. I'm using a raglan tee pattern from Ottobre (the 02/2006 issue), but you can draft your own with this great tutorial. First you have to make sure that your pattern is not cut "on the fold", so that you can lay it out in a single layer to cut up. I find the easiest way to make this happen is to treat your tracing paper as if it were fabric, fold it in half and cut out your pattern pieces, just as you would if they were fabric.
Now that you have your single layer pattern pieces, draw lines on them where you would like seams to be.
Cut them up once you like the way the piecing looks and you have your pattern!
Don't forget to add seam allowances to the cut edges when you cut out your fabric. When you are ready to sew, just reassemble the cut pieces to make whole pattern pieces and assemble your garment as usual.
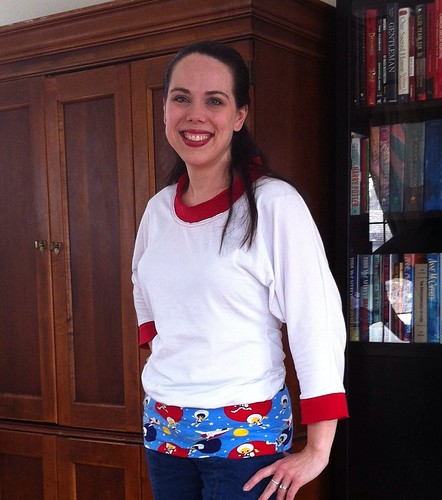
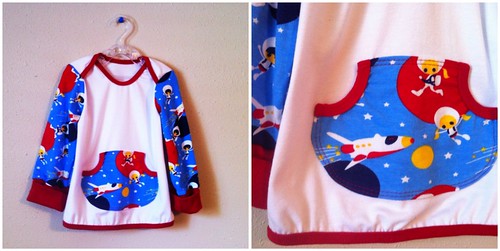
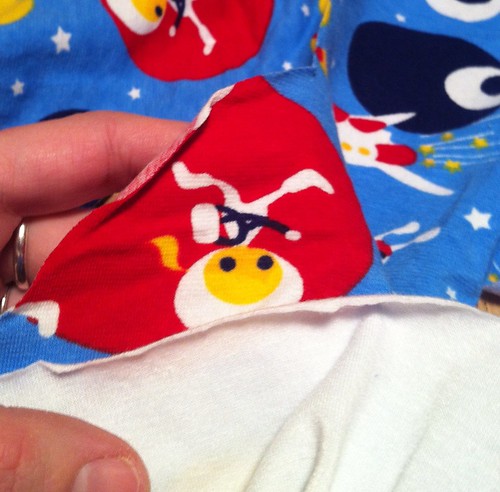
When I piece a garment, I like to use at least three different fabrics. My special fabric (generally a print), a neutral fabric (the white in this case) and a coordinating trim (print or solid - here I used red). I like to pick up a less dominant color in the color scheme for my coordinating color.
Colorblocking
This is a hot trend right now, so don't limit yourselves to just kids clothes for this one. Give it a try yourself!
Colorblocking is even easier than piecing, since there is no pattern manipulation involved. All you do is choose which pieces of the pattern you want for each fabric.
For Myra's tee, I used the print fabric for the body, white for the sleeves and red for the binding. As with piecing, I like to use a three color palette and to pick up an accent color from my special fabric.
Special Accents: Pockets, Patches and Applique
This method frequently uses small pieces, so you can use up every scrap of your precious fabric.
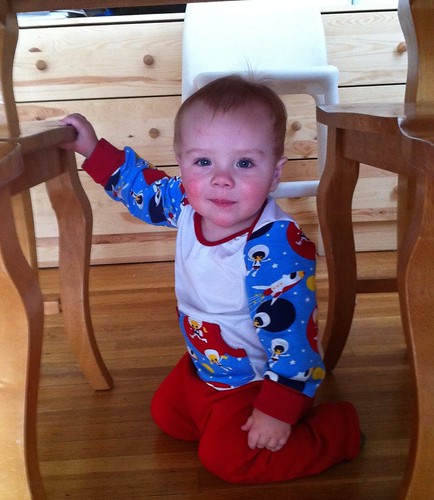
For Duncan's top, I used my print fabric to make a pocket in his envelope neckline tee. My pattern is from Ottobre, but you can use this tutorial to draft your own. I also colorblocked the sleeves with my print. You can use any of these methods together to personalize your item.
And then... Make Small Things:
After you've cut out your pieces and color blocked parts and appliques, use those little bits left to make little things. Millie outfitted her whole family with just a half meter!
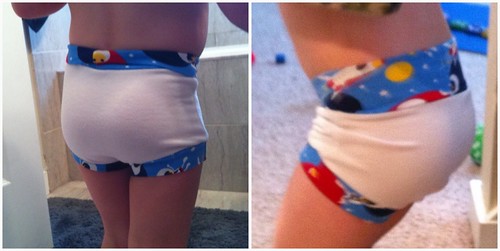
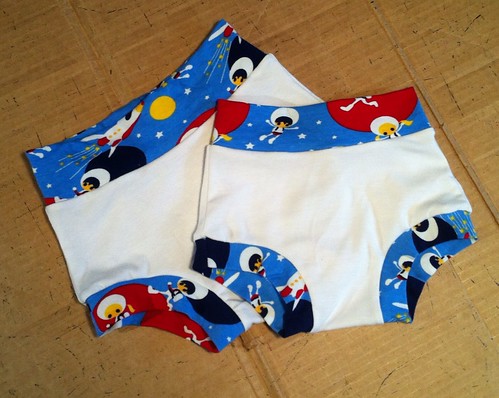
Underwear is such a perfect use up for small pieces of soft knit. I made mine coordinating, but you don't have to. Who's going to know?
My pattern is the Boy Brief Unisex Underwear pattern from Kitschy Coo. It is perfect for those little strips of fabric that I always end up with. As a bonus, this wonderful jersey has stretch in both directions, so I can cut my bands in whichever direction I happen to have fabric and they still stretch perfectly. Love that.
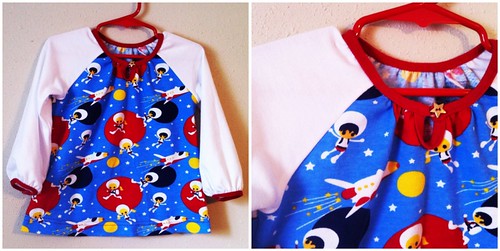
So the final tally? My one meter cut of absolutely fabulous blue astronaut jersey stretched (hah!) to make one adult dolman sleeve top, one size 6 raglan tee, one size 3 raglan tunic, one size 18 month envelope tee, two pair of underwear (size 5/6 and 3/4) and several appliques. And I still have a few scraps left. Enough for another pair of underwear and an applique or two. So, what can you squeeze out of a meter of fab fabric?
Thursday, 8 March 2012
Tutorial: How to successfully mix different knit fabrics into a single garment
Katie knows a crazy amount about loads of different fabrics, so she was an obvious choice to share her expertise on knits. So much so, I'm having to split her guest post into two parts! Today's installment is how to combine different knits into a single garment. Part two will be putting this knowledge into practise and showing some of the different ways to make precious hoarded fabric last for multiple projects. So here we go with Katie.........
How to successfully combine different knits into a single garment:
I am so excited that Amanda has asked me to guest post on her blog, and even more excited that we get to talk about my favorite sort of fabric - KNITS!!
- Piecing: One of my favorite ways to make a special fabric really count is to piece it with solids or coordinating prints.
- Colorblocking: This is a hot trend right now, so don't limit yourselves to just kids clothes for this one. Give it a try yourself!
- Special Accents: Pockets, Patches and Applique. This method frequently uses small pieces, so you can use up every scrap of your precious fabric.
The most important factors are amount of stretch and weight. If these two things are compatible, your project should go swimmingly.
Determining stretch:
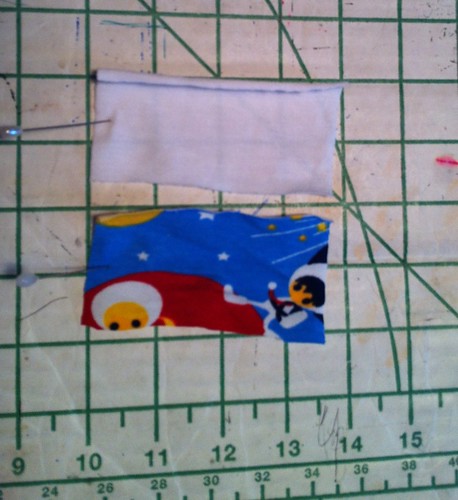
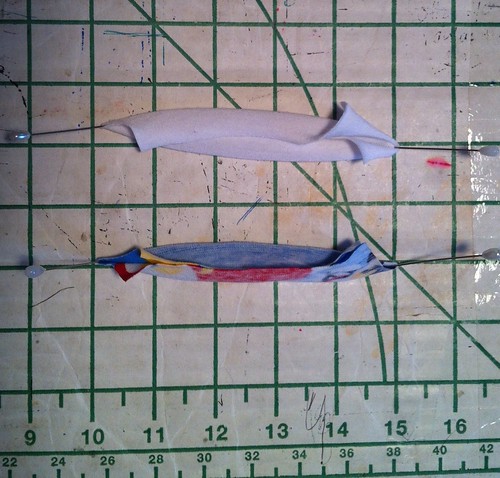
Amount of stretch is really pretty easy to determine. Take a 4 inch long piece of your fabric and stretch it as far as it will go (without permanent distortion).
I stretch over a ruler so that I can measure how far and get a ratio that gives you the percent stretch.
For example, if my 4 inch long piece only stretches to 5 inches long, (ie one inch is gained) then I have a 25% (1/4) stretch. If you are comparing two pieces of fabric, you don't have to do the math though. Just stretch them together and make sure they are pretty close. They don't have to be exact, but if you try to stitch something with a ton of stretch to something fairly stable, the stretchy side may grow out of proportion to the non-stretchy side.
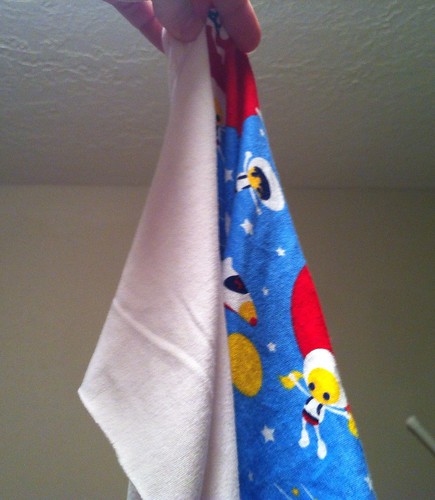
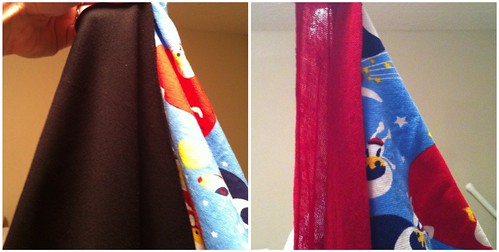
Determining weight: Weight can be a little harder to make out. Basically, the idea is that your don't want to sew something super thin to something massively thick. They don't have to be a perfect match, but they should at least behave the same way. I like to test this by draping my fabrics together.
I grab a corner of the two fabrics in one hand, and see how they fall. You want them to make the same size "cone" of fabric as they fall away from your hand.
One final, but still important, consideration is fiber content. In general, fabrics made from the same fiber will have similar properties, which will make them easier to work with together. You also want to consider washability. If you are sewing a cotton-lycra jersey that you intend to throw in the wash, you don't want to pair it with dry-clean-only silk jersey. And you do want to make sure that all of your fabrics have been pretreated so that they don't shrink. Imagine if just one shrank while the others didn't!! Catastrophe! Using fabrics of the same fiber type will help make this less of a problem as well.
________________________________________________________________A massive thanks to Katie for demystifying the process of pairing knits together for a single project. You guys won't believe what she managed to squeeze out of a metre! Mad skillz.
Wednesday, 7 March 2012
Houston, we have dresses...
Just in time for spring (and ultimately summer), I have finished my long-sleeve dress pattern. Obviously long-sleeves are not a problem in the land of infinite winter but I should probably get my skates on for a short sleeve or sleeveless dress pattern. I can't even imagine the need for such things sitting here next to my calor gas heater.
Speaking of skates, I'm tentatively naming this The Skater Dress due to its fitted bodice, curved dropped waist and drapey flared skirt. Truth be told, skater dresses are normally much shorter. But then there's this:
Still modest despite high-footed stomps which is important in this family. Personally, my preference is for more above the knee; Maia is (inexplicably and maddeningly) unhappy with any dress that is less than Amish-length ankle.
Monday, 5 March 2012
News: These Just Out
Saturday, 3 March 2012
Make it in a metre series: Underwear
When I launched the fabric shop, I asked a couple of supremely talented knit-sewing bloggers if they'd be willing to write guest posts about how they make a small amount of knits go as far as possible. I know it's natural to think that £20 is a lot to spend on a metre of fabric, but with a bit of thought and the right pattern, a metre can go really far. Especially when you're sewing for children; a metre can easily yield at least two (if not more) garments!
So first up in the Make It In a Metre series, Millie from Needles and Haystacks is here to show you how half a metre of brown cloud knit from me and some contrasting ribbing and notions from her stash has kitted out four children and herself with some snazzy underwear. She covers the best way to cut multiple projects from a single piece, how to individualise a pattern for various children and shares her knit-sewing nous as well. Take it away, Millie...
_________________________________________________________________
A few days ago Amanda asked me if I could make something from some of her gorgeous knits...I had flu at the time, and it was 2am and I couldn't sleep with a fever, Amanda's email asked me to come up with an idea....my mind whirred even more than it already had been whirring! I came up with the idea of making underwear for all four of my children. I have a 9 year old girl, a 7 year old boy, and 3 and a half year old twin girls.
When you are a mother of more than one, you feel the need to be fair to everyone, so a plan was hatched to make everyone underwear with the ribbing colour of their choice. I find that including them in some of the decisions about the clothes that I make them, increases the chances of them wearing the clothes....I cannot imagine there will be any problems with them not wanting to wear these!
My twin girls, refuse to wear pink, so the pink got shoved on my eldest daughter. One of the twins, chose red and my darling boy said he would take the turquoise, because he knew the last girlie would choose orange. I love that these fabrics are so unisex.
I rinsed out the fabric in some hot water, and dried it. The edges curled a lot when the fabric was wet, but when it dried, I ironed it and sprayed it with a bit of spray starch...that helped, and I had no more problems once I got it cut. I use a tiny rotary cutter to cut out underwear. It saves moving those tiny pieces too much. I also use the cutter to cut the ribbing, it gives a lovely clean straight finish.
My task was to make as much as I could out of the piece of fabric, and I reckoned that half a metre should be enough. When making the girl’s underwear, all of the piece are cut on the fold...when I firt started sewing, I thought that the fold was the fold down the centre of the fabric...I quickly learned that the fold is where ever you put it, so long as it is in the right direction. So I started laying out each set of undies along a fold, cutting them one at a time, and re-folding for each pair. (The pattern I used needed seam allowances added, so I needed a bit extra all around)
The boxers are made differently.. they have no side seams, so I cut the front and back of the leg as one piece, and the centre panels on the fold. Because the fabric doesn’t really have a direction, or at least not one that matters for such small pieces, or for underwear, it meant that I could place the larger boxer pattern pieces in the best possible place so long as it was with the grain, to avoid waste.
As you can see below, I pinned the edges of the fabric to stop any rolling as I cut out.
I had only a little left over. I tried to leave that piece as whole as possible, hoping to squeeze something extra out of it. So I set to work sewing up the underwear...each child checking on me repeatedly when theirs was being sewn, asking when they could wear them! The fabric was a dream to sew with...it hardy curled at all when I sewed with it, and it is so soft, especially inside....perfect for under garments.
I am really pleased with the results...I love how each child has chosen their own colour for the binding. I love that one fabric suits all ages and genders. I love that I squeezed this all out of half a metre!
I make most of my children’s underwear, and I promise you, that they will grab the handmade ones over shop bought one every morning! I also try to make most of my own, but I never make enough for myself...the children always get looked after first.
So , on Sunday morning as the children played quietly, I set about making something out of the little piece left over. (obviously not that little!) I didn’t have enough for the seam allowance in one spot, but I took a chance, it is nice stretchy fabric!
I only had enough for the front, but I couldn’t resist!
I used some of my more grown up elastics, and some plain brown for the gusset, and the back.
Wanna see them modelled?! No not me...not a hope...a trusty cushion I grabbed off the couch...doesn’t she look well in them...
So tomorrow morning, we will all get up and put on our cloudy undies, and wear them with a smile! He hasn’t said anything, but I just know that my husband is trying to contain disappointment...maybe next time!
I used patterns from Ottobre Design 4/2004, however Amanda sells a gorgeous pattern for boys and girls. I use a Danglez pattern for myself.
Friday, 2 March 2012
I could probably go to Renfrew* and not get beat up for my shirt
I've been itching to use some of my new knits for myself but I wasn't sure how to use them. As well we all know, I've done my cowl dress pattern to death (including with normal neckline) and should just step back from that. And alas, despite earnest attempts I have never managed to successfully amend it to t-shirt length. But after seeing at least sixteen different people's versions of the Renfrew shirt from Sewaholic I thought I'd splash out and take advantage of someone else's hard work.
The pattern is great because it has three different necklines (scoop, v-neck, and cowl) and three different sleeve lengths (short, three-quarters, and long) so you can mix and match. Another feature that obviously gets two thumbs up from me is arm cuffs and waistband. No hemming, just as I like it. Very fast to sew up. If you can't bear to look as such extreme close-ups of me, I went with three quarter sleeves and a scoop neck. The fabric is very nice double knit I picked up from Mandor's last year, and I used less than a metre.
If I'm looking thoughtful in the above picture, that's probably because I'm wondering why anyone drafts a knit pattern with 5/8" seam allowances. I cannot sew large seam allowances on my serger, ever. If I had noticed it used 5/8" I would have removed 3/8" from the pattern before cutting the fabric, and not noticing this until after caused me to have some serious First World problems. My neckband is 3/8" too tall and therefore not taut at all. The shoulder seams fall roughly 3/8" off my shoulders onto my upper arm.
Just look how deeply saddened I am about the pooling of fabric above my waistband. No doubt this would also improve if I either used 5/8" as I was told to or reduced the pattern. I also have a freakishly short torso, so I should maybe shorten the whole shebang at high waist-ish. Anyone have any (non-perverted) helpful thoughts about the horizonatal over-bust and diagonal under-bust drags?
Although I generally look depressed or angry in these pictures, I was actually taking very specific instructions from Jamie about how I should stand and which way I should look. That's right, I trust my six year old to get better pictures than Steven.
*There is a Renfrew in Scotland within fifty miles of us and I would probably get beat up for other reasons.