With two more sleeps til our trip and twelve million things to do before then, let's roll this
Dolmaniacs Sew-along up with a fantastic guest post from
Kadiddlehopper! Fancy making your Dolman top into a dress? Katie will show you how...
_____________________________________________________________________________
I'm so excited to be guest posting here on Kitschy Coo! I have long been an admirer of her patterns and designs. My kids love her clothes, too!
I'm Katie and I blog over at
Kadiddlehopper. I sew for myself and my 3 kids, so I'm always looking for a fun, stylish pattern that I can whip up in a naptime. If I can personalize it with fun additions, so much the better, and the
Dolman Top is absolutely perfect! It's an easy sew, with tons of ways you can really make it your own.
Today I'd like to show you how I took the Dolman Top pattern and made a trendy elastic waist dress for my daughter - perfect for everything from a trip to the mall to playing on the playground.
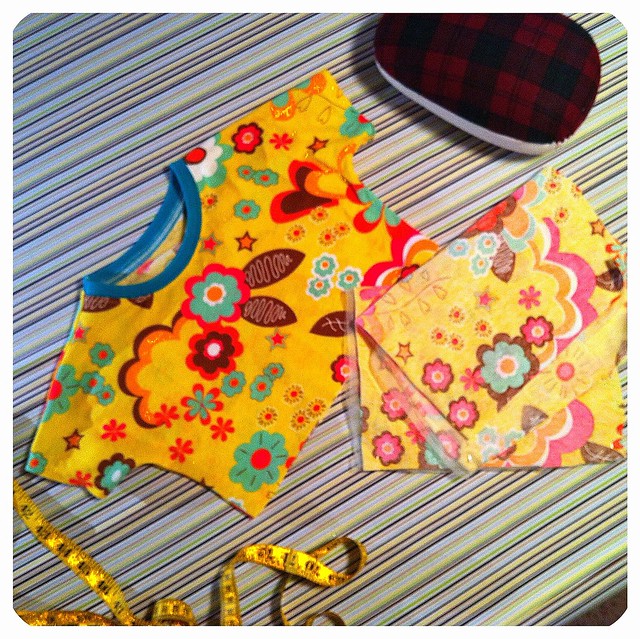
You'll need:
Your
Dolman Top pattern by Kitschy Coo, cut or traced to the size you'll be making.
1 yard of jersey knit fabric. Lighter weight will drape better.
Coordinating ribbing for the neckband and armbands if you wish, about 1/8 yard or just scraps. Interlock also works well for this.
1/4 inch elastic long enough to go around the waist of your child.
The first thing you'll need to do is prepare your pattern pieces. For this you'll need to do a little measuring.
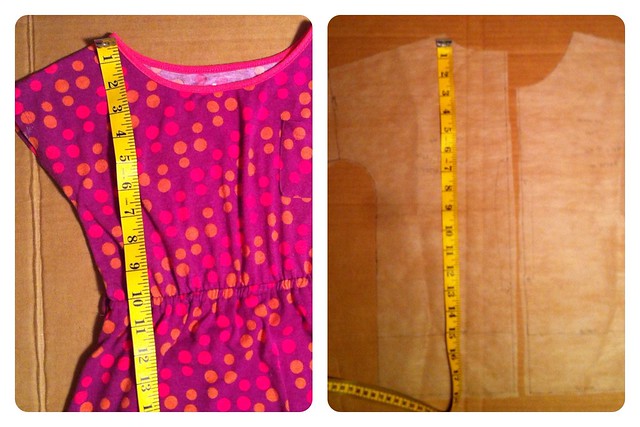
You can either measure the child you are making the dress for, or if you have a dress that fits the way you like, you can measure your dress, as I am. The shoulder point is a good place to measure, as necklines can vary between styles, and are hard to determine on a wiggly child.
Be sure to measure from the seamline on your pattern, down in a straight line, parallel to the foldline and the side seam.
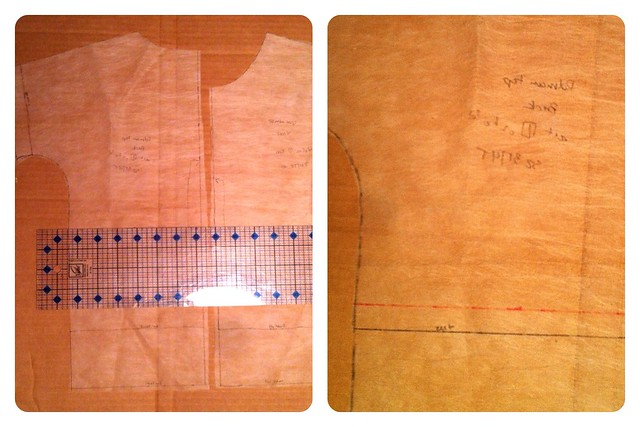
Now draw a complete line across both front and back pattern pieces at the waistline you've determined. This will be your waist seam line (in red on the above right picture). Add a 1/2 inch seam allowance below the seam line on your pattern (in black on the right picture). This will be the new cutting line for your bodice. The 1/2 inch seam allowance is important. It will become the casing for the elastic at the waist.

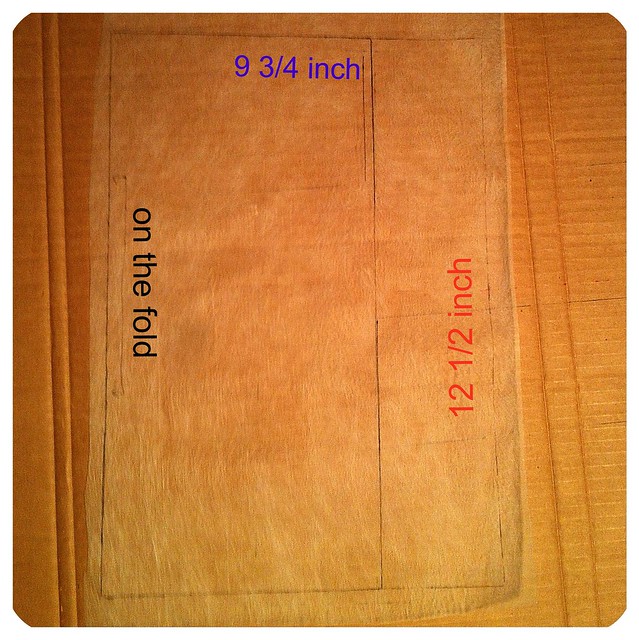
Now that you have your bodice pieces prepared, we need to make a skirt pattern. This will be a very simple skirt made of a couple of rectangles. To determine the measurements for your skirt, first measure the bottom edge of your bodice pattern piece. The back and front are the same for this pattern, so you can measure either one. I'm making the size 3T/4T and mine measured 6 3/4. I wanted a bit more fullness in my skirt, but not too much, so I added 1/2 times as much width - making my final measurement 9 3/4 for the width of the skirt. There is already a 3/8 inch seam allowance, so you don't have to add it to the width. For the length, measure your child or a skirt that you like the length of, then add 1/2 inch to the top for the casing and 1 inch to the bottom for a hem allowance. For my skirt, I wanted 11 inches of length, so my final pattern piece was 12 1/2 inches long.

Here's the final pattern piece. Yep, big rectangle. You'll cut two of these with the fold on the long edge. You can see my "on the fold" arrow on the left side of the picture. I like to trace out a second pattern piece, so that I won't forget to cut out two for the skirt, but if you are less absentminded than I am, you don't have to do that.
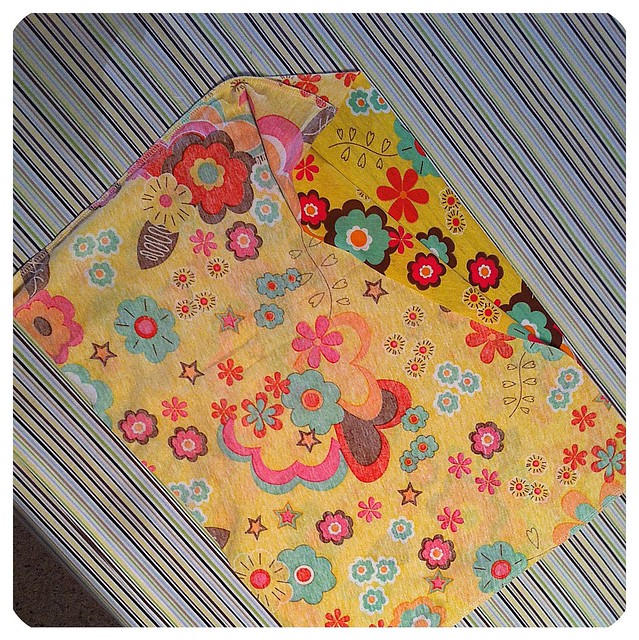
The next step is to assemble the bodice, just as if you were making a Dolman Top. Follow the instructions on the pattern, up to #16, the point where you attach the waistband or hem the bottom - don't do those things! You're going to be putting on a skirt! You can choose to either hem or band your arm openings - totally up to you. I hemmed mine, but it would be cute either way.
Here is what you should have at this point. The Dolman Top is totally finished except for the raw edge at the bottom that is waiting for the skirt. You have two skirt pattern pieces awaiting assembly, so lets get those together!
Start by assembling your skirt. Make a tube by stitching the side seams (the shorter edges) right sides together.
You should have a simple tube of fabric when you are finished. If you have a print that has an up or down direction, chose the one you want to go up and stitch two rows of
gathering stitches at the top edge. Gather the skirt onto the bodice right sides together and pin it in place. You don't have to be too fussy about perfect gathers here. The elastic at the waist pulls it in a little and evens things out nicely.
Sew the skirt to the bodice using a 1/2 inch seam allowance. DON"T USE YOUR SERGER FOR THIS STEP! You do not want to trim off any of your seam allowance - you'll need it for the casing. Use your regular sewing machine (
see Amanda's tute) using a lightning stitch, triple stitch or very narrow zigzag. Once you have sewn the seam, finish the edges together using a wide zigzag or your serger, just don't trim the fabric, serge right along the edge.
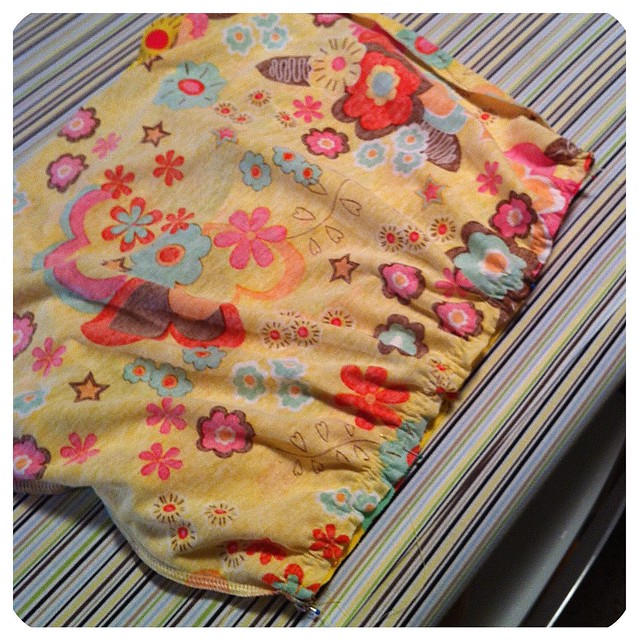
When you're finished, it should look like the picture on the left. Be sure to carefully press the seam up toward the bodice. Take your time doing this. You'll be stitching up your casing here and you want it to be nice and even.
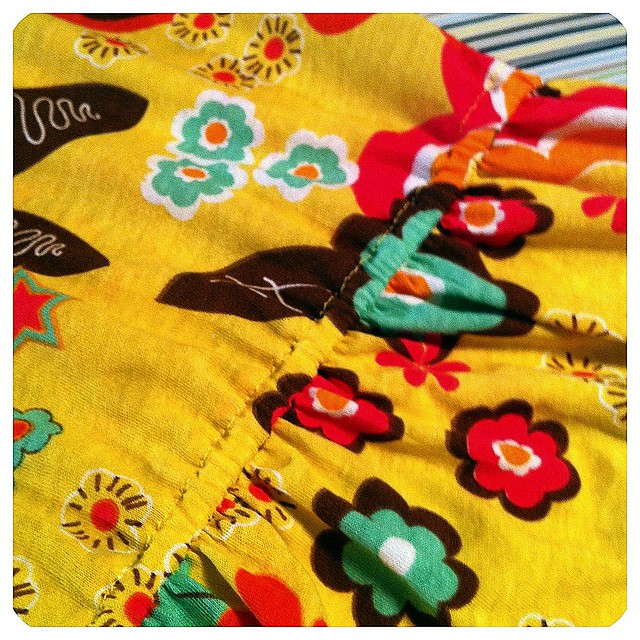
Now you'll sew the casing. From the wrong side, stitch along the edge of the casing allowance, attaching it to the bodice. Again, you'll want a straight line, so the triple stitch, lightning stitch or a very narrow zigzag will work here. Make sure your zigzag width is 0.5 or less, otherwise it will make your casing too narrow. For reference, I used a lightening stitch. Sew around the casing, but leave a gap at the end to insert your elastic. I like to put a pin in place to remind me to stop sewing short of where I started. In the right picture, you can see the green pin where I have stopped my stitching. The red arrow indicates where my stitching began.

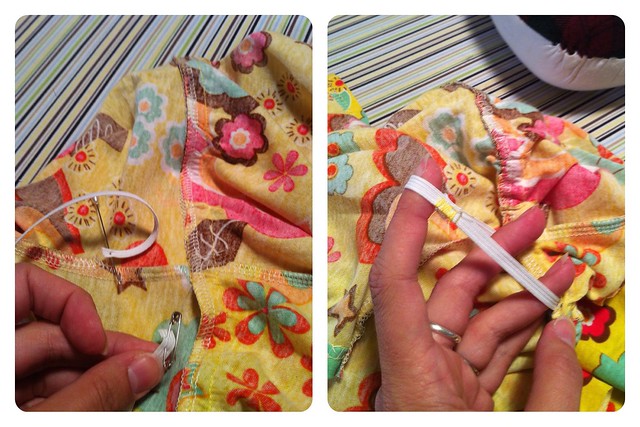
Now you're ready to feed in the elastic. Cut it to your child's waist measurement. I like to feed my elastic with a safety pin on the introducing end and a long corsage pin across the back end, (left picture) to prevent it from being pulled through. Nothing is more annoying than losing your elastic in the casing and having to start over! Once your elastic is in, make sure it isn't twisted, then overlap it about 1/2 inch and zigzag across the end to secure them together. Even up the elastic in the casing and stitch closed the opening you used to insert the elastic.
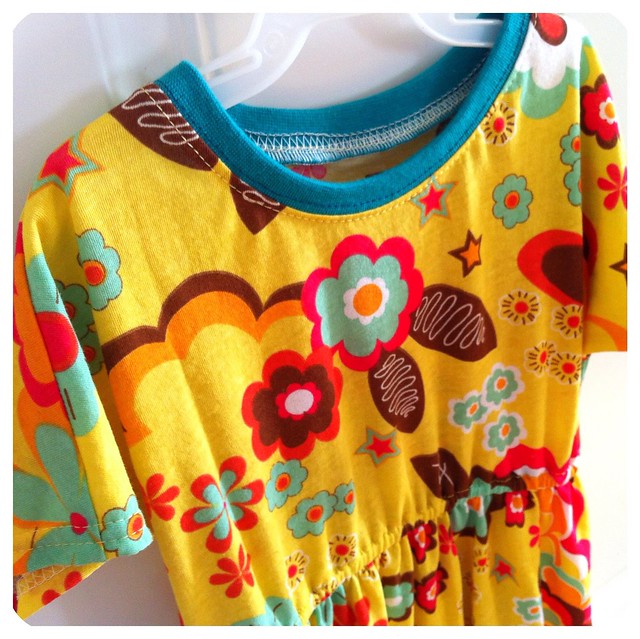
Here is how our waistband looks from the outside. You should have something that looks like a dress now! All that is left is finishing the bottom edge! You can hem it if you like; be sure to review
Amanda's tutorial about that. Remember, you added a one inch hem allowance at the pattern stage. You could also add a band to the lower edge. Use the pattern instructions for the waistband, but make the circumference of the band the same as your skirt.
Finished! Put it on your child and enjoy!!


Oh! You must have read my mind. I made my first Dolman yesterday (having finally received my needles). It was lovely, when I finished it I thought it would make a fab dress - and here we are.
ReplyDeleteHave a great trip!