

When I launched the fabric shop, I asked a couple of supremely talented knit-sewing bloggers if they'd be willing to write guest posts about how they make a small amount of knits go as far as possible. I know it's natural to think that £20 is a lot to spend on a metre of fabric, but with a bit of thought and the right pattern, a metre can go really far. Especially when you're sewing for children; a metre can easily yield at least two (if not more) garments!
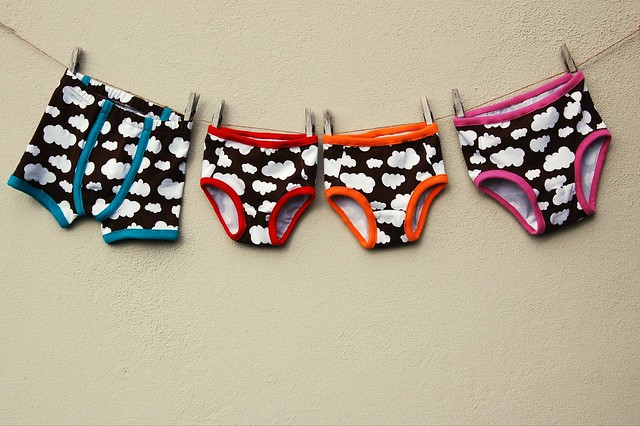
So first up in the Make It In a Metre series, Millie from Needles and Haystacks is here to show you how half a metre of brown cloud knit from me and some contrasting ribbing and notions from her stash has kitted out four children and herself with some snazzy underwear. She covers the best way to cut multiple projects from a single piece, how to individualise a pattern for various children and shares her knit-sewing nous as well. Take it away, Millie...
_________________________________________________________________
A few days ago Amanda asked me if I could make something from some of her gorgeous knits...I had flu at the time, and it was 2am and I couldn't sleep with a fever, Amanda's email asked me to come up with an idea....my mind whirred even more than it already had been whirring! I came up with the idea of making underwear for all four of my children. I have a 9 year old girl, a 7 year old boy, and 3 and a half year old twin girls.
When you are a mother of more than one, you feel the need to be fair to everyone, so a plan was hatched to make everyone underwear with the ribbing colour of their choice. I find that including them in some of the decisions about the clothes that I make them, increases the chances of them wearing the clothes....I cannot imagine there will be any problems with them not wanting to wear these!
My twin girls, refuse to wear pink, so the pink got shoved on my eldest daughter. One of the twins, chose red and my darling boy said he would take the turquoise, because he knew the last girlie would choose orange. I love that these fabrics are so unisex.
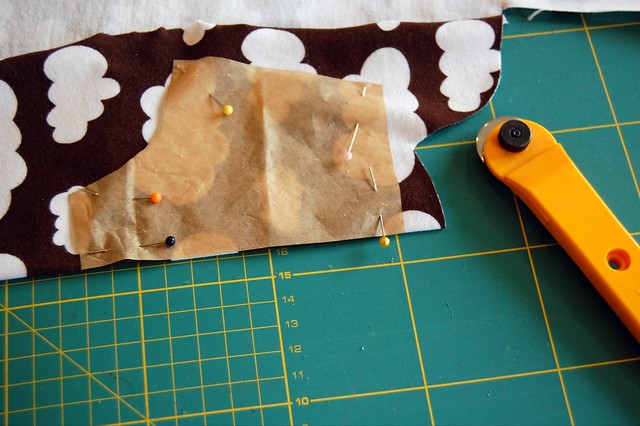
I rinsed out the fabric in some hot water, and dried it. The edges curled a lot when the fabric was wet, but when it dried, I ironed it and sprayed it with a bit of spray starch...that helped, and I had no more problems once I got it cut. I use a tiny rotary cutter to cut out underwear. It saves moving those tiny pieces too much. I also use the cutter to cut the ribbing, it gives a lovely clean straight finish.
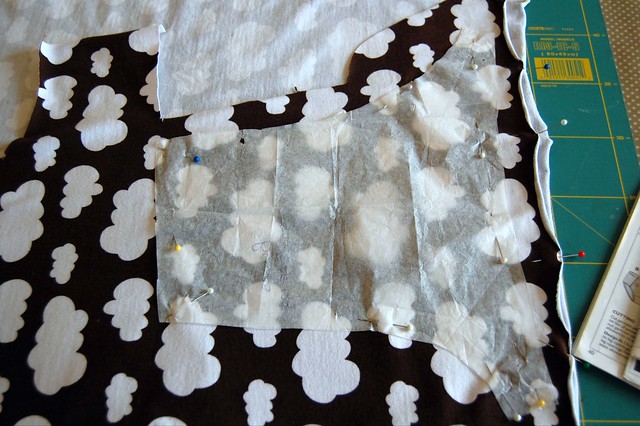
My task was to make as much as I could out of the piece of fabric, and I reckoned that half a metre should be enough. When making the girl’s underwear, all of the piece are cut on the fold...when I firt started sewing, I thought that the fold was the fold down the centre of the fabric...I quickly learned that the fold is where ever you put it, so long as it is in the right direction. So I started laying out each set of undies along a fold, cutting them one at a time, and re-folding for each pair. (The pattern I used needed seam allowances added, so I needed a bit extra all around)
The boxers are made differently.. they have no side seams, so I cut the front and back of the leg as one piece, and the centre panels on the fold. Because the fabric doesn’t really have a direction, or at least not one that matters for such small pieces, or for underwear, it meant that I could place the larger boxer pattern pieces in the best possible place so long as it was with the grain, to avoid waste.
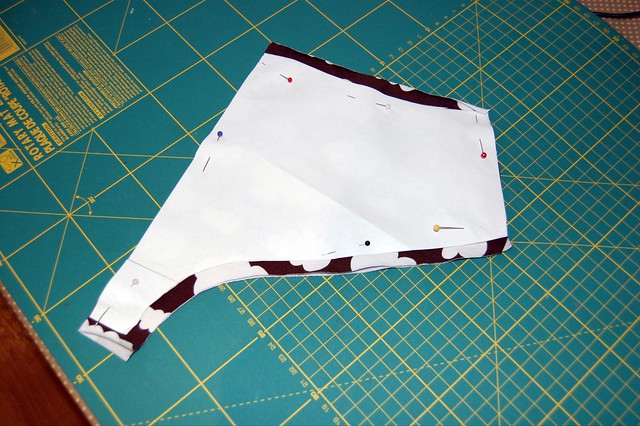
As you can see below, I pinned the edges of the fabric to stop any rolling as I cut out.
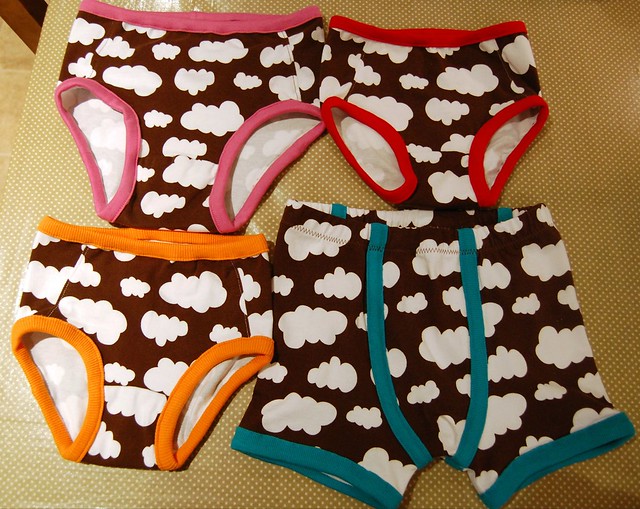
I had only a little left over. I tried to leave that piece as whole as possible, hoping to squeeze something extra out of it. So I set to work sewing up the underwear...each child checking on me repeatedly when theirs was being sewn, asking when they could wear them! The fabric was a dream to sew with...it hardy curled at all when I sewed with it, and it is so soft, especially inside....perfect for under garments.
I am really pleased with the results...I love how each child has chosen their own colour for the binding. I love that one fabric suits all ages and genders. I love that I squeezed this all out of half a metre!
I make most of my children’s underwear, and I promise you, that they will grab the handmade ones over shop bought one every morning! I also try to make most of my own, but I never make enough for myself...the children always get looked after first.
So , on Sunday morning as the children played quietly, I set about making something out of the little piece left over. (obviously not that little!) I didn’t have enough for the seam allowance in one spot, but I took a chance, it is nice stretchy fabric!
I only had enough for the front, but I couldn’t resist!
I used some of my more grown up elastics, and some plain brown for the gusset, and the back.
Wanna see them modelled?! No not me...not a hope...a trusty cushion I grabbed off the couch...doesn’t she look well in them...
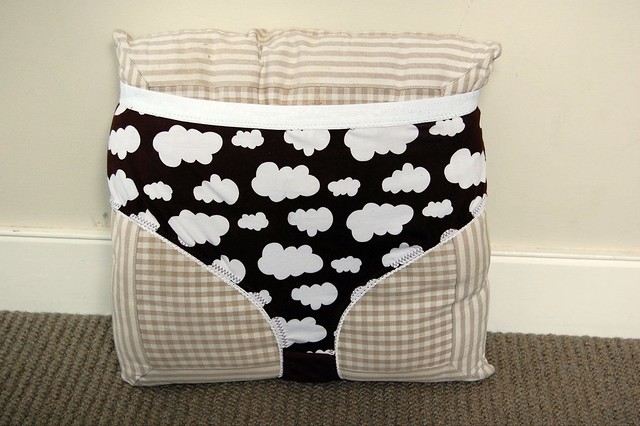
So tomorrow morning, we will all get up and put on our cloudy undies, and wear them with a smile! He hasn’t said anything, but I just know that my husband is trying to contain disappointment...maybe next time!
I used patterns from Ottobre Design 4/2004, however Amanda sells a gorgeous pattern for boys and girls. I use a Danglez pattern for myself.
Now those are some snazzy underpants! Great post!:)
ReplyDeleteI don't know about the cushion looking so bad....it looks a bit like me in my knickers!
ReplyDeleteSuper Millie,the knicker queen!
Well done, Millie! My son wandered in while I read this post and admired your handiwork -- I know he'd love a pair of his own!
ReplyDeleteWell done Millie!
ReplyDeleteWhat cheerful underwear!
ReplyDeleteFabulous, Millie! I want to make some right now!
ReplyDeleteGreat idea for a series of posts, and wonderful undies!
ReplyDeleteLove the undies, Millie! Great post - I feel like making some too now :-)
ReplyDeleteThank you, Amanda, for the guest poster, and thank you, Millie, for an awesome idea!
ReplyDeletewhere can I find the pattern to this?
ReplyDelete