Sunday, 30 June 2013
3
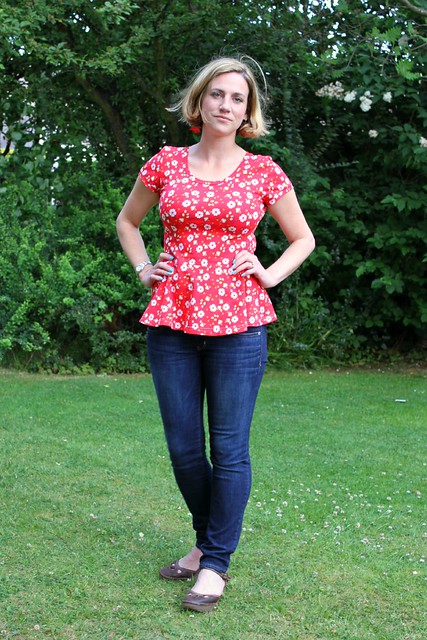
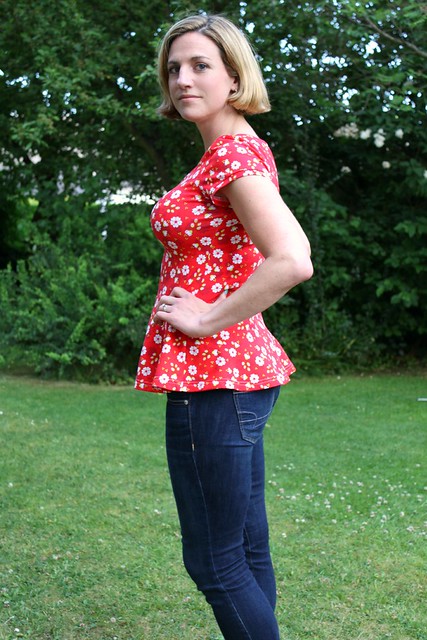
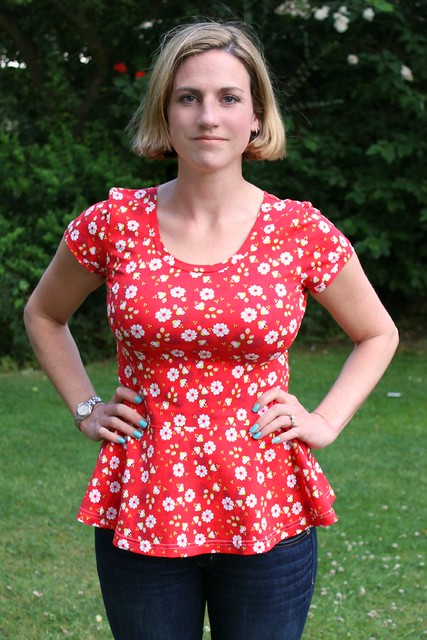
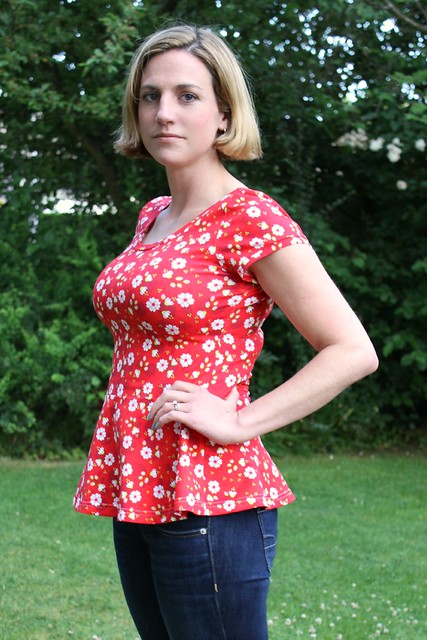
To complete my peplum experiment, I went the middle ground for peplum 3.0- fuller than the tiger peplum but less slash and spread than the turquoise peplum 1.0.
From the side it has a little more fullness than the tiger peplum, but the fabric is slightly thinner with a bit more drape so the overall silhouette is practically the same.
The front view definitely has a more obvious peplum appearance than the tiger top. Incidentally, I think I agree with Emily's comment on the last post that I could do with moving the waist seam down. More than an inch and I'd be venturing into a more 'problematic' tummy area but I think the overall silhouette would improve if the bodice was longer and the peplum section shorter.
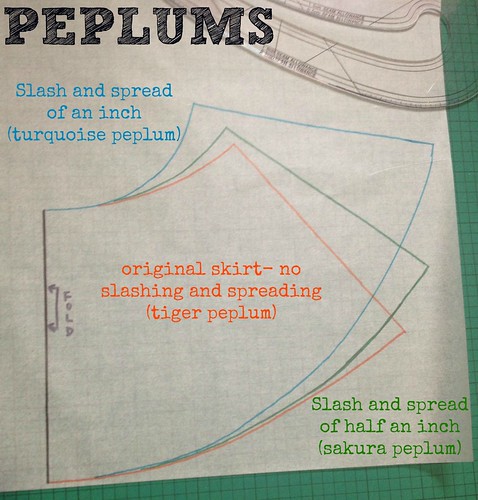
So. If you're wanting to make your Lady Skater dress into a Lady Skater peplum, it's a choose your own adventure game! The orange pattern is the skirt piece unchanged (except for the length obviously)- no slashing and spreading at all. This is just over a half circle so there is still plenty of fullness and a nice curved waist seam that will offer some draping / skimming over the lower stomach. If you want to add even more fullness, it's the same process as I outlined in the Kids' Peplum Hack. Divide the skirt into four quarters (so three slash lines) and spread them apart:
For this Sakura middle-ground peplum, I spread the the sections apart by 1/2" each; for the original full peplum I spread them 1" each so it became almost a full circle. As you can see in the comparison Peplum picture above, the distance you are spreading not only affects the hem fullness but also the curve at the waist. The more drastic the curve, the more it will drape into those folds over the tummy.
If you are wanting to peplum your Lady Skater, how much fullness to use will be largely up to personal preference and the fabric you are using. If your fabric is thick and / or not very drapey, a fuller peplum will make a fairly pronounced cone shape. But if your fabric is thin and / or very drapey, a less full peplum might cling over the tummy and show off any lumps or bumps that would be skimmed over by a fuller peplum. There is no right or wrong peplum, just one that suits your own preferences and fabric choices.
In other news, these are the first pictures with my shiny new Canon 7D! Steven was stoked (this might be an overstatement, it is more accurate to say he was less irritated than normal) that he could shoot pictures in full auto instead of me messing around in manual to try to get everything right. And then normally making him go out a second or third time when I messed up my settings. Even better, he could take tonnes quickly in a row without a processing lag whereas my old Canon 1ti Rebel would only take a couple of shots before freezing. I'm so excited to get stuck in with the new camera.
Finally, as a blogger I think we're all supposed to make a statement this week about the demise of Google Reader. Tomorrow it'll be gone so make sure you import all your blog lists elsewhere. I made the transition to Feedly when I first heard and my initial thoughts are positive. I like that you can maintain your Reader folders by importing it directly and choosing which viewing style (title, magazine, cards and full) makes skimming and choosing which to expand easier than Reader. However, I've also heard rave reviews about Bloglovin and the ability to 'Like' posts (thereby improving their reach) is a very appealing feature for the way people read blogs these days. You can also follow by email subscription in the right sidebar.
Choose Your Own Adventure: Peplum Edition
To complete my peplum experiment, I went the middle ground for peplum 3.0- fuller than the tiger peplum but less slash and spread than the turquoise peplum 1.0.
From the side it has a little more fullness than the tiger peplum, but the fabric is slightly thinner with a bit more drape so the overall silhouette is practically the same.
The front view definitely has a more obvious peplum appearance than the tiger top. Incidentally, I think I agree with Emily's comment on the last post that I could do with moving the waist seam down. More than an inch and I'd be venturing into a more 'problematic' tummy area but I think the overall silhouette would improve if the bodice was longer and the peplum section shorter.
So. If you're wanting to make your Lady Skater dress into a Lady Skater peplum, it's a choose your own adventure game! The orange pattern is the skirt piece unchanged (except for the length obviously)- no slashing and spreading at all. This is just over a half circle so there is still plenty of fullness and a nice curved waist seam that will offer some draping / skimming over the lower stomach. If you want to add even more fullness, it's the same process as I outlined in the Kids' Peplum Hack. Divide the skirt into four quarters (so three slash lines) and spread them apart:
For this Sakura middle-ground peplum, I spread the the sections apart by 1/2" each; for the original full peplum I spread them 1" each so it became almost a full circle. As you can see in the comparison Peplum picture above, the distance you are spreading not only affects the hem fullness but also the curve at the waist. The more drastic the curve, the more it will drape into those folds over the tummy.
If you are wanting to peplum your Lady Skater, how much fullness to use will be largely up to personal preference and the fabric you are using. If your fabric is thick and / or not very drapey, a fuller peplum will make a fairly pronounced cone shape. But if your fabric is thin and / or very drapey, a less full peplum might cling over the tummy and show off any lumps or bumps that would be skimmed over by a fuller peplum. There is no right or wrong peplum, just one that suits your own preferences and fabric choices.
In other news, these are the first pictures with my shiny new Canon 7D! Steven was stoked (this might be an overstatement, it is more accurate to say he was less irritated than normal) that he could shoot pictures in full auto instead of me messing around in manual to try to get everything right. And then normally making him go out a second or third time when I messed up my settings. Even better, he could take tonnes quickly in a row without a processing lag whereas my old Canon 1ti Rebel would only take a couple of shots before freezing. I'm so excited to get stuck in with the new camera.
Finally, as a blogger I think we're all supposed to make a statement this week about the demise of Google Reader. Tomorrow it'll be gone so make sure you import all your blog lists elsewhere. I made the transition to Feedly when I first heard and my initial thoughts are positive. I like that you can maintain your Reader folders by importing it directly and choosing which viewing style (title, magazine, cards and full) makes skimming and choosing which to expand easier than Reader. However, I've also heard rave reviews about Bloglovin and the ability to 'Like' posts (thereby improving their reach) is a very appealing feature for the way people read blogs these days. You can also follow by email subscription in the right sidebar.
Subscribe to:
Post Comments (Atom)


They're all winners really, I guess it depends on the amount of drape you've got. You are super helpful, not just one pattern hack but three depending on what type of knit you want to use!
ReplyDeleteGorgeous top! Wonderful work!
ReplyDeleteThis is on my to do lost after NZ!
ReplyDelete