Showing posts with label lady skater extra content. Show all posts

Wednesday, 19 March 2014

24

Perfect Pattern Parcel: Lady Skater / Ava Mashup into Wonder Woman Dress

Ava / Lady Skater mashup

You've probably seen people blogging about the inaugural Perfect Pattern Parcel everywhere over the last ten days!  The brainchild of Rachael from Imagine Gnats, Jill from Made with Moxie (as well as her techie husband Danny), Pattern Parcel collects together patterns from Independent Designers and makes them available as a bundle for two weeks only.


Not only does PPP aim to support indie designers, but a portion of the proceeds also goes to the charity Donors Choose, an amazing organization that matches up the needs of teachers and their students for specific projects with willing donors. The funds raised from each Pattern Parcel sale will go to help K-12 students in minimizing educational inequality and encourage a community where children have the tools and experiences necessary for an excellent education.   Not only does the buyer get to choose their own price for the bundle, but they also get to choose how that price is proportioned between designers / organisers / charity.  Neato, right?

Ava / Lady Skater mashup

I had such a hard time choosing which pattern to make!  Obviously I wanted to use knits (because I am nothing if not predictable) and although the Ava Dress / Top from Victory Patterns is supposed to be for wovens after I saw Adriana Crafterhours's knit Ava I knew I must do it.

Ava / Lady Skater mashup

And I must do it ridiculously.  Achievement unlocked.

Ava / Lady Skater mashup

So, a laundry list of the changes I made to the Ava to start.  Based on my measurements and finished garment measurements I started with a straight size 8.  I reduced the seam allowances from 5/8" to 3/8" because you couldn't pay me to use 5/8"s with knits.  After a first fitting, I removed an additional 1/2" to the shoulder height because of my petite upper body, increased the under bust darts by half an inch each, and removed 2" from each side seam in width at the bust tapering to nothing at the bottom edge.

Ava / Lady Skater mashup

I added a 3" waist band as I wanted it to hit less at empire height, and more at my natural waist.  To compensate for the extra travelling distance over the bust, I had to make a sway back adjustment to the back bodice of about an inch before attaching the waistband.  It still hangs a little bit lower to the back.

Ava / Lady Skater mashup

The original plan was to leave it sleeveless (as one of the pattern options) but all of my bras come up so very high under the arm that sleeveless garments are generally problematic and more hassle than they're worth to perfect.  So I also drafted sleeves, and banded them with yellow.  The neckline I dropped by 1.5" at centre front, and banded as well.

Ava / Lady Skater mashup

The Ava skirt is a similar shape to the Lady Skater skirt but it is panelled and I literally had a half a metre left of the blue stars.  So I used the Lady Skater skirt instead and narrowed the sweep until I could fit it in my tiny fabric piece.  I'm happy with the less full skirt as it makes it more casual and less costume-y.

Wonder Woman shoes

The real stars of this photoshoot (if really there is such a thing*) are of course my shoes!  If I wore my Wonder Woman bathing suit and this dress and my shoes, that'd be three full layers of dorkery.

Ava / Lady Skater mashup

For all the people who've been making fun of my interchangeable facial expressions, this is why.  I'm not angry, this is just my face.

So if you haven't already, head over to Perfect Pattern Parcel to get your bundle!  It's only available til Friday night (21 March).

*This is my first time using my tripod and remote outside.  The only thing more embarrassing than taking pictures of yourself in a Wonder Woman dress in your shared garden is taking pictures of yourself in your overcoat in a field overlooked by the entire estate before taking your tripod and camera home in a huff because you couldn't get it to focus.

Friday, 6 September 2013

8

Lady Skater Pattern Hack: Go Sleeveless

Lady Skater Tank

I know, what better way to celebrate autumn than to post the long-overdue Lady Skater Sleeveless hack!    Southern hemis, this one's for you.  Northern hemis, bookmark or pin for later.  All hemis, ignore the fact that my photos aren't technically even a Lady Skater Dress.  I'm demonstrating how easy it is to extend the bodice to make t-shirts.

LS Sleeveless Collage

So you want to make your Lady Skater sleeveless? You might remember that Cindy from Siestas and Sewing made a sleeveless skater for the tour as illustrated by the picture on the right.  If you do nothing to the bodice armhole except add trim as she did, the tank becomes a mini cap sleeve that is in no way displeasing, but if you prefer a more traditional tank-like appearance you have to change your armhole:

front skater bodice to tank

The main difference is to reduce the shoulder width.  The sleeved Lady Skaters are designed for the sleeve seam to hit right on the shoulder cap so removing the sleeve and adding trim means that the shoulder seam will extend over the shoulder cap.  If you want a skinnier shoulder, remove the greatest width at the top.  The red line shows the revised armhole- it's closer to vertical at the top, scooped out along the armhole curve, and tapered to nothing at the armpit.  The reason why I taper to nothing at the armpit is that I am very particular about my bra  band showing.  My short torso / big bust combo means that my bra bands hit very high up and it's my personal preference for a very close fitting sleeveless armhole.  If you prefer a looser armhole, feel free to scoop it out there too!  The purpose of scooping out along the curve is to compensate for the width of the band, but also to remove the pooling of excess fabric that can happen above the bust.

Lady Skater tank hack back bodice

After you've amended the front bodice, to amend the back bodice first ensure the shoulder width is the same as you're using for the front.  The back armhole is less curved than the front and pooling is less of an issue so you don't have to scoop into the curve, just remove a more-or-less uniform amount to account for the trim.  If you remove too much from the back armhole you risk the bra strap showing.  Make sure also that if you scooped into the armpit in the front bodice that you do the same to the back bodice so the side seams are still the same length.

 front skater bodice to tank band calc

Once you have revised your armhole for both the front and the back, you'll need to determine the length of band you will use to trim.  To do so measure the new armhole (less the shoulder seam allowance) and multiply it by .85 for the length.  This percentage works for fabric that has some elastane / lycra / spandex but if your fabric has less stretch and recovery (for example interlock) you might find .9 works better.  For the height I personally tend to use 4cm (so 2cm on the fold) as it results in a trim rather than band appearance but feel free to increase the height if you want.  Remember that the more you increase your trim height, the more you need to remove from the armhole curve.

front skater bodice to tank armpit

To sew on the band I follow the same process as the neckband in that I sew it on flat rather than in the round.  This is because I like to sew my side seams last so I can adjust any fitting problems then.  It is worth saying that if you're busty like me that you might find the extra wedge added to the front bodice piece needs to be removed in your sleeveless version.  With sleeves, this wedge reduces pulling across the chest and allows freer range of motion through the sleeve.  However, in a sleeveless version you might find that you need to pull the front bodice tighter at the armpit and sew the side seam closer (effectively pulling the band in and ) so that it hugs the curve of the bust without gaping.

Go forth and sleeveless!


Sunday, 30 June 2013

3

Choose Your Own Adventure: Peplum Edition

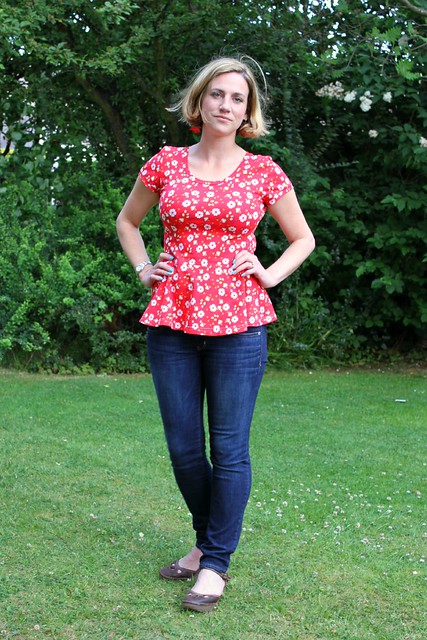
sakura peplum full

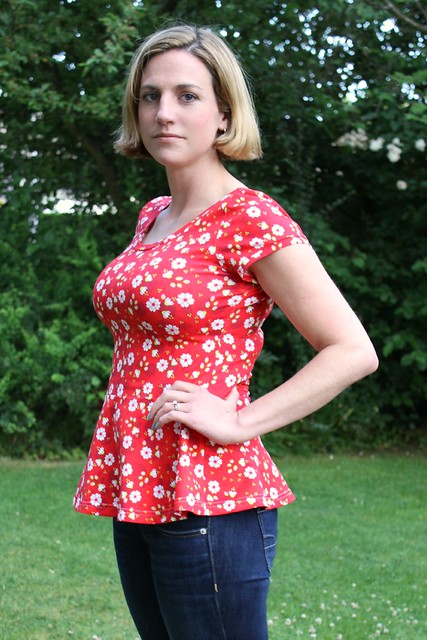
To complete my peplum experiment, I went the middle ground for peplum 3.0- fuller than the tiger peplum but less slash and spread than the turquoise peplum 1.0.

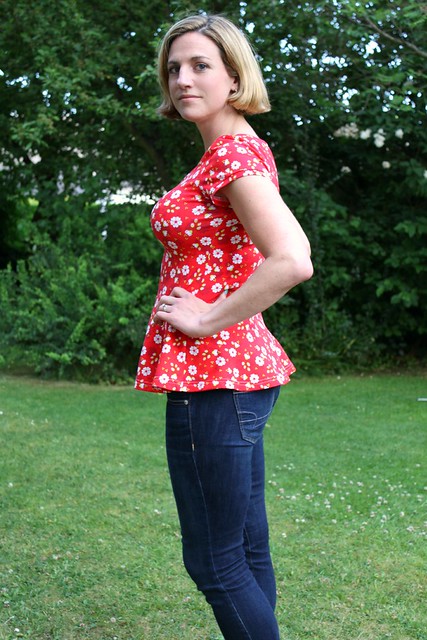
sakura peplum side 2

From the side it has a little more fullness than the tiger peplum, but the fabric is slightly thinner with a bit more drape so the overall silhouette is practically the same.

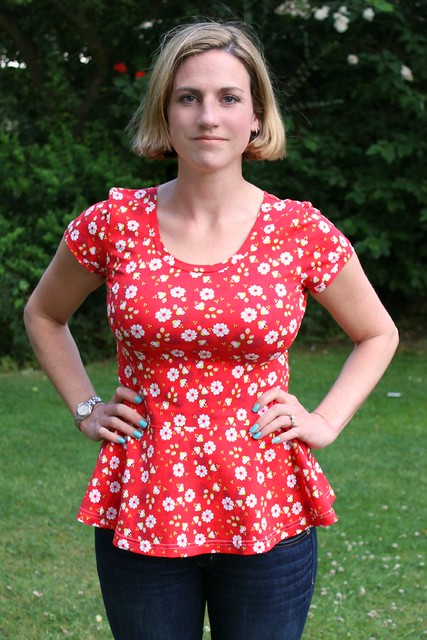
sakura peplum close

The front view definitely has a more obvious peplum appearance than the tiger top. Incidentally, I think I agree with Emily's comment on the last post that I could do with moving the waist seam down.  More than an inch and I'd be venturing into a more 'problematic' tummy area but I think the overall silhouette would improve if the bodice was longer and the peplum section shorter.

peplums

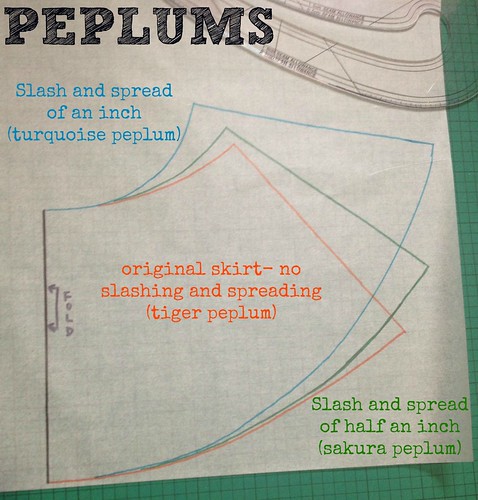
So.  If you're wanting to make your Lady Skater dress into a Lady Skater peplum, it's a choose your own adventure game!  The orange pattern is the skirt piece unchanged (except for the length obviously)- no slashing and spreading at all.  This is just over a half circle so there is still plenty of fullness and a nice curved waist seam that will offer some draping / skimming over the lower stomach.  If you want to add even more fullness, it's the same process as I outlined in the Kids' Peplum Hack.  Divide the skirt into four quarters (so three slash lines) and spread them apart:


For this Sakura middle-ground peplum, I spread the the sections apart by 1/2" each; for the original full peplum I spread them 1" each so it became almost a full circle.  As you can see in the comparison Peplum picture above, the distance you are spreading not only affects the hem fullness but also the curve at the waist.  The more drastic the curve, the more it will drape into those folds over the tummy.

If you are wanting to peplum your Lady Skater, how much fullness to use will be largely up to personal preference and the fabric you are using.  If your fabric is thick and / or not very drapey, a fuller peplum will make a fairly pronounced cone shape.  But if your fabric is thin and / or very drapey, a less full peplum might cling over the tummy and show off any lumps or bumps that would be skimmed over by a fuller peplum.  There is no right or wrong peplum, just one that suits your own preferences and fabric choices.

sakura peplum side

In other news, these are the first pictures with my shiny new Canon 7D!  Steven was stoked (this might be an overstatement, it is more accurate to say he was less irritated than normal) that he could shoot pictures in full auto instead of me messing around in manual to try to get everything right.  And then normally making him go out a second or third time when I messed up my settings. Even better, he could take tonnes quickly in a row without a processing lag whereas my old Canon 1ti Rebel would only take a couple of shots before freezing.  I'm so excited to get stuck in with the new camera.

Finally, as a blogger I think we're all supposed to make a statement this week about the demise of Google Reader. Tomorrow it'll be gone so make sure you import all your blog lists elsewhere.  I made the transition to Feedly when I first heard and my initial thoughts are positive.  I like that you can maintain your Reader folders by importing it directly and choosing which viewing style (title, magazine, cards and full) makes skimming and choosing which to expand easier than Reader.  However, I've also heard rave reviews about Bloglovin and the ability to 'Like' posts (thereby improving their reach) is a very appealing feature for the way people read blogs these days. You can also follow by email subscription in the right sidebar.

Sunday, 16 June 2013

21

The Lady Skater: Fitting and Adjustments

I've had quite a few emails asking for fitting help so I'm going to delve into some common fitting adjustments here on the blog. If you have a question that isn't covered, throw it into the comments so other people can benefit from the hive mind!

determining bodice length


It's clearly your lucky day as I turned pictures of me in my bathing suit into drawings for illustrative purposes.  This shows my underbust line, high waist line, low waist line, and an entirely accurate belly button.  Although I am slimmer towards my underbust, the intended seam line of the pattern (The Zone) falls around the high waist (if it was at the underbust it would become empire line which might indeed be cute but is not how I designed it).  Like a lot of people that may or may not have had children, things become 'less streamlined' below my high waist so the seam falling above and the drape of the skirt should skim over that and be more flattering.

How do you find your Zone?

torso lengths 2
When drafting for grown-ups, there's no way to make a golden pattern that will fit everyone without adjustments.  Not only are people different heights and sizes, but the distribution of their body parts varies wildly.  The good news is that the Skater Dress only has one really important horizontal seam- the bodice / skirt seam.  I am very short-waisted (that's actual me to the left), but I manipulated the pictures to show different torso builds for a proportional waist and a long waist. This is nothing to do with your overall height, but proportions.  Although the busts are identical and the underbust lines even, the high waists and low waists shift incrementally.  The standard pattern pieces for the Lady Skater are for the proportional waist in the middle, which means that even I have to make changes to my own pattern to fit me better! 

If you have experience of making adult clothes for yourself, you probably have a good idea of your body type but if you're new to this a really useful exercise is to do just as I have: take a photo of yourself in your bathing suit or tight fitting clothes and trace around it.  Find your underbust, high waist, low waist, and hip lines and look at how they are distributed.  If you're still having having trouble conceptionalising, here are some (fast and loose) indications that you might have to tinker with your bodice length:
  • Your overall height.  The pattern is graded for a 5'5" woman.  If you are shorter than 5'5" or taller than 5'5" you will probably need to utilise the lengthen / shorten line on the bodice.
  • Your torso proportions. Again, this takes some body awareness and experience, but if you are short or long waisted you will need to adjust the bodice piece to remove or add height.
  • Bust size.  This is the least important factor of the three but if you are of the small to average bust you might need to shorten your bodice as less of the fabric is being used to go up and over the breasts.  Equally, very large busts might need to add length to the front bodice piece / remove length from the back bodice to have an evenly hanging hemline.
Bodice length adjustments might be something that you're able to do to the pattern before sewing, but you might find that locating your Zone is only achievable after muslining the bodice.  If you've made the bodice and tried it on, is it hitting you at your high (natural) waist?  Is it too close to your underbust?  Is it clinging or pooling somewhere closer to your low waist because it's too long?

Lengthening your bodice

front bodice length added

This is probably the most straight-forward change to make!  All you need to do is split the pattern all the way across the lengthen line, add height with a piece of paper underneath, and smooth your side seams. The grey section is what you've added.  Make sure you do the same change to your front and back bodice.

Shortening your bodice

front bodice shorten

Split your bodice along the shorten line, pull the bottom section up so that it overlaps with the top section (keeping the fold line aligned), and then smooth out your side seam.  The grey section shows the overlap.  Make sure you do the same change to your front and back bodice.

I'm happy with my front bodice length but my back bodice is hanging lower / I'm having pooling centre back:

back bodice sway back

As per my tutorial instructions, I highly recommend that you muslin the bodice before cutting precious hoarded fabric.  When you make the bodice to ascertain if the waistline is hitting 'The Zone', you might notice when turning sideways that the back bodice is hanging lower than the front. Or- you might not notice until your final dress is finished and you want to know how to fix it.  Uneven hems can be very common, particularly if you're busty.  Now, I did a sway back adjustment to every size of the master pattern to try to counteract this but your own proportions might mean that you need to make further adjustments.  Like the lengthen and shorten instructions above, what you need to do is slash your pattern  along the lengthen / shorten line but do not cut through your size line on the side seam, only cut very close to it.  Swing the lower section upwards so that you are overlapping the upper section at the centre back.  This probably won't need to be a huge overlap (3/4" to 1"), and tape in place.  The centre edge of the lower section will swing over the vertical fold line.  Return this line to vertical and (if required) add the same amount of width that you removed at the centre vertical to the side seam.  The sway back adjustment is essentially taking a wedge out of centre back to reduce pooling, nothing else is changing in a major way.  Depending on how much you removed, you might need to smooth your bottom seam line so it's convex rather than a harsh angle.   If you only found this pooling after your entire dress was complete, try it on inside out and with the help of a friend pull the back bodice / skirt seam up until the hem is even and pin in place.  Seam-rip along the centre back (the side seams should be unaffected), remove the excess to the back bodice piece and re-sew. If you find pooling both at the front and the back your bodice is too long.

My high bust and waist aren't the same sizes:

blend between sizes


When you are measuring your high  bust and high waist, you might find that your high bust corresponds to a different size than your waist.  The above picture shows smoothing the side seam between smaller bust / larger waist and larger bust / smaller waist.  When blending sizes, the majority of the extra room happens in the bust where its needed.

cheater fba

Depending on your fabric choice and your cup size, you might find that you need more room in the bust only.  Using a fabric with less stretch capacity like interlock or jersey without lycra might result in a drag line across the full bust.  Fixing this is almost the same as blending a larger bust to smaller waist except you're doing it to the front bodice only.  Adding extra width to the armhole and upper bodice means that you'll have to also add the same amount to the front sleeve so it fits.  If the front bodice side seam becomes slightly longer than the back bodice side seam, ease the extra length into the top half of the seam where the bust is.

**EDITED TO ADD ANOTHER ONE BASED ON COMMENTS**

Shortening the shoulder height / Upper bust height:

shorten upper chest

If you find that after making a bodice muslin that there is pooling above your bust towards the sleeve hole, or that the sleeve cap is sitting funky off your shoulder cap, you might need to shorten your shoulder height or shoulder width.  With your bodice muslin on inside out, pinch the shoulder seam to bring it up and pin out the excess.  On your paper pattern, match the amount you pinned out to the corresponding smaller size (for example, if you pinned 1/4" below the shoulder seam you would go down one size to both the front and back bodices, 1/2" goes down two sizes, etc). Use that armscye / sleeve hole but when you get to the side seam increase the width to your original size.  In the picture above (as per Lyn's adjustments in the comments!), I'm showing how to use the upper bust and shoulder of a size 3 with the width of the size 6 in the lower bodice.  Use the sleeve of the smaller size but add the extra width at the front and back corners to reflect the size of your lower bodice.

I hope all of this helps!  If you have a question about fitting that I haven't covered, chuck it in the comments.


Friday, 14 June 2013

17

The Lady Skater Dress: FAQs and further information

Firstly, thanks for all the support everyone has thrown behind me and my first adult pattern! I'm so grateful for all you guys, truly.  I hasn't gone without hitches but it's gone and that's something.

blank


Those of you that follow me on Instagram might have seen that I had to do a complete rebranding within a couple of hours of the launch!  As hard as it is to believe, there are loads of people who don't read my blog and were unaware that I had a girls' skater dress.  So our in-joke of Big Girl / Little Girl lost its context and Big Girl became Plus Size.  Now, I have zero problems with being aligned with 'Plus Size' and probably the largest sizes I offer are indeed 'Plus Size' by some definitions but there are also very small sizes so I needed to rename to reflect that.  Not that everyone has been happy with Lady Skater as a name but hey-ho :)  I guess if there's a lesson to be learned it's that everyone should read my blog.

Why did I name my sizes 1 through 8?

skater dress essential details

Several reasons!  Firstly, the sizes included in all patterns are relative.  Having eight sizes means that they could've potentially been called XXS, XS, S, M, L, XL, XXL, and XXXL but that's misleading because it's relative to my own grade rule and how many sizes I included.  Like it or not, relative sizes like XS or XXL carry meaning as to where you fall in comparison 'average' and I feel very strongly about not doing that.  So why didn't I use sizes in relation to off-the-rack clothes (like 2, 6, 8, 10, 12 etc)?  My cop-out answer is that my customers come from all over the world so researching how I should marry UK / US / EU sizes accurately would've been tricky (even more so as off-the-rack sizes vary wildly between manufacturers and even within the same manufacturer due to different factories of origin).  But more than that, numbers again carry weight.  I want people to choose their size based on their own measurements, not because of conditioned responses like 'I'm an 6'. 

Why do you use your high bust measurement and not your full bust?

high bust and waist annotated

Full bust measurements vary wildly, high bust measurements less so. For smaller or average busted people, choosing a sized based on your full bust might be the same size as it would be on your high bust (more likely it would be 1-2 sizes up).  But if there's a large difference between your full and high bust and you choose size based on full bust, it will be way too big through the shoulders and upper bust.  Katie is doing a really interesting experiment of sewing big-4 patterns based on full and high busts if you want to read more about it (clue: you do).  This is a knit dress so a lot of our full bust differences will be taken care of through negative ease but if you find that you need extra room for the girls, you can add it where it's needed: the bust.  This might be as simple as increasing the width of the front bodice under the arm, or you might need to do a more official FBA to increase the length of the front bodice too.  I'll be talking more about this in a fitting post. 

What is clear elastic and why should I use it?

Clear elastic

The Lady Skater calls for you to insert clear elastic into your shoulder seams and your bodice / skirt seams.  If you've never come across it before, clear elastic is an elastic that you can insert inside your seams to stabilise them and stop them from distorting over time.   It's not 100% essential it totally is but it's easy to sew in and will greatly improve the longevity of your dress.  How clear elastic differs from other elastics is its stability. If you cut a 5" piece of (good quality) clear elastic and stretch it out, when you let go it'll go back to 5"*.  When inserted into a seam, clear elastic means that the seam can stretch, but that it won't overstretch, particularly over time.  An interlock dress without clear elastic will start losing its intended dimenstions through wear for example.  In a fabric with a highish lycra content, clear elastic is less important but I'm still going to attempt to convince you.

Clear elastic done

Inserting the elastic in the seams couldn't be easier!  Rather than trying to sew it in while you're sewing your shoulder or bodice / skirt seams (which is admittedly trickier to catch all three layers), the elastic is basted on to the wrong side of the fabric before attaching pieces to one another.  I use a 2.5 x 2 zigzag and the stability of the elastic is great enough that it's no harder than basting on a woven ribbon- you're not stretching it at all so it really does behave like that.

Tl;dr: Clear elastic is the business.

*For this reason you can also use clear elastic for gathering!  Cut the length you require for the final intended size and sew it on while stretching it to fit the fabric. For example, you want to make a 15" piece of fabric gathered to 10".  Cut a 10" length of elastic, tack it to the fabric at either edge and then sew it on while stretching the elastic and it will gather to 10" (or slightly more if your fabric is dense).