Showing posts with label Sewing for Women. Show all posts

Wednesday, 19 March 2014

24

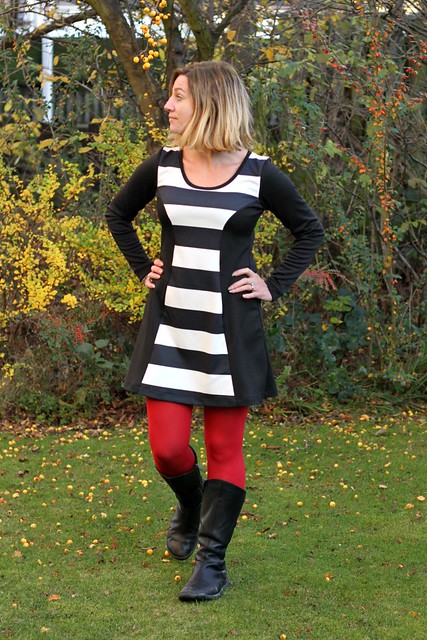
Perfect Pattern Parcel: Lady Skater / Ava Mashup into Wonder Woman Dress

Ava / Lady Skater mashup

You've probably seen people blogging about the inaugural Perfect Pattern Parcel everywhere over the last ten days!  The brainchild of Rachael from Imagine Gnats, Jill from Made with Moxie (as well as her techie husband Danny), Pattern Parcel collects together patterns from Independent Designers and makes them available as a bundle for two weeks only.


Not only does PPP aim to support indie designers, but a portion of the proceeds also goes to the charity Donors Choose, an amazing organization that matches up the needs of teachers and their students for specific projects with willing donors. The funds raised from each Pattern Parcel sale will go to help K-12 students in minimizing educational inequality and encourage a community where children have the tools and experiences necessary for an excellent education.   Not only does the buyer get to choose their own price for the bundle, but they also get to choose how that price is proportioned between designers / organisers / charity.  Neato, right?

Ava / Lady Skater mashup

I had such a hard time choosing which pattern to make!  Obviously I wanted to use knits (because I am nothing if not predictable) and although the Ava Dress / Top from Victory Patterns is supposed to be for wovens after I saw Adriana Crafterhours's knit Ava I knew I must do it.

Ava / Lady Skater mashup

And I must do it ridiculously.  Achievement unlocked.

Ava / Lady Skater mashup

So, a laundry list of the changes I made to the Ava to start.  Based on my measurements and finished garment measurements I started with a straight size 8.  I reduced the seam allowances from 5/8" to 3/8" because you couldn't pay me to use 5/8"s with knits.  After a first fitting, I removed an additional 1/2" to the shoulder height because of my petite upper body, increased the under bust darts by half an inch each, and removed 2" from each side seam in width at the bust tapering to nothing at the bottom edge.

Ava / Lady Skater mashup

I added a 3" waist band as I wanted it to hit less at empire height, and more at my natural waist.  To compensate for the extra travelling distance over the bust, I had to make a sway back adjustment to the back bodice of about an inch before attaching the waistband.  It still hangs a little bit lower to the back.

Ava / Lady Skater mashup

The original plan was to leave it sleeveless (as one of the pattern options) but all of my bras come up so very high under the arm that sleeveless garments are generally problematic and more hassle than they're worth to perfect.  So I also drafted sleeves, and banded them with yellow.  The neckline I dropped by 1.5" at centre front, and banded as well.

Ava / Lady Skater mashup

The Ava skirt is a similar shape to the Lady Skater skirt but it is panelled and I literally had a half a metre left of the blue stars.  So I used the Lady Skater skirt instead and narrowed the sweep until I could fit it in my tiny fabric piece.  I'm happy with the less full skirt as it makes it more casual and less costume-y.

Wonder Woman shoes

The real stars of this photoshoot (if really there is such a thing*) are of course my shoes!  If I wore my Wonder Woman bathing suit and this dress and my shoes, that'd be three full layers of dorkery.

Ava / Lady Skater mashup

For all the people who've been making fun of my interchangeable facial expressions, this is why.  I'm not angry, this is just my face.

So if you haven't already, head over to Perfect Pattern Parcel to get your bundle!  It's only available til Friday night (21 March).

*This is my first time using my tripod and remote outside.  The only thing more embarrassing than taking pictures of yourself in a Wonder Woman dress in your shared garden is taking pictures of yourself in your overcoat in a field overlooked by the entire estate before taking your tripod and camera home in a huff because you couldn't get it to focus.

Wednesday, 12 March 2014

16

Introducing The Trifecta Top!

Trifecta Top line drawings

At very long last, the Trifecta Top is now available!  Named thusly because of the three neckline heights, three sleeve lengths, and three optional extras.  From the official description:
The Trifecta Top is a versatile wardrobe builder with loads of customisation options! There are three necklines (high scoop, low scoop, and scooped V-neck), three sleeve lengths with hem or band finishes (cap with hem or band, elbow length hem or band, long sleeve hem or band), and two shirt lengths (a hit-at-the-hip hem length and a marginally longer waistband length). Fitted through the bust, there is gentle side seam shaping through the high waist before skimming through the hips. Scrap hoarders will be delighted that there are also options for a tiny pocket, contrasting shoulder insets, and a centred triangle inset to showcase those small scraps you can’t bear to part with. With easy to sew raglan sleeves this top is a perfect introduction to sewing for yourself and testing the sewing-with-knits waters; a super fast sew and straightforward to fit. More experienced sewers will enjoy the myriad customisation options and more challenging insets and V-neck. Colour-block the sleeves and body for a sporty baseball style, utilise the inset neckline triangle for a retro sweatshirt look, or throw something fancy into the shoulder insets for dress up occasions! There are eight sizes included in the pattern, ranging from a 30” to 44” high bust, and a 24” to 38” high waist.
Here is but a few of the ones I've made through the testing process...

Amanda Trifecta Collage
Not pictured: Another six

One of these things is not like the other, amirite? Remember that time on Facebook I said using my new tripod and remote to take pictures inside would be a game-changer?  Unless that game is called Grainy Pics, it hasn't changed at all.  Lucky for me my friend Clare was free to take some pictures in the garden this morning.

TrifectaTester Collage

Speaking of pics, how about them testers?!  As per usual, best in the world.  Additional mega-props to Susan from Crafterhours for her nifty digitisation and general awesomeness.

So without further ado, you can get The Trifecta Top here!  From now until Sunday at midnight you can save 20% on two or more patterns using TRIFECTA at checkout.  I've just changed the listing for the Reversible Zippy Hoodie to include all sizes from 18m to 8y as well.


Thursday, 6 February 2014

14

Shades Of Me Series: Blues Edition

Shades of Me Cover

There's a fun series going on right now organised by Welcome To The Mouse House and Petit a Petit and Family encouraging people to sew for themselves.  The twist?  A rainbow spectrum of colours to build your outfit around!  Everyone is welcome to sew-along, there are linky parties on Hayley's and Celina's blogs as well as a Flickr Shades of Me pool, and a HUGE giveaway to boot.  The series kicked off with yellow, followed swiftly by orange and white, but there's a veritable rainbow still outstanding.

Image Map

Each day, there are three bloggers building an outfit around a single colour.   In 'well duh' news, I had blue.

shades of me close

I wasn't sure when I started planning how much license we had to deviate from our pallet so I pulled out the fabric that was the most Blue and Blue and Blue All Over, this swirly stretch cord from ye olde stash.

Shades of Me waistband

See? All the blues.  With some monochrome black, grey and white for good measure.

Shades of Me back

I drafted up some skinny fit trousers, and admittedly some might think I look crazypants in my crazy pants but I love patterned trousers and no one can stop me.

Shades of Me Full 2

I was all set to cut into some plain petrol jersey for a coordinating tunic when I remembered that I had, in fact, made a petrol blue Renfrew a couple of years ago that was a perfect colour match.  There are compelling reasons to have two (or more!) petrol blue tops as it's my favourite colour, but probably not compelling reasons to have two basic petrol tops without any adornments.  With busy trousers, the neutral Renfrew won out.


To celebrate the series, there's an amazing giveaway with a tonne of prizes (including my Lady Skater pattern).  To see what's included, you can click through, or if you like surprises just blithely enter by clicking this: a Rafflecopter giveaway

Monday, 16 December 2013

6

The Penny Pinafore Sewing Pattern is go!


Release the hounds, release the kracken, release what you have at hand but The Penny Pinafore is finally available in my shop!  If you haven't heard me talking about nothing else for the last month, here's a description of the pattern:
This striking knit dress has shapely princess seams, a scooped banded neckline, a gently curved a-line shape in three different lengths (tunic / mini / knee length), and options for banded cap sleeves, ¾ length sleeves or long sleeves. It's designed to flatter the figure with a close fit through the bust, subtle waistline shaping through the natural waist, and then gently skimming over the lower waist and hips. The separate panels and princess seams give ample opportunity for fitting to individual shapes and adjusting to preferred ease. In a single colour or overall print the dress lends itself to a casual wardrobe staple that's cute thrown over leggings or tights, or use a contrasting print or colour in the centre panels for an striking hourglass shape. There are eight sizes included in the pattern, ranging from a 30” to 44” high bust, and a 24” to 38” high waist. Due to the slightly challenging nature of sewing princess seams and easing different curves into each other, I would class this an intermediate pattern but essentially it's a very quick sew.
And just to cleanse the internet's visual palette of only me wearing the Penny Pinafore round these parts, here's a fraction of the makes my awesome testers made.  I think they made nearly twenty between them, they are the absolute best.  And my mum tested for me this time so I am nearly a family business.


Also the best is my digitiser, Susan, from Crafterhours.  If you're looking for a digitiser she's a joy and a pleasure.  Better comb your hair, though, as she really likes Facetime.


Want to wear coordinating Penny Pinafores with your little doppelganger?  The Mini Penny will be released tomorrow!


I released this pattern specifically for the Designer's Challenge (initiated by the awesome Andrea from The Train To Crazy), where designers were challenged to come up with the unique 'original' pattern.  It's being going strong for over a month now, there's some fun patterns!  You can check them all out on Pattern Revolution.

Monday, 2 December 2013

9

The Amazing Technicolour Paneled Pinafore

dotties paneled pinafore full 

As I got towards the end of the bolt of this Tulipa Dotties I selfishly took it out of the shop and reserved it for me. Yes, it's a bit garish and riotous, and the just-over-a-metre cut mean it's also super mini but I regret nothing.  I think I have tights to match at least half of these colours.  The resident / reluctant photographer didn't notice that there was a random shaft of light coming around the side of the building so there's a weird streak across the dress in all the pictures.


Meh, whatever.  I'm in love with this dress and nothing can taint that.

dotties paneled pinafore back

Not even my roots situation or derp feet.

dotties paneled pinafore close

Testing is going awesome and I'm getting pretty excited about this pattern.  All I need to do is settle on a name.  I like the Little and Lady play on the Skater and would like something similar for this.  Any ideas?


Monday, 25 November 2013

12

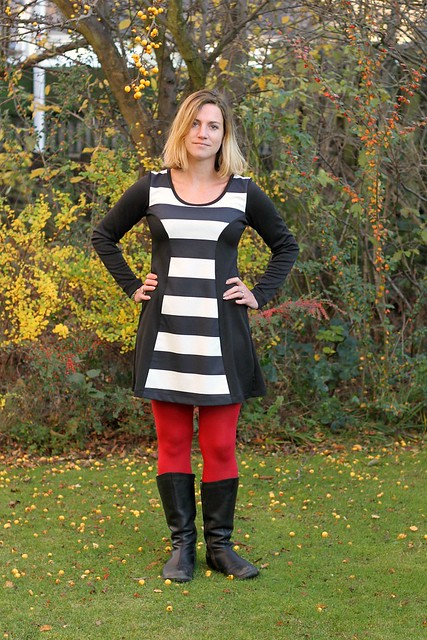
The Mod Dress

mod dress full

In case you missed it on Instagram or Facebook, I'm working on drafting the Paneled Pinafore in ladies' sizes.  This is version three and I'm just about happy with everything.  Version One is all in a grey ponte and it's trickier to see the seam lines so for this one I used a big fat striped ponte for the centre panels so you could see those princess seams.

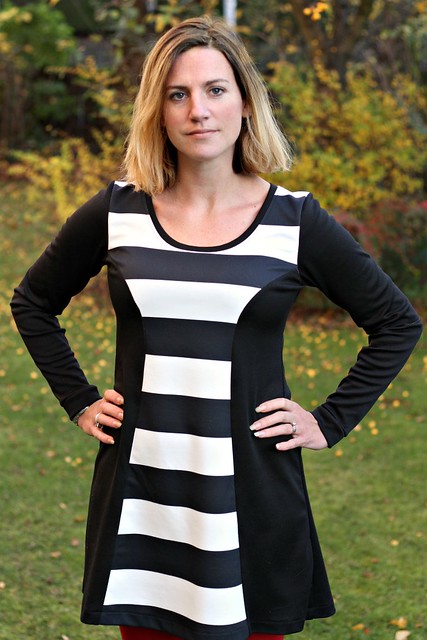
mod dress close

The front has a more dramatic curve that nips in at the waist for an at-a-glance hourglass shape.  As the seams are more of a decorative feature than a shaping feature, the hourglass is somewhat of an optical illusion but princess seams are the perfect seams for adjusting fit to your individual body.

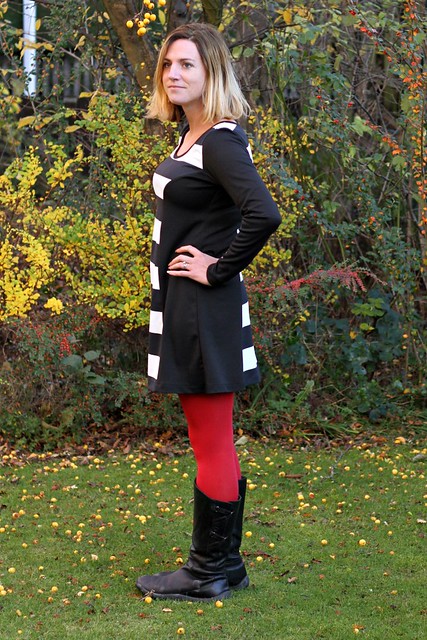
mod dress side

From the side you can see that there is a looser, drapier fit than it looks from the front.  There is negative ease through the bust but not through the waist because I think this pattern will be good to throw over jeans or trousers (in tunic length) or tights in mini / knee length. 

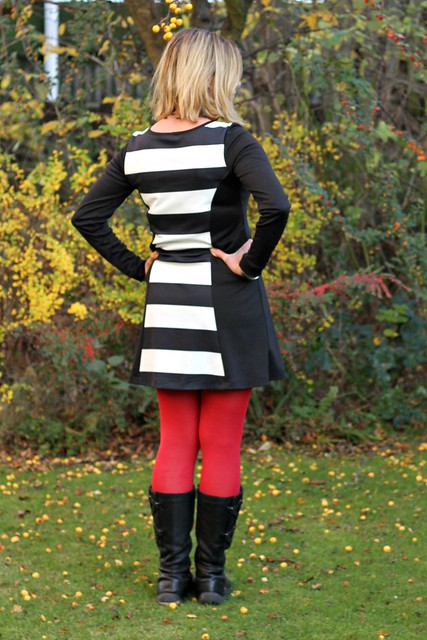
mod dress back

The back has less dramatic curves and also pesky thumbs causing pooling.

mod dress action

If you're waiting for an action shot to show you different things you can do while wearing this dress, the style clearly lends itself well to giving The Eyebrow to your son's friend who is spying on your photoshoot from around the side of the building.


Thursday, 26 September 2013

17

Selfish Sewing: Maritime Shorts

maritime shorts cover

In case you didn't notice, I am a Featured Stitcher on Made With Moxie's blog today with a pattern review for her and Imagine Gnat's Selfish Sewing Week.  When Jill asked if I'd be willing to review a pattern I jumped at the chance to a) actually make something for myself for fun and b) step out of my comfort zone and learn some new skills.  The Maritime Shorts from Grainline Studio fit the bill on both counts as not only have I never sewn myself woven shorts (or trousers for that matter) but I've also never sewn a zipper fly.  Shocking.

maritime shorts close

The printing, taping and tracing was a doddle and my measurements corresponded to a straight size 8 without blending between sizes.  Aiming for a wearable muslin for my first time, I used a nice teal thick canvas as it's already very autumnal in Scotland (as evidenced by the mid-shoot sweater addition- let's just say it was noticeably cold).  In hindsight, this wasn't the very best fabric to choose but more on that later.

maritime shorts back

I absolutely love the two cute pockets to the back; between these pockets and the tiny pocket I sewed on my Tumble Tee I think I've got a burgeoning pocket obsession.  Could they be behind my two cute pockets on the Panelled Pinafore?  Perhaps.  Crisp pressed edges, neat top-stitching, triangle corners... what's not to love?  And now the moment of truth... just how did I get on with that fly?  Not too shabby.  I admit that I had some issues with figuring out exactly how it would work (there is a separate tutorial on the Grainline blog with pictures that helped a lot) and I made some mistakes.  Clue: when she says baste she actually means baste because that stitching comes out later.  Despite knowing in my heart of hearts that no good would come of stitching both sides of a zipper face down, my cavalier attitude towards basting zippers (clue: nobody has time for that) won and my prize was a seam-ripper.  See also: baste the fly shield.

maritime shorts inside

Now that we're looking at the inside, I'll extrapolate a bit about the problem I had with this fabric - it has no right or wrong side.  Not a problem where the main pieces were concerned, but the cutting instructions had the waistband facings in the same fabric as the body fabric so I had two back pieces, two front right pieces, and two front left pieces in the same fabric, looking the same on both sides, and it all went haywire.  Because of the fly, the front left and right pieces are not symmetrical.  First I ironed interfacing onto the wrong pieces and had to cut them again.  And then I assembled the waistband wrong.  Finally I decided to find the precise back, front left and front right pieces needed to do the waistband correctly, set them aside and cut facings out of the pocket lining fabric.  In the end, this was a good idea as the canvas is so thick that a self-faced (with interfacing as well!) waistband would've been very bulky.  While we're talking about the pocket lining fabric, I also want to mention that you might need to notch the curve of the lining before pining and stitching it on, I just couldn't manage it without.

 maritime shorts full

I made one final schoolgirl error (entirely my own, no fault of the pattern!) in that I fitted it before attaching the waistband.  I have a tremendous swayback from my long career of standing louche-ly and when I tried it on I ascertained that I should pinch out an inch at centre back.  So I did, amended my waistband to reflect and soldiered on.  What I forgot, however, is that what I lack in the centre back I make up for in the centre front and that extra inch would be desirous at waistband height.   It's not a disaster and they're still wearable but I think I'll go right back to the original pattern for my next go.   Overall, I'm very pleased with how they turned out and I'm looking forward to making more for the summer in snazzier fabrics.

Disclosure: I received this pattern free as part of Selfish Sewing Week. All opinions my own.

Wednesday, 12 June 2013

15

The Lady Skater Dress Sewing Pattern is go!

skater dress essential details

Bang the drums and release the hounds, the Lady Skater is now available for people who aren't me.  I'd like to thank my parents, my coffee machine, pesterers, and Photoshop.  And of course my awesome testers!  Here are just some of the pics that are already in the public domain: 
Big Girls' Skater Dress Collage
Although I spent countless hours messing with my own pictures to turn them into pattern's line drawings, I also had the added pleasure of messing with other people's pictures just for sh*ts and giggles.  Agreeing to let me use your images is both a blessing and a curse:

 
If you want to read what testers have to say about the pattern, Katie, Cindy and Alida have all blogged about it already! As others pop up I'll add them to this post.

And if you want to check out all the details about the pattern, you can find it here!


Friday, 31 May 2013

15

The Skater Dress goes Starlion

Starlion skater dress side close

If I'm looking pretty pleased with myself here, I have good reason.  After two late nights (late enough to be considered morning), the Big Girls' Skater Dress is finally done and with testers!  The moment we  thought we'd never see.

Starlion skater dress full

I don't want you to perceive me a disloyalal to Scandi Flowers or anything, but when we're alone I whisper 'I love you most of all' to my Starlions.  I prefer the lighter drape and the fabric is so smooth it's almost liquid.  Dreamy.

Starlion skater dress side

Wish all the testers luck and hopefully I'll have good news soon!

Monday, 27 May 2013

15

Scandi Flowers Skater Dress hits London, London doesn't notice

Big Girl Skater dress full

The night before my London trip I left the relative comfort of muslin-world and finally sewed up a skater dress in proper fabric.  The prospect of having someone who isn't seven years old take pictures of me somewhere that isn't my garden was too great an opportunity to pass up.  Obviously, being a rushed late-night venture I didn't get any pictures taken of the process so if I'm finally going to get my act together and write the tutorial I'll need to make myself at least one more skater dress.  Not a bad problem to have, all things considered. 

Big Girl Skater dress close

The Scandi flowers fabric is a cotton/lycra blend with quite a bit of body so the fit was less drapey than the viscose and interlock muslins.  Being a three-quarter length sleeve a thicker fabric is appropriate as a autumn / winter / spring dress (or if it's this year a summer one too).  I'll use a thinner fabric and a short sleeve next time to see how that changes the fit. 

Big Girl Skater dress photobombed

Ha- my favourite picture and it's the one that was photobombed! 

Sunday, 14 April 2013

9

Skater Dress for grown up ladies in hot climes (named Amanda)

Sleeveless skater dress

For the non-Instagrammers, I wanted to quickly update with the heady progress of the grown up Skater Dress. Making no changes to the version one pattern (save omitting the sleeves), I whipped up version two from ye olde stash fabric to test the behaviour of interlock and to see how it works sleeveless.

Sleeveless skater dress

As you can see, there is some gapping under the arm but that is easily fixed by taking in the side seam at the armpit.  Interlock is not my favourite fabric for clothes for me; I find the lack of lycra means it can pull across the chest where there's negative ease and it also relaxes from its intended shape through wear.  However, overall I'm happy with everything and will start the grading up and down this week!  Exciting / nerve-wracking times.
In tangential good news, I also now have two wearable muslins.... However, seafoam green and pastel pink are the absolute worst colours on me (unless I make a pastel yellow one and that becomes the absolute worst) and I want to do something to the fabric to liven it up.  Inspiring things I've seen recently are Alida's Casual Lady Fabric Sharpie treatment, Delia's mind-blowingly awesome Fabric Sharpie-ing of all the things, and Jess's hand-carved fabric stamping.  Or even not carving the stamps myself, but buying stamps.  Or another possibility would be freezer paper stencilling.  What would you do with these dresses (other than burn them in a fire)?  Any ideas?