Sunday, 30 June 2013

3

Choose Your Own Adventure: Peplum Edition

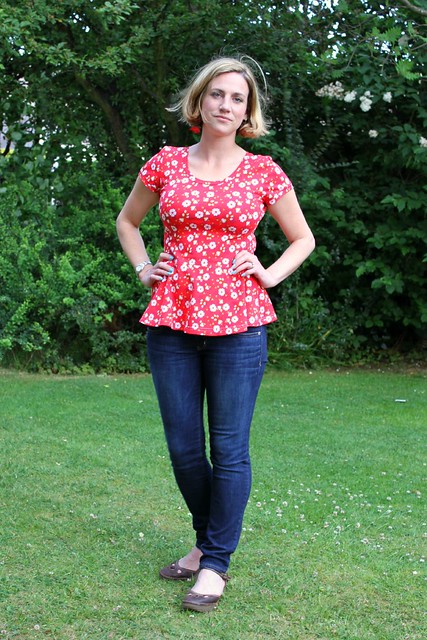
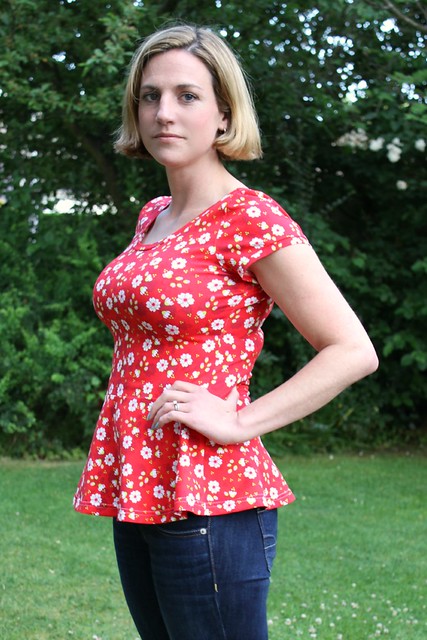
sakura peplum full

To complete my peplum experiment, I went the middle ground for peplum 3.0- fuller than the tiger peplum but less slash and spread than the turquoise peplum 1.0.

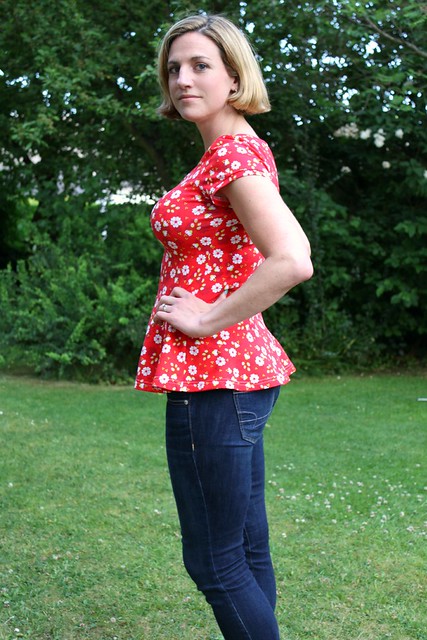
sakura peplum side 2

From the side it has a little more fullness than the tiger peplum, but the fabric is slightly thinner with a bit more drape so the overall silhouette is practically the same.

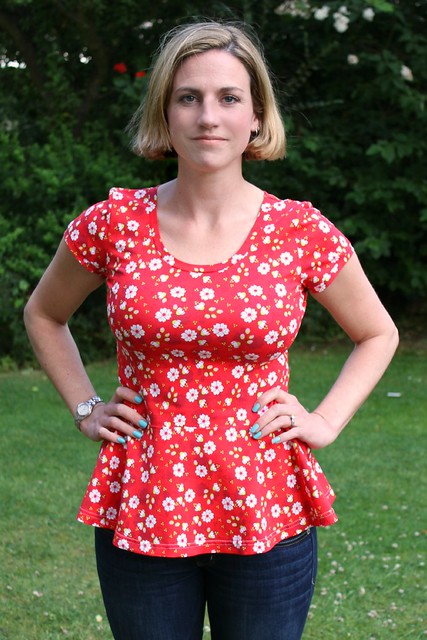
sakura peplum close

The front view definitely has a more obvious peplum appearance than the tiger top. Incidentally, I think I agree with Emily's comment on the last post that I could do with moving the waist seam down.  More than an inch and I'd be venturing into a more 'problematic' tummy area but I think the overall silhouette would improve if the bodice was longer and the peplum section shorter.

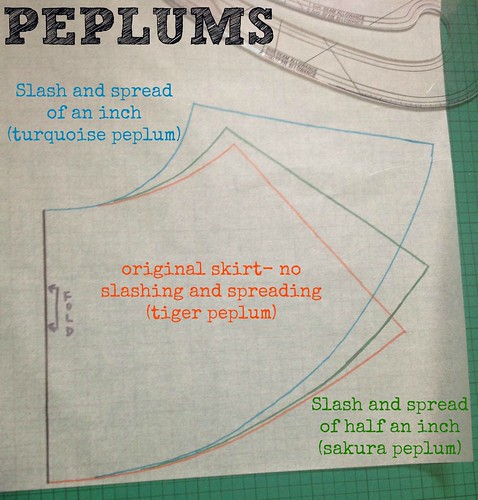
peplums

So.  If you're wanting to make your Lady Skater dress into a Lady Skater peplum, it's a choose your own adventure game!  The orange pattern is the skirt piece unchanged (except for the length obviously)- no slashing and spreading at all.  This is just over a half circle so there is still plenty of fullness and a nice curved waist seam that will offer some draping / skimming over the lower stomach.  If you want to add even more fullness, it's the same process as I outlined in the Kids' Peplum Hack.  Divide the skirt into four quarters (so three slash lines) and spread them apart:


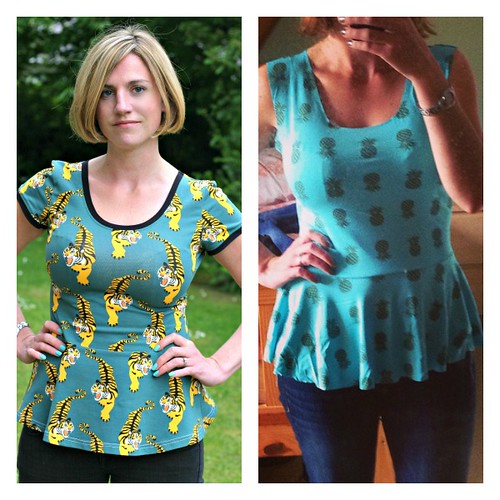
For this Sakura middle-ground peplum, I spread the the sections apart by 1/2" each; for the original full peplum I spread them 1" each so it became almost a full circle.  As you can see in the comparison Peplum picture above, the distance you are spreading not only affects the hem fullness but also the curve at the waist.  The more drastic the curve, the more it will drape into those folds over the tummy.

If you are wanting to peplum your Lady Skater, how much fullness to use will be largely up to personal preference and the fabric you are using.  If your fabric is thick and / or not very drapey, a fuller peplum will make a fairly pronounced cone shape.  But if your fabric is thin and / or very drapey, a less full peplum might cling over the tummy and show off any lumps or bumps that would be skimmed over by a fuller peplum.  There is no right or wrong peplum, just one that suits your own preferences and fabric choices.

sakura peplum side

In other news, these are the first pictures with my shiny new Canon 7D!  Steven was stoked (this might be an overstatement, it is more accurate to say he was less irritated than normal) that he could shoot pictures in full auto instead of me messing around in manual to try to get everything right.  And then normally making him go out a second or third time when I messed up my settings. Even better, he could take tonnes quickly in a row without a processing lag whereas my old Canon 1ti Rebel would only take a couple of shots before freezing.  I'm so excited to get stuck in with the new camera.

Finally, as a blogger I think we're all supposed to make a statement this week about the demise of Google Reader. Tomorrow it'll be gone so make sure you import all your blog lists elsewhere.  I made the transition to Feedly when I first heard and my initial thoughts are positive.  I like that you can maintain your Reader folders by importing it directly and choosing which viewing style (title, magazine, cards and full) makes skimming and choosing which to expand easier than Reader.  However, I've also heard rave reviews about Bloglovin and the ability to 'Like' posts (thereby improving their reach) is a very appealing feature for the way people read blogs these days. You can also follow by email subscription in the right sidebar.

Friday, 28 June 2013

0

Stop the press: pink Blomma Birds, new Folklore Hearts, and MOAR VIKINGS

Guys, I apologise: I jumped the gun with the sale yesterday. There was one package of fabric that was outstanding but I didn't think it would arrive until I was closed up next week. Not so, the international postage gods must have been smiling on me and it arrived today!  Sorry not sorry.
We have blue Vikings again!  Like their authentic fore-bearers, we assumed that never again would those Vikings make a surprise appearance on British soil.  But that's the thing about Vikings: they're never gone, they're just waiting for a surprise attack.  I'm so happy to see them again.

We also have a new Folklore Hearts fabric in delicious petrol, red, pink, orange and green.  And the popular Blomma Birds in tangerine, bubblegum pink, and red.

Discount codes still apply as follows:

  • Save 10% on fabric orders over £50 by using the code FABRICLOVER at checkout

  • Save 15% on orders over £100 by using the code FABRICJUNKIE at checkout
Because I am presumptuous I am overwhelmed  I wanted to give today and yesterday's customers the chance to see the new fabrics before shipping, I will hold off posting all sale orders until Monday.

All fabrics are still here!

Thursday, 27 June 2013

0

Shop News: SALE (yay!) and closing dates (boo)

Just to give plenty(ish) advanced warning but with the last day of school tomorrow and our upcoming America trip, I'll be closing the the shop up for everything except pdf patterns from early next week til sometime in late July. Is the thought of not having access to the most delicious jerseys for your summer sewing plans filling you with dread? Good news for you times two!

First up, discount codes:
  • Save 10% on fabric orders over £50 by using the code FABRICLOVER at checkout
  • Save 15% on orders over £100 by using the code FABRICJUNKIE at checkout
The 10% discount is available until I close up shop, but the 10% discount for bulk orders I'm going to keep up indefinitely.  I have a lot of loyal customers, and  want to show my ongoing appreciation for your custom :)

Still need some extra enabling?  When I receive a box of fabric, what I normally do is cut off a small piece for clothing making and list the remainder as per half metre cuts.  This normally works out well but I occasionally end up with odd bits and pieces once the fabric has officially sold out.  Sometimes I use them for present-making but mostly they just sit about taking up space.  I desperately need more space. So I've raided my personal stash, and resurrected some of ye olde favourites in the LAST CHANCE section.  Almost all of these are currently unavailable for reordering from the manufacturer (although sometimes they do cave to demand and reprint) so when they're gone, they're gone!


Head over to the shop if you're interested and remember to use your discount codes!


Wednesday, 26 June 2013

13

The Goldilocks Peplum

Peplum Collage

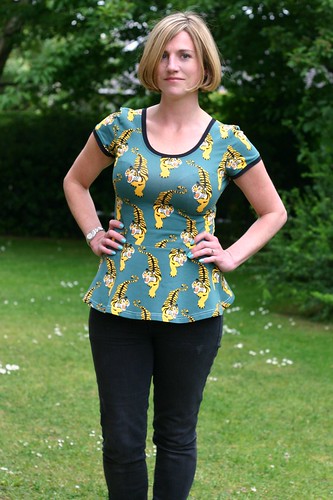
I've been playing around with the skirt portion of the Lady Skater to peplum it.  The first muslin (at the right) I used the same technique as the little Skater peplum tutorial, I slashed and spread the skirt so that it was a full circle.  Despite not ironing or hemming (or cleaning the mirror or hiding bedroom detritus while we're discussing things I didn't do) I felt a bit hippy in a full circle peplum.  This fabric is a very drapey fabric of undetermined content, and most of my jerseys are heavier cotton lycra blends with more body so IG recommendations to remove some of the fullness made a lot of sense; a short-length full circle peplum in the cotton lycra would've been almost conical! So for tiger peplum 2.0 I slashed and spread not at all.  This is the straight skirt pattern piece just shortened to 9" (unhemmed).  It has some drape and obviously ease through the hips compared to the negative ease of the bodice.  Isn't it remarkable how differently the bodice fits in the two different fabrics?!

tiger peplum side

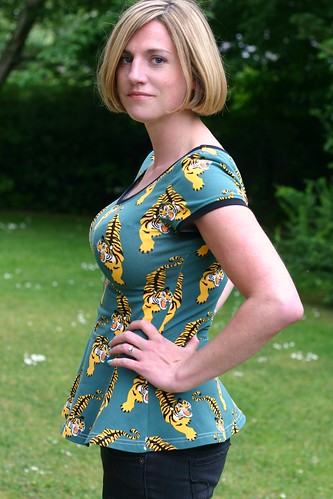
I like the silhouette from the side quite a bit, it's way more flattering on me than a traditional fitted t-shirt.

tiger peplum full 2

But from the front I'm not sure it's peplum-y enough or it just looks like a t-shirt with a strange bisecting seam and flare.  Goldilocks segue... V1.0 peplum's too full? V2.0 peplum's too straight? Would a as-yet-undrafted middle ground V3.0 peplum be just right?

Monday, 24 June 2013

3

Capacious Be-Pocketed Changing Bag: Keep It in the Family Edition

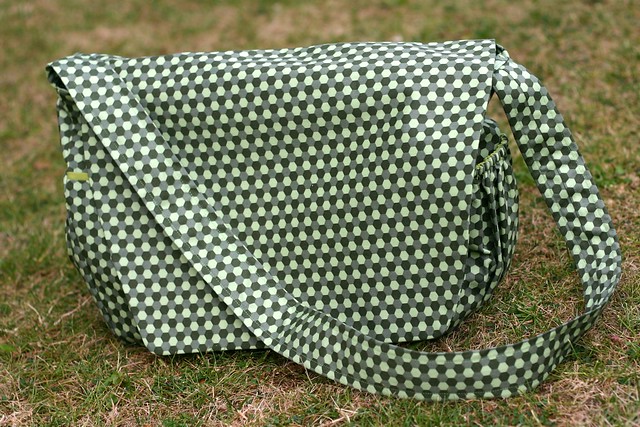
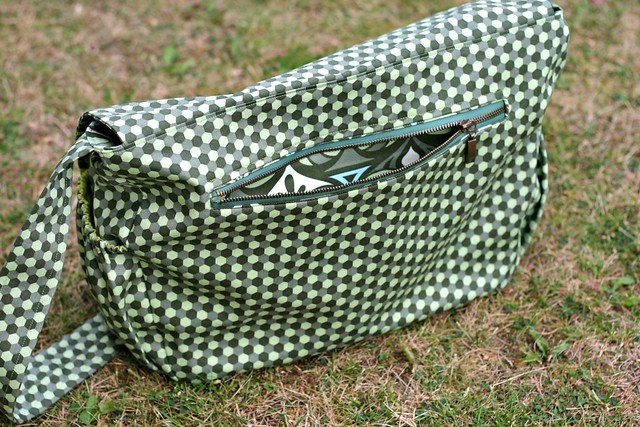
changing bag front

My sister-in-law's sister is (over)due her first baby and I was commissioned to make her a changing bag.  I used the same pattern that I drafted for my original Capacious Be-Pocketed Changing Bag, but I made it even more capacious and be-pocketed.  Many apologies to Clare, the recipient of bag 1.0.  Your bag is still great.

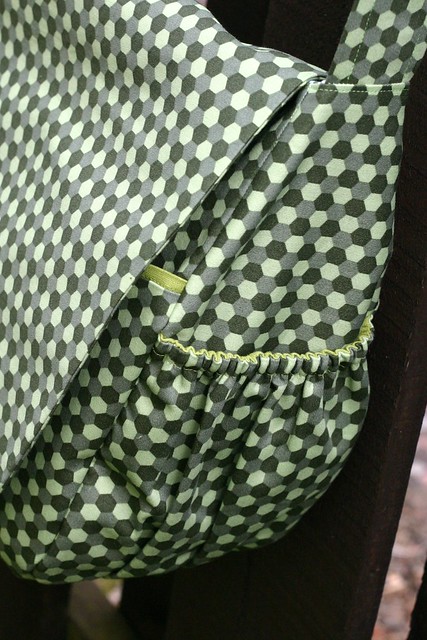
changing bag side pockets

To the side we have two lined pockets that are gathered at the bottom and elasticated at the top, good for holding bottles or wallets snug and accessible.  The side panels of version 2.0 are trapezoidal in nature rather than the rectangles of version 1.0- I tapered it to the width of the strap so it would hang better.  The strap is cross-body length, made of self-fabric but with a webbing strap inside for stability.  Speaking of stability, almost every piece is interfaced and some of the more important pieces are interlined with sturdy canvas as well.  I'm lucky that my machine is such a workhorse with all those layers.

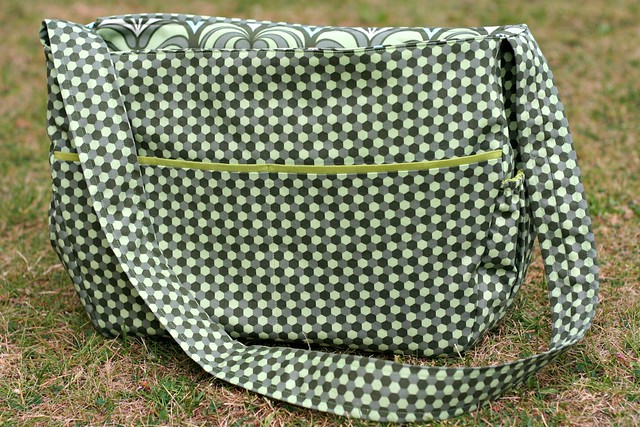
changing bag front pockets 2

Underneath the messenger flap are two front pockets that are lined with green linen. I made the linen piece slightly taller so that it acts like a faux trim.

changing bag back zippered pocket

And to the back a large zippered welt pocket.  The zipper was thrifted from one of Steven's old sweatshirts as, for reasons I can't explain, I've never bought a metal zip.  I must rectify this travesty immediately.

changing bag inside pockets

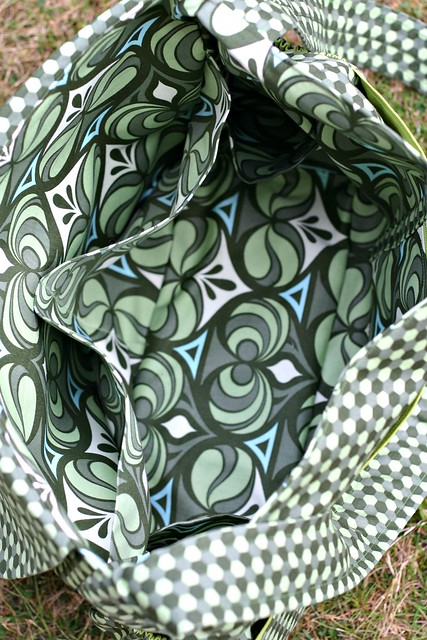
Inside, there are two more full width pockets to the front lining, and two more full width side pockets (this time without elastication).  Good for keeping nappy, wipes, phone, keys, etc separate and easily findable.

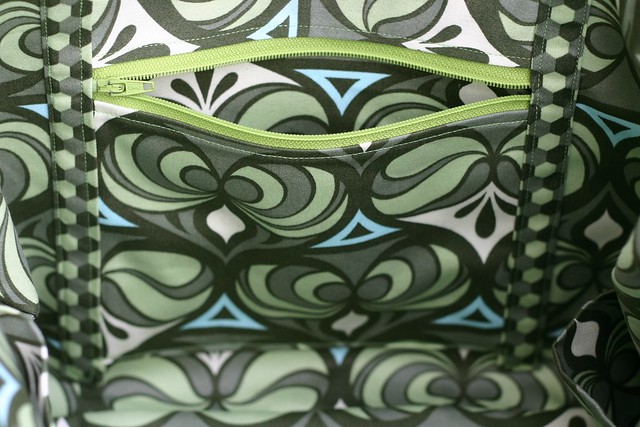
changing bag inside zippered pocket

And just for extra snazzy there's an internal zippered patch pocket that I edged with the external fabric.  No particular reason for doing it this way except it looks fancy.


Wednesday, 19 June 2013

2

This just in: HEAPS

The biggest box ever arrived this week filled with loads of new fabrics:
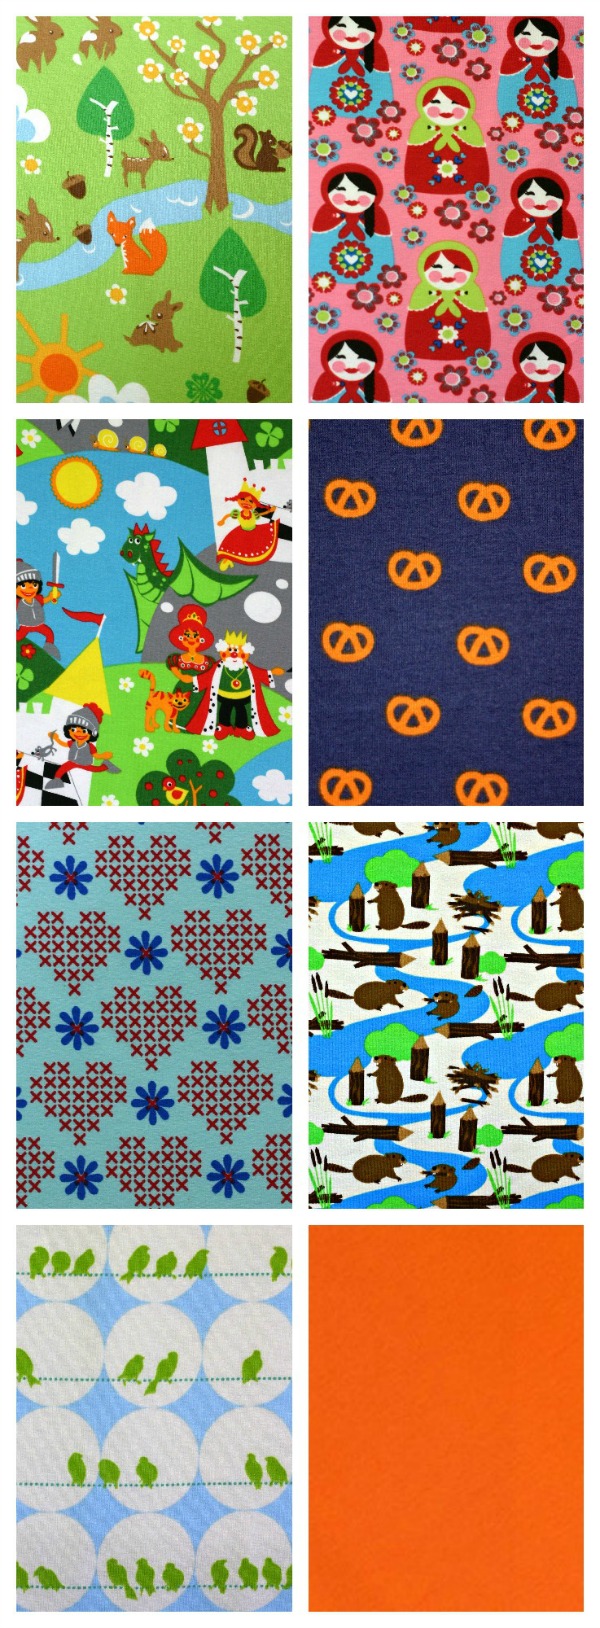
New Lillestoff Collage

From top to bottom we have Springtime, Matryoshkas, World of Knights, Pretzels, X Daisylove, Busy Beavers, Blomma birds, and bright orange plain jersey.  All organics, all smooths as butter, all awesome.  I have also restocked Sakura and Dancing in the Rain (Drops), and Icy Blue and Green Tigers.  For the fabric-covetous, all can be found here!


Sunday, 16 June 2013

21

The Lady Skater: Fitting and Adjustments

I've had quite a few emails asking for fitting help so I'm going to delve into some common fitting adjustments here on the blog. If you have a question that isn't covered, throw it into the comments so other people can benefit from the hive mind!

determining bodice length


It's clearly your lucky day as I turned pictures of me in my bathing suit into drawings for illustrative purposes.  This shows my underbust line, high waist line, low waist line, and an entirely accurate belly button.  Although I am slimmer towards my underbust, the intended seam line of the pattern (The Zone) falls around the high waist (if it was at the underbust it would become empire line which might indeed be cute but is not how I designed it).  Like a lot of people that may or may not have had children, things become 'less streamlined' below my high waist so the seam falling above and the drape of the skirt should skim over that and be more flattering.

How do you find your Zone?

torso lengths 2
When drafting for grown-ups, there's no way to make a golden pattern that will fit everyone without adjustments.  Not only are people different heights and sizes, but the distribution of their body parts varies wildly.  The good news is that the Skater Dress only has one really important horizontal seam- the bodice / skirt seam.  I am very short-waisted (that's actual me to the left), but I manipulated the pictures to show different torso builds for a proportional waist and a long waist. This is nothing to do with your overall height, but proportions.  Although the busts are identical and the underbust lines even, the high waists and low waists shift incrementally.  The standard pattern pieces for the Lady Skater are for the proportional waist in the middle, which means that even I have to make changes to my own pattern to fit me better! 

If you have experience of making adult clothes for yourself, you probably have a good idea of your body type but if you're new to this a really useful exercise is to do just as I have: take a photo of yourself in your bathing suit or tight fitting clothes and trace around it.  Find your underbust, high waist, low waist, and hip lines and look at how they are distributed.  If you're still having having trouble conceptionalising, here are some (fast and loose) indications that you might have to tinker with your bodice length:
  • Your overall height.  The pattern is graded for a 5'5" woman.  If you are shorter than 5'5" or taller than 5'5" you will probably need to utilise the lengthen / shorten line on the bodice.
  • Your torso proportions. Again, this takes some body awareness and experience, but if you are short or long waisted you will need to adjust the bodice piece to remove or add height.
  • Bust size.  This is the least important factor of the three but if you are of the small to average bust you might need to shorten your bodice as less of the fabric is being used to go up and over the breasts.  Equally, very large busts might need to add length to the front bodice piece / remove length from the back bodice to have an evenly hanging hemline.
Bodice length adjustments might be something that you're able to do to the pattern before sewing, but you might find that locating your Zone is only achievable after muslining the bodice.  If you've made the bodice and tried it on, is it hitting you at your high (natural) waist?  Is it too close to your underbust?  Is it clinging or pooling somewhere closer to your low waist because it's too long?

Lengthening your bodice

front bodice length added

This is probably the most straight-forward change to make!  All you need to do is split the pattern all the way across the lengthen line, add height with a piece of paper underneath, and smooth your side seams. The grey section is what you've added.  Make sure you do the same change to your front and back bodice.

Shortening your bodice

front bodice shorten

Split your bodice along the shorten line, pull the bottom section up so that it overlaps with the top section (keeping the fold line aligned), and then smooth out your side seam.  The grey section shows the overlap.  Make sure you do the same change to your front and back bodice.

I'm happy with my front bodice length but my back bodice is hanging lower / I'm having pooling centre back:

back bodice sway back

As per my tutorial instructions, I highly recommend that you muslin the bodice before cutting precious hoarded fabric.  When you make the bodice to ascertain if the waistline is hitting 'The Zone', you might notice when turning sideways that the back bodice is hanging lower than the front. Or- you might not notice until your final dress is finished and you want to know how to fix it.  Uneven hems can be very common, particularly if you're busty.  Now, I did a sway back adjustment to every size of the master pattern to try to counteract this but your own proportions might mean that you need to make further adjustments.  Like the lengthen and shorten instructions above, what you need to do is slash your pattern  along the lengthen / shorten line but do not cut through your size line on the side seam, only cut very close to it.  Swing the lower section upwards so that you are overlapping the upper section at the centre back.  This probably won't need to be a huge overlap (3/4" to 1"), and tape in place.  The centre edge of the lower section will swing over the vertical fold line.  Return this line to vertical and (if required) add the same amount of width that you removed at the centre vertical to the side seam.  The sway back adjustment is essentially taking a wedge out of centre back to reduce pooling, nothing else is changing in a major way.  Depending on how much you removed, you might need to smooth your bottom seam line so it's convex rather than a harsh angle.   If you only found this pooling after your entire dress was complete, try it on inside out and with the help of a friend pull the back bodice / skirt seam up until the hem is even and pin in place.  Seam-rip along the centre back (the side seams should be unaffected), remove the excess to the back bodice piece and re-sew. If you find pooling both at the front and the back your bodice is too long.

My high bust and waist aren't the same sizes:

blend between sizes


When you are measuring your high  bust and high waist, you might find that your high bust corresponds to a different size than your waist.  The above picture shows smoothing the side seam between smaller bust / larger waist and larger bust / smaller waist.  When blending sizes, the majority of the extra room happens in the bust where its needed.

cheater fba

Depending on your fabric choice and your cup size, you might find that you need more room in the bust only.  Using a fabric with less stretch capacity like interlock or jersey without lycra might result in a drag line across the full bust.  Fixing this is almost the same as blending a larger bust to smaller waist except you're doing it to the front bodice only.  Adding extra width to the armhole and upper bodice means that you'll have to also add the same amount to the front sleeve so it fits.  If the front bodice side seam becomes slightly longer than the back bodice side seam, ease the extra length into the top half of the seam where the bust is.

**EDITED TO ADD ANOTHER ONE BASED ON COMMENTS**

Shortening the shoulder height / Upper bust height:

shorten upper chest

If you find that after making a bodice muslin that there is pooling above your bust towards the sleeve hole, or that the sleeve cap is sitting funky off your shoulder cap, you might need to shorten your shoulder height or shoulder width.  With your bodice muslin on inside out, pinch the shoulder seam to bring it up and pin out the excess.  On your paper pattern, match the amount you pinned out to the corresponding smaller size (for example, if you pinned 1/4" below the shoulder seam you would go down one size to both the front and back bodices, 1/2" goes down two sizes, etc). Use that armscye / sleeve hole but when you get to the side seam increase the width to your original size.  In the picture above (as per Lyn's adjustments in the comments!), I'm showing how to use the upper bust and shoulder of a size 3 with the width of the size 6 in the lower bodice.  Use the sleeve of the smaller size but add the extra width at the front and back corners to reflect the size of your lower bodice.

I hope all of this helps!  If you have a question about fitting that I haven't covered, chuck it in the comments.